> ## Documentation Index
> Fetch the complete documentation index at: https://help.hiredata.com/llms.txt
> Use this file to discover all available pages before exploring further.
# Connect with Carerix
> Step-by-step guide to connect HireData with Carerix, set up authentication, and start automating recruitment workflows between the two platforms in minutes.
*Welcome to our detailed guide on connecting your Carerix account with HireData. This tutorial is designed to be user-friendly and efficient, helping you to leverage the full potential of Carerix within your HireData automations. For visual guides, be sure to watch our two step-by-step videos.*
## Connect with Carerix RMA (Recommended)
***This is the standard and recommended way to connect Carerix with HireData.
No manual configuration, client IDs, or secrets are required.***
### Before you begin, you'll need
* Access to your **Carerix environment**
* Permission to install apps from the **Marketplace**
### Step 1: Install Carerix RMA from the Marketplace
*1.1 Log in to your Carerix application*
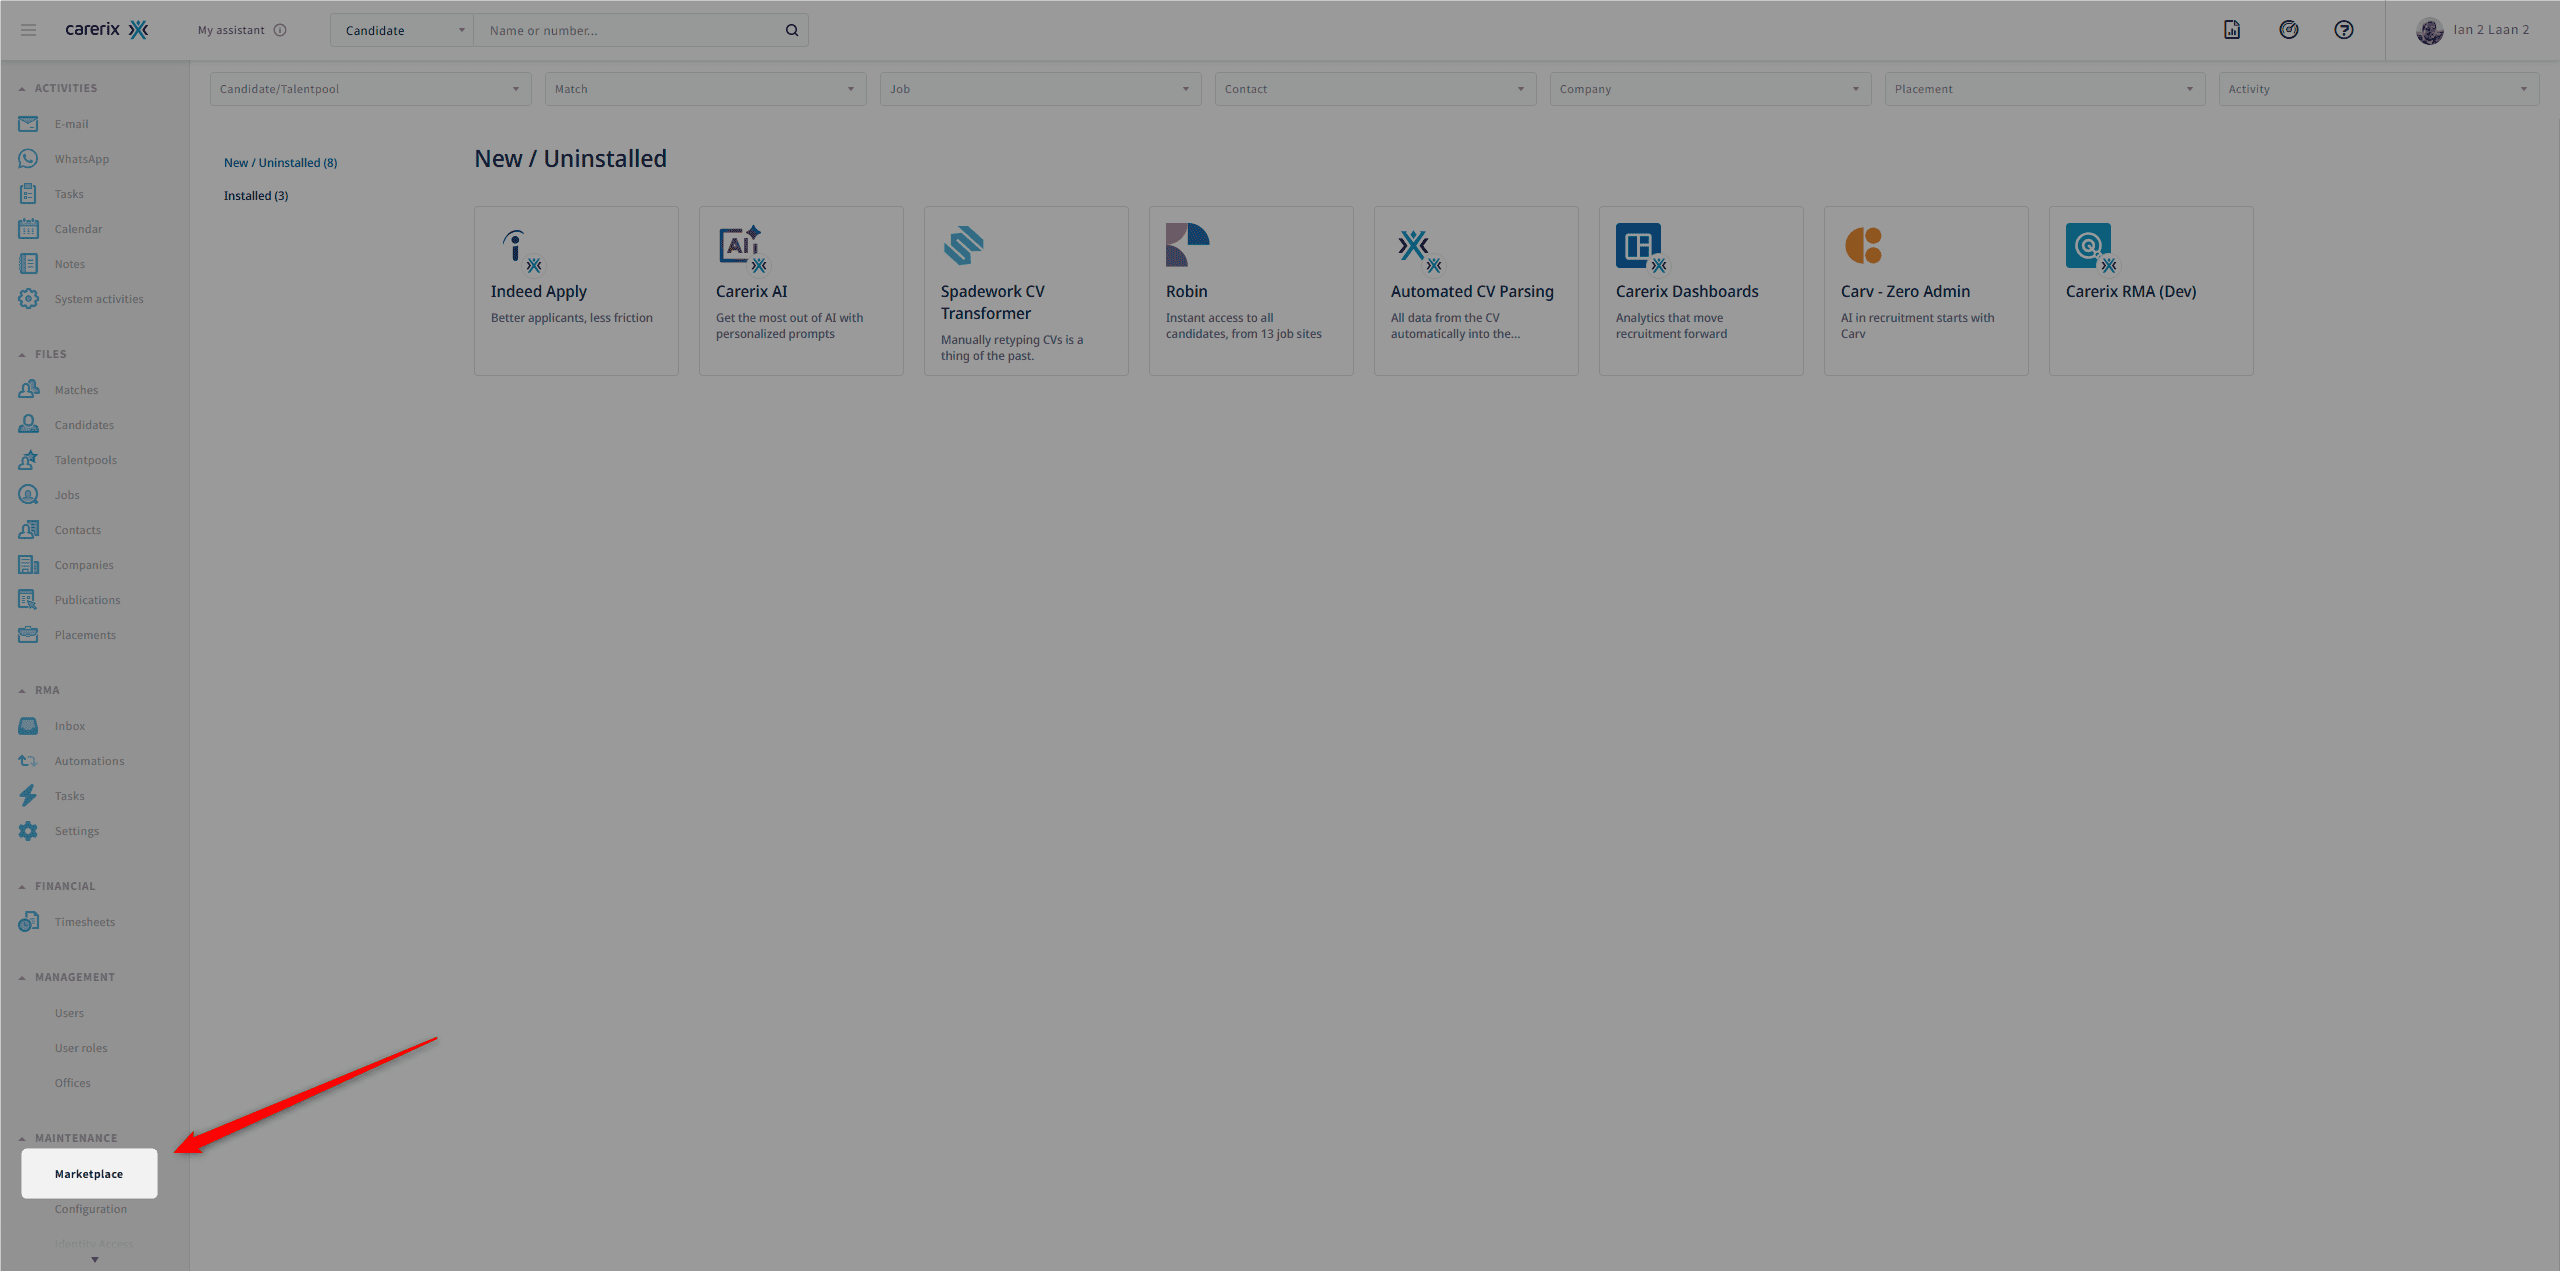
 *1.2 Open the \[Marketplace]*
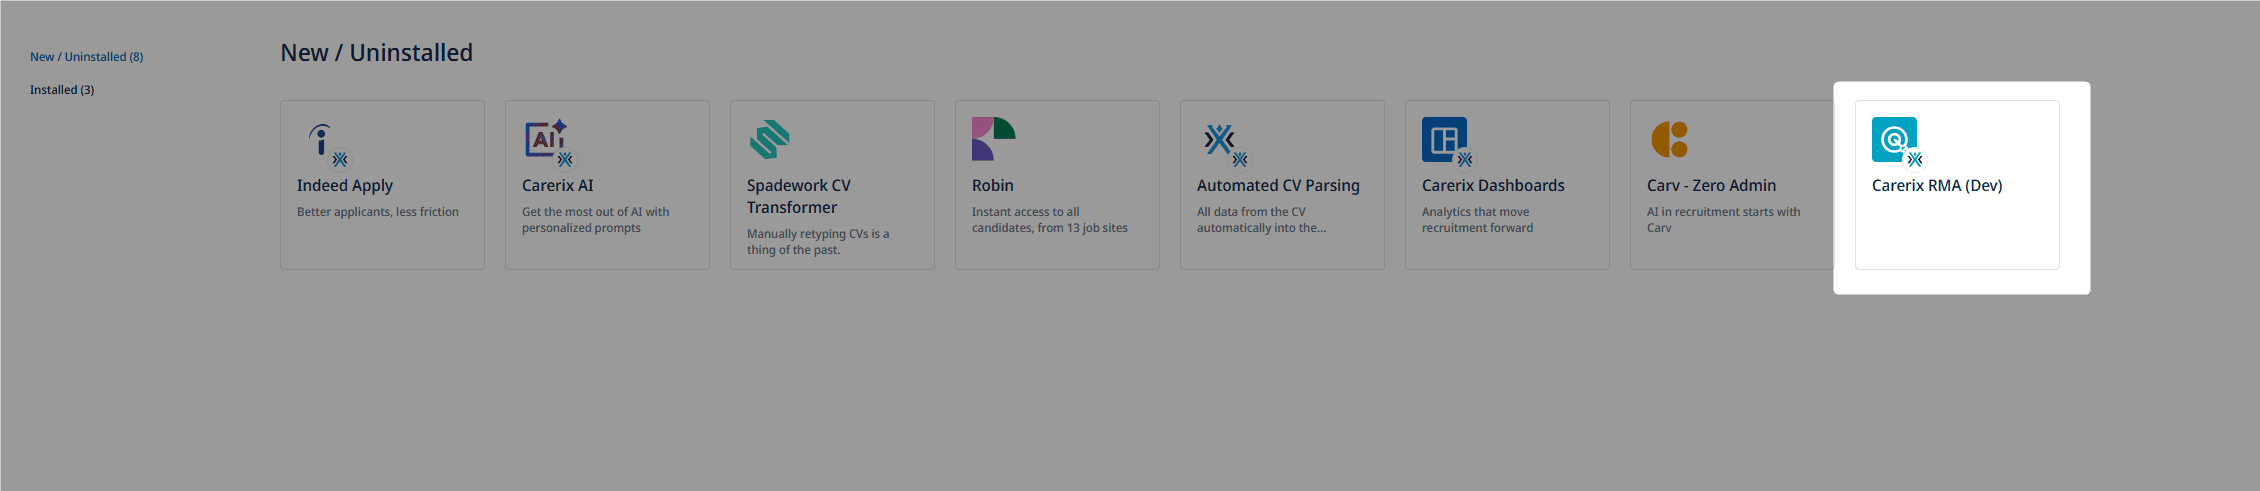
 *1.3 Under \[New/Uninstalled], locate Carerix RMA (powered by HireData)*
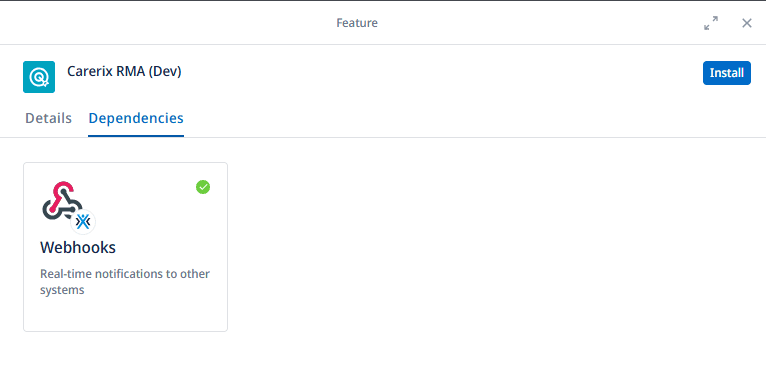
 *1.4 Click \[Install]*
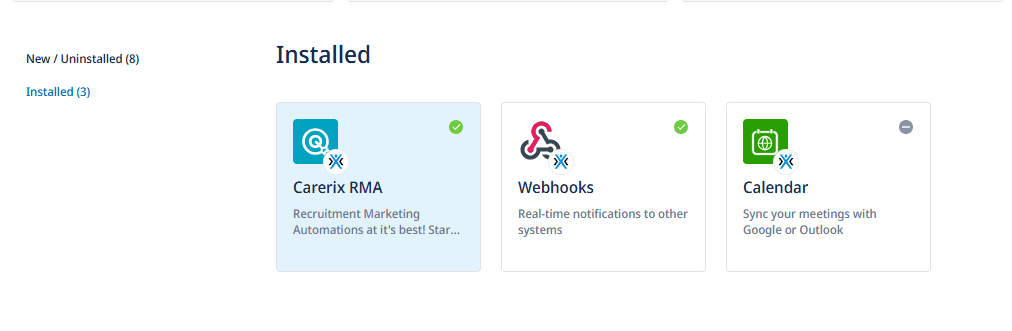
 *1.5 After installation, the app will appear under \[Installed]*
 ### Step 2: Activate Carerix RMA
*2.1 Go to \[Installed] tab in the \[Marketplace]*
### Step 2: Activate Carerix RMA
*2.1 Go to \[Installed] tab in the \[Marketplace]*
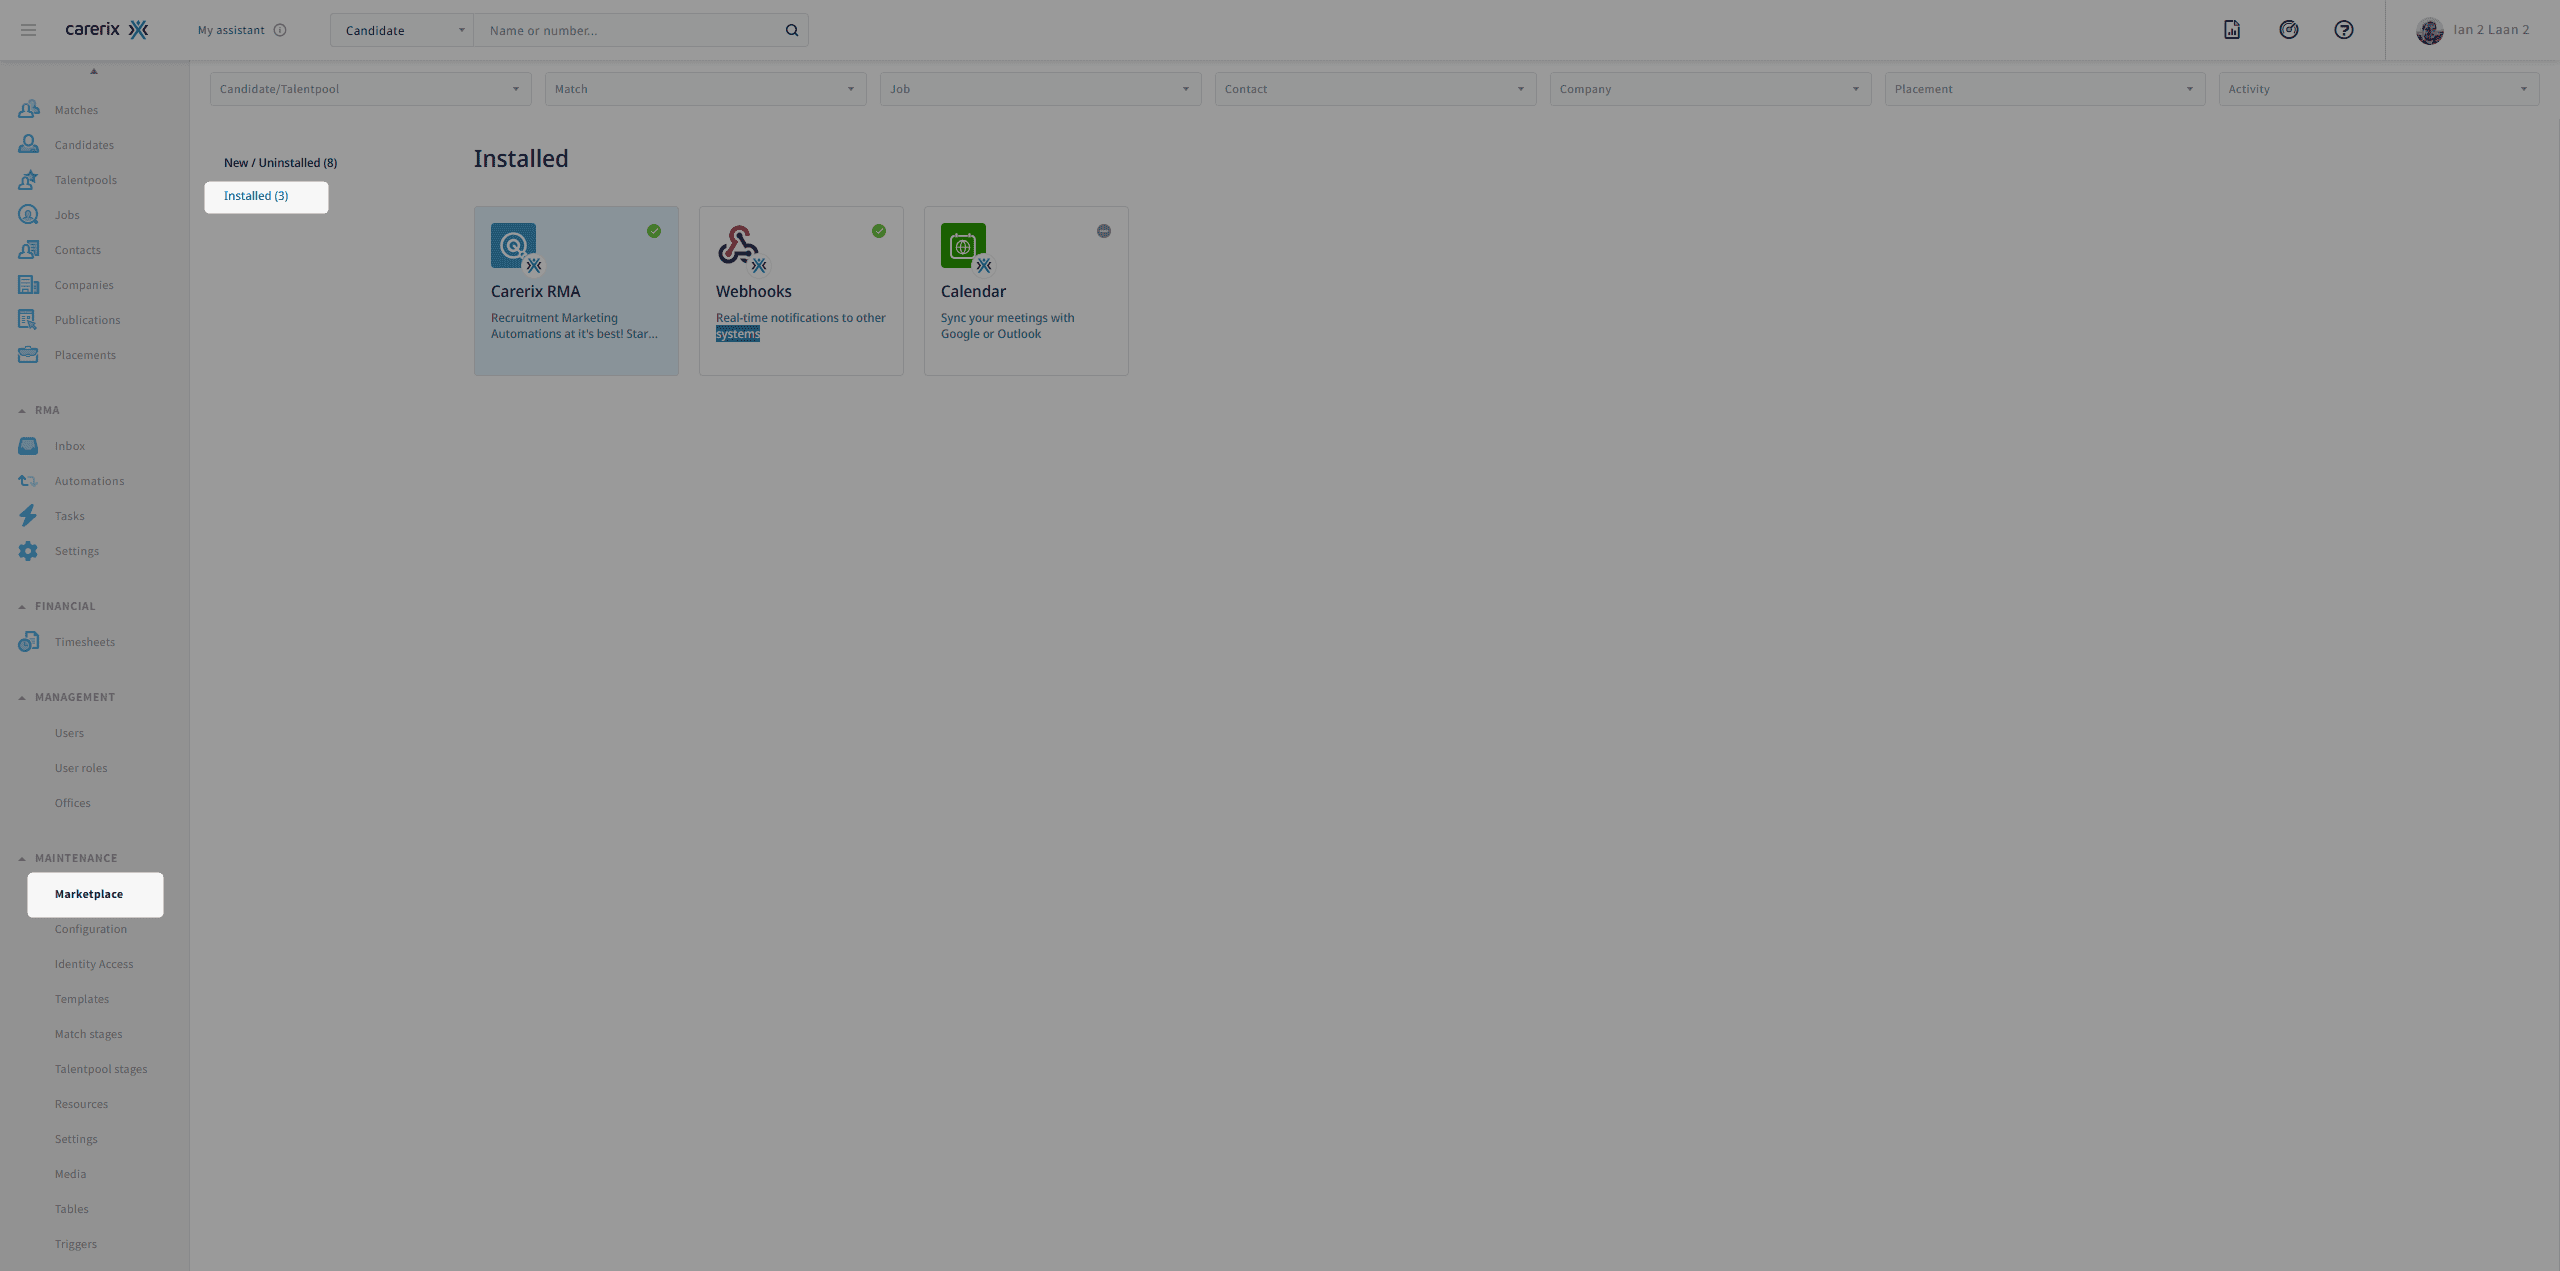 *2.2 Find Carerix RMA*
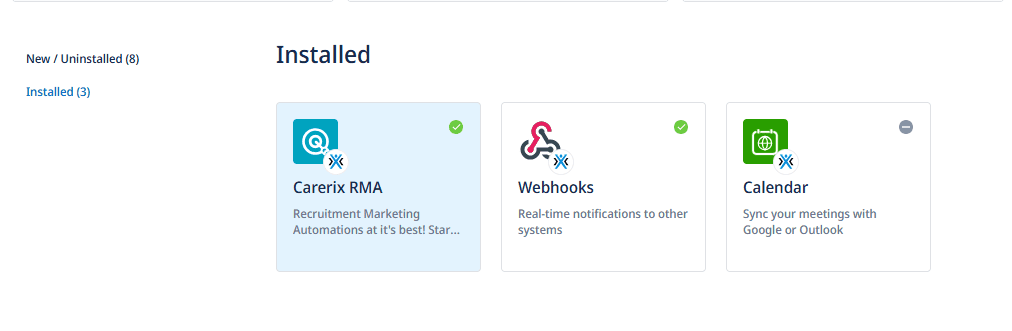 *2.3 Fill in your settings, including:*
* *Credit bundle*
* *Additional brand(s)*
* *Additional core app(s)*
* *Additional WhatsApp number(s)*
*2.3 Fill in your settings, including:*
* *Credit bundle*
* *Additional brand(s)*
* *Additional core app(s)*
* *Additional WhatsApp number(s)*
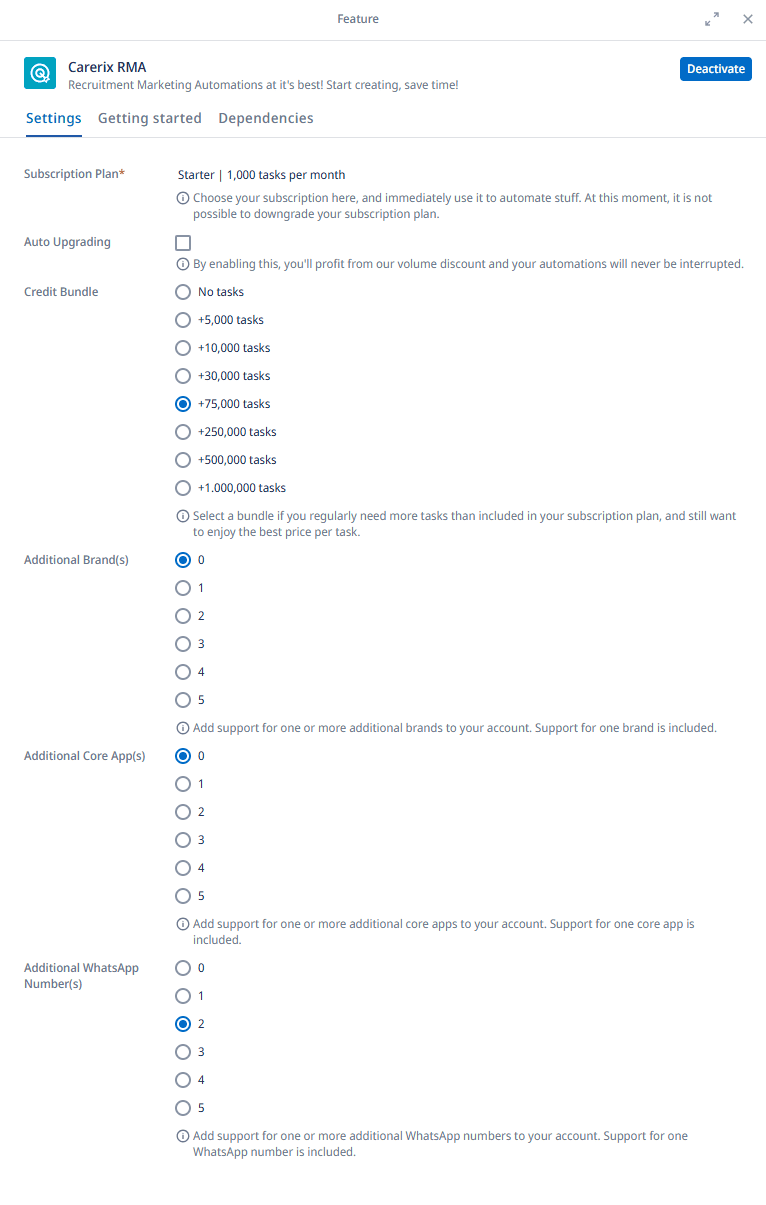 *2.4 Click \[Activate]\* to activate the app*
*\*In this screenshot, the \[Deactivate] button is visible because the app is already active.*
*2.4 Click \[Activate]\* to activate the app*
*\*In this screenshot, the \[Deactivate] button is visible because the app is already active.*
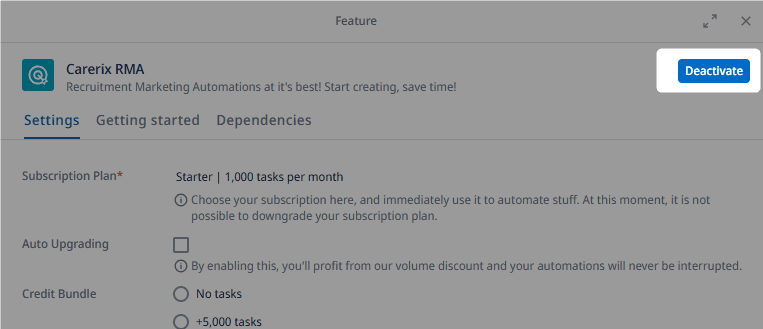 The Carerix RMA app depends on the Webhooks app.
This dependency is usually installed automatically during activation. If not, install the Webhooks app before activating the Carerix RMA.
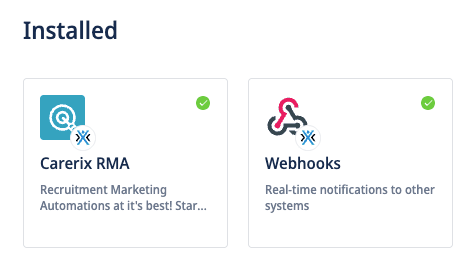
You should see a green checkmark next to the Carerix RMA and the Webhooks apps if both were installed correctly.
The Carerix RMA app depends on the Webhooks app.
This dependency is usually installed automatically during activation. If not, install the Webhooks app before activating the Carerix RMA.
You should see a green checkmark next to the Carerix RMA and the Webhooks apps if both were installed correctly.
 Please check out our video tutorial for a full step-by-step guide on how to set up the connection:
## Connecting multiple tenants (Advanced Setup)
*If you need to connect **more than one Carerix tenant** to HireData (for example, a **production** and **staging** environment), you must use the **legacy connection method inside HireData**.*
*This setup is intended for **advanced use cases** and is **not required** for single-tenant connections.*
### Step 1: Navigating to Carerix App
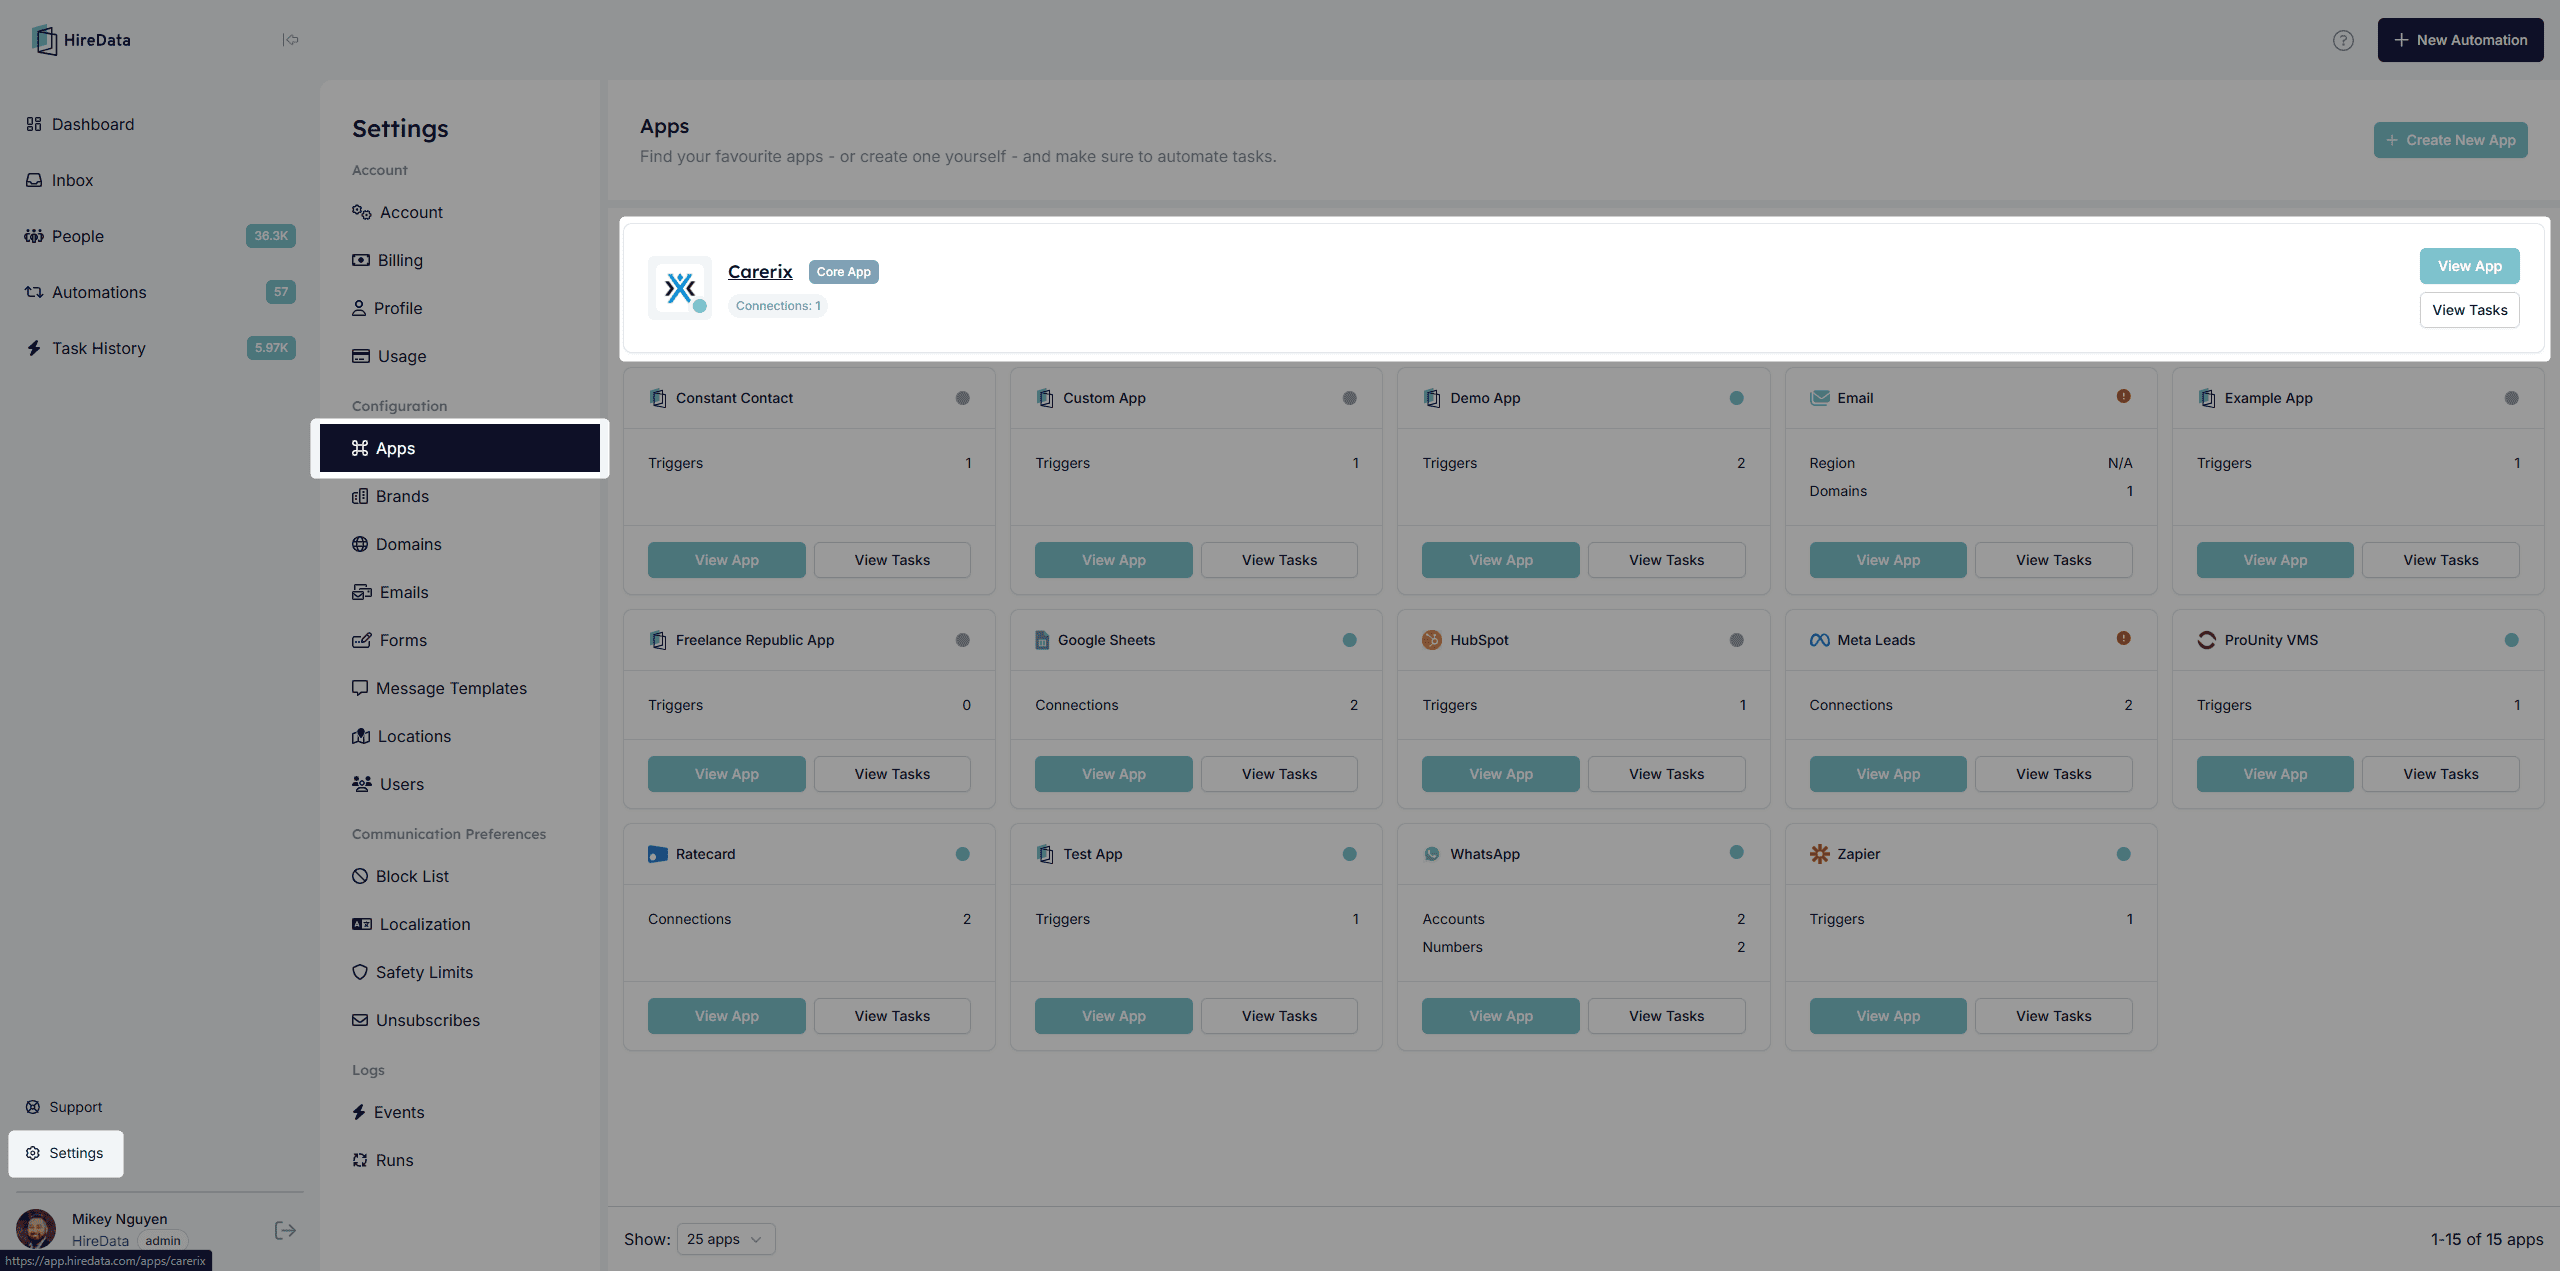
Begin by navigating to the [app section](https://app.hiredata.com/apps) within **HireData**. Here, you'll find the option to [integrate with Carerix](https://app.hiredata.com/apps/carerix). This initial step is simple yet fundamental for the integration process.
Please check out our video tutorial for a full step-by-step guide on how to set up the connection:
## Connecting multiple tenants (Advanced Setup)
*If you need to connect **more than one Carerix tenant** to HireData (for example, a **production** and **staging** environment), you must use the **legacy connection method inside HireData**.*
*This setup is intended for **advanced use cases** and is **not required** for single-tenant connections.*
### Step 1: Navigating to Carerix App
Begin by navigating to the [app section](https://app.hiredata.com/apps) within **HireData**. Here, you'll find the option to [integrate with Carerix](https://app.hiredata.com/apps/carerix). This initial step is simple yet fundamental for the integration process.
 ### Step 2: Configuring your Carerix environment
In order to connect your Carerix and HireData environments, you need (a) to activate webhooks (see: step 2.1), and (c) set up a client (see: step 2.2) in order to get a (I) Client ID and (II) Client Secret for your Carerix environment. Please follow the steps below to obtain those:
#### Step 2.1 Activating webhooks
First, you need to activate webhooks for your Carerix environment. This is done by [sending a support ticket to Carerix](mailto:support@carerix.com). Once webhooks are activated, you can proceed to the next step. Before activating webhooks, some scopes that are needed will not be available yet.
#### Step 2.2 Setting up a Confidential Client
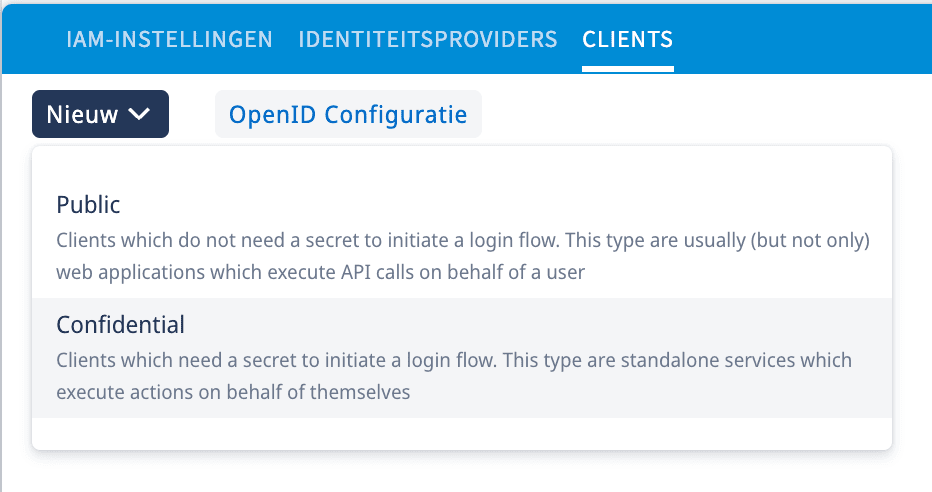
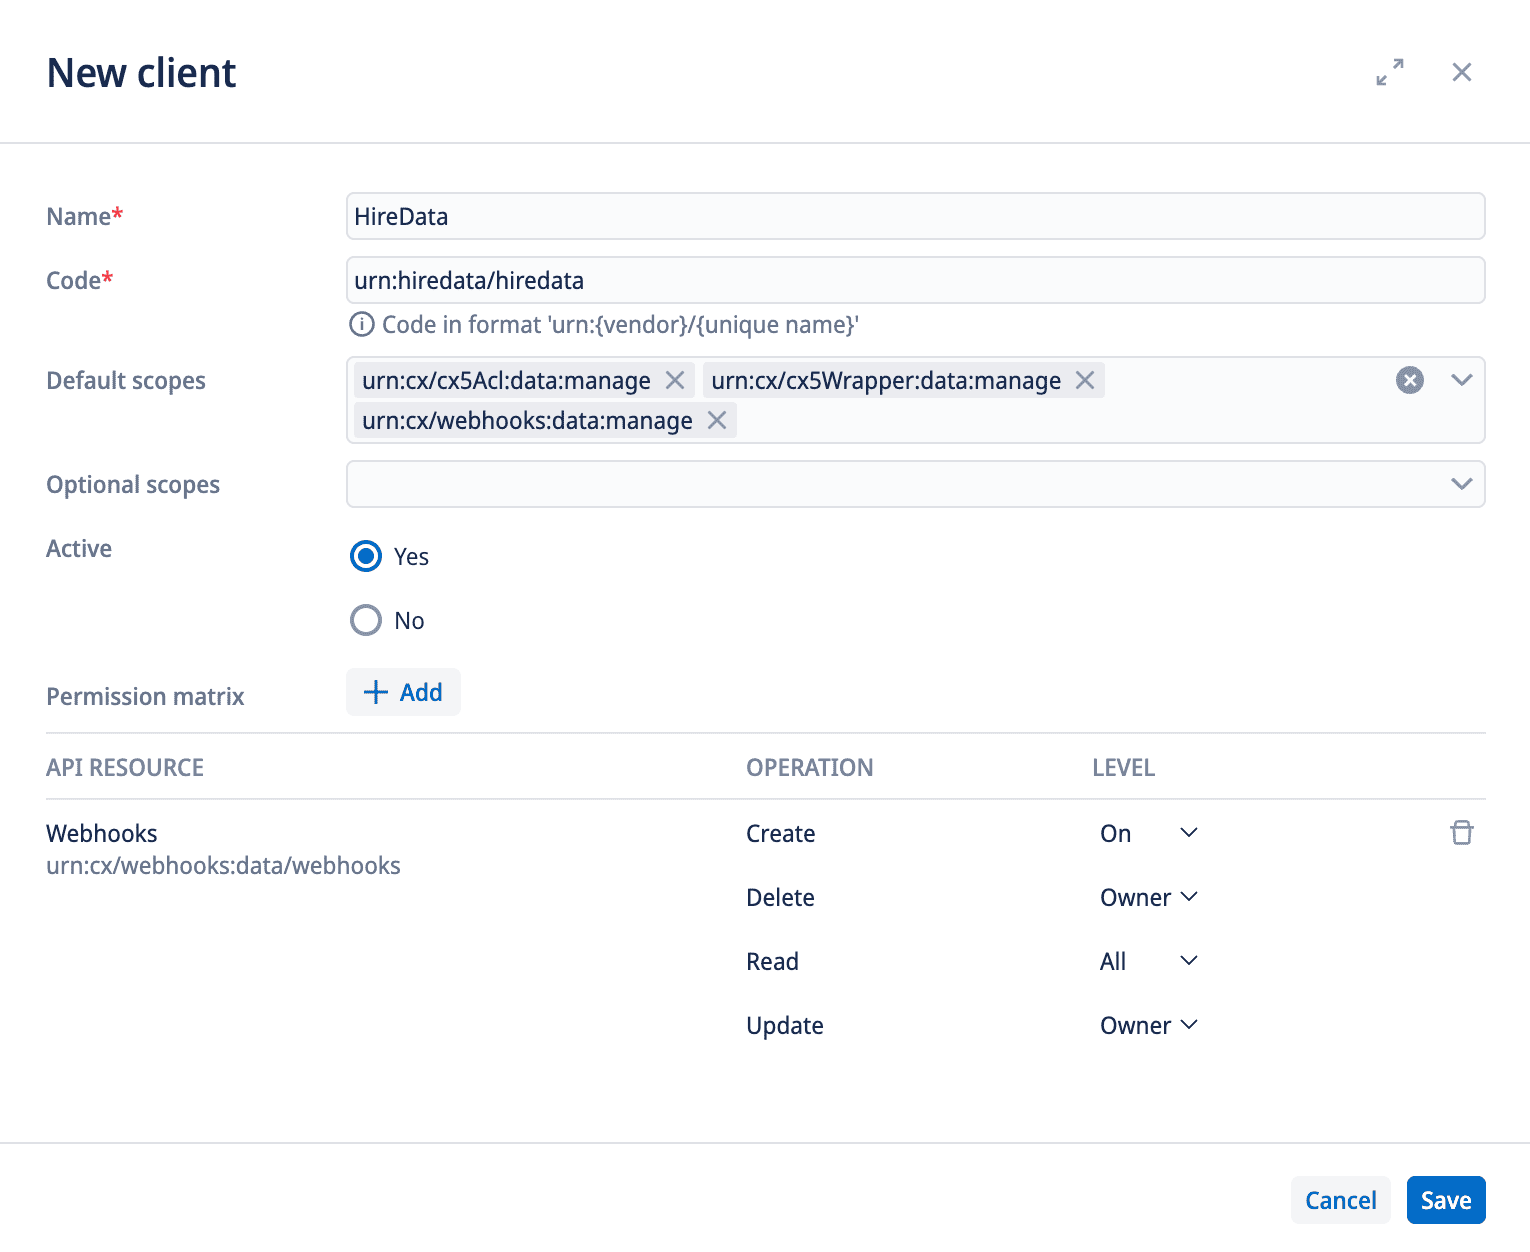
Second, head over to your Carerix environment, navigate to \[Maintenance] > \[Identity Management] > \[Clients], and click on the \[New] > \[Confidential] link. Then, fill in the following values:
* Name: `HireData`
* Code: `urn:hiredata/hiredata`
* Default scopes:
* `urn:cx/cx5Wrapper:data:manage`
* `urn:cx/webhooks:data:manage`
* Permissions:
* Click \[Add] and search for `Webhooks`
* Configure permissions as follows:
* create: `on`
* delete: `owner`
* read: `all`
* update: `owner`
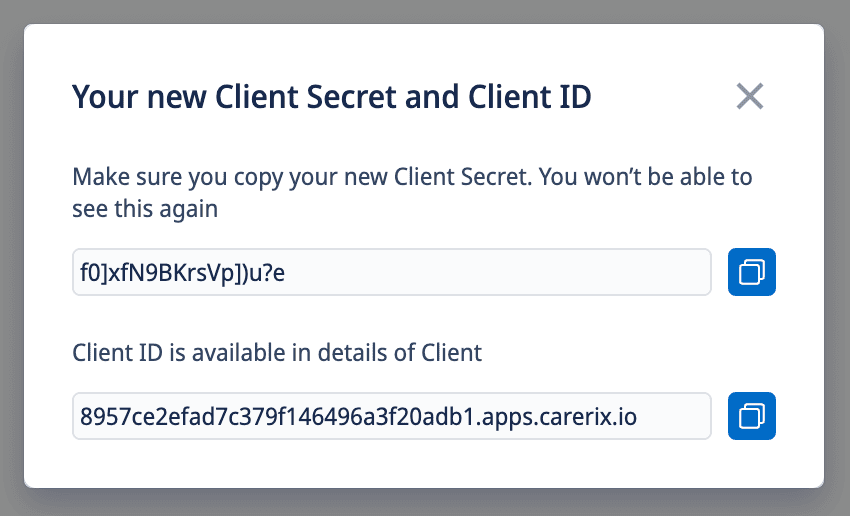
Last but not least, click "Save". Don't forget to save your Client ID and Client Secret - especially the latter - since you'll only be shown these values once for security reasons. If you don't save them, you'll have to redo this step.
*2.2.1: Create a Confidential Client within Carerix*
### Step 2: Configuring your Carerix environment
In order to connect your Carerix and HireData environments, you need (a) to activate webhooks (see: step 2.1), and (c) set up a client (see: step 2.2) in order to get a (I) Client ID and (II) Client Secret for your Carerix environment. Please follow the steps below to obtain those:
#### Step 2.1 Activating webhooks
First, you need to activate webhooks for your Carerix environment. This is done by [sending a support ticket to Carerix](mailto:support@carerix.com). Once webhooks are activated, you can proceed to the next step. Before activating webhooks, some scopes that are needed will not be available yet.
#### Step 2.2 Setting up a Confidential Client
Second, head over to your Carerix environment, navigate to \[Maintenance] > \[Identity Management] > \[Clients], and click on the \[New] > \[Confidential] link. Then, fill in the following values:
* Name: `HireData`
* Code: `urn:hiredata/hiredata`
* Default scopes:
* `urn:cx/cx5Wrapper:data:manage`
* `urn:cx/webhooks:data:manage`
* Permissions:
* Click \[Add] and search for `Webhooks`
* Configure permissions as follows:
* create: `on`
* delete: `owner`
* read: `all`
* update: `owner`
Last but not least, click "Save". Don't forget to save your Client ID and Client Secret - especially the latter - since you'll only be shown these values once for security reasons. If you don't save them, you'll have to redo this step.
*2.2.1: Create a Confidential Client within Carerix*
 *2.2.2: Configure your Confidential Client within Carerix*
 *2.2.3: Copy your Client ID and Client Secret*
 ### Step 3: Creating a New Connection
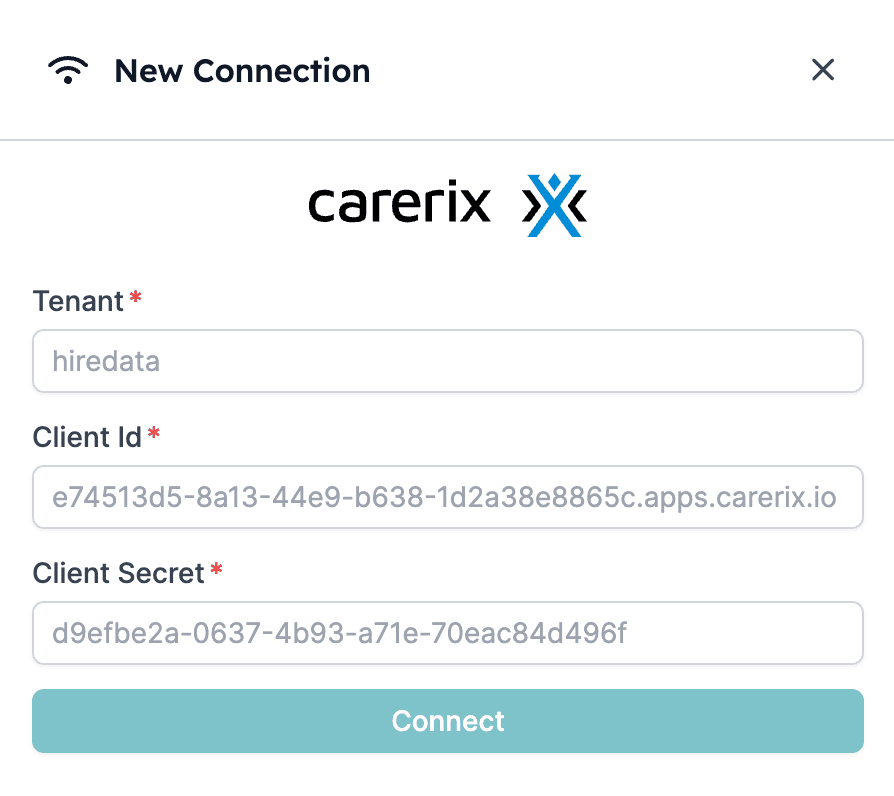
Click on \[+ New Connection] and enter the required Carerix details: your tenant (customer name or sub domain), Client ID, Client Secret, and API Key. If you don't have a Client ID, Client Secret, and/or API Key yet, please get in touch with your account manager at Carerix or [contact Carerix' support team](mailto:support@carerix.com).
*3.1: Click \[+ New Connection] and start connecting your Carerix*
### Step 3: Creating a New Connection
Click on \[+ New Connection] and enter the required Carerix details: your tenant (customer name or sub domain), Client ID, Client Secret, and API Key. If you don't have a Client ID, Client Secret, and/or API Key yet, please get in touch with your account manager at Carerix or [contact Carerix' support team](mailto:support@carerix.com).
*3.1: Click \[+ New Connection] and start connecting your Carerix*
 *3.2: Provide your tenant (no capitals), client ID, and client secret to set up a new connection*
 ### Step 4: Carerix Connected
After you've clicked "Connect", you've finished setting up the connection between Carerix and HireData. When it's the first time you've set up this connection, HireData might need a few minutes to sync data from your Carerix database. After that, you're all set to [set up your first Carerix automation in HireData](/apps/carerix/create-a-carerix-automation-in-hiredata).
Please check out our video tutorial for a full step-by-step guide on how to set up the connection:
## Next step: Creating a Carerix Automation in HireData
Now that you've set up the connection with Carerix, let's [create your first Carerix automation](/apps/carerix/create-a-carerix-automation-in-hiredata) within HireData.
## Related topics
- [Welcome to HireData](/index.md)
- [Connect with OTYS](/apps/otys/connect-with-otys.md)
- [Carerix Integration Overview](/apps/carerix/overview.md)
- [Connect with Recruitee](/apps/recruitee/connect-with-recruitee.md)
- [Connect with Salesforce](/apps/salesforce/connect-with-salesforce.md)
### Step 4: Carerix Connected
After you've clicked "Connect", you've finished setting up the connection between Carerix and HireData. When it's the first time you've set up this connection, HireData might need a few minutes to sync data from your Carerix database. After that, you're all set to [set up your first Carerix automation in HireData](/apps/carerix/create-a-carerix-automation-in-hiredata).
Please check out our video tutorial for a full step-by-step guide on how to set up the connection:
## Next step: Creating a Carerix Automation in HireData
Now that you've set up the connection with Carerix, let's [create your first Carerix automation](/apps/carerix/create-a-carerix-automation-in-hiredata) within HireData.
## Related topics
- [Welcome to HireData](/index.md)
- [Connect with OTYS](/apps/otys/connect-with-otys.md)
- [Carerix Integration Overview](/apps/carerix/overview.md)
- [Connect with Recruitee](/apps/recruitee/connect-with-recruitee.md)
- [Connect with Salesforce](/apps/salesforce/connect-with-salesforce.md)