> ## Documentation Index
> Fetch the complete documentation index at: https://help.hiredata.com/llms.txt
> Use this file to discover all available pages before exploring further.
# Enable Carerix fields and relationships in automations
> Configure Carerix objects, fields, and relationships in your HireData connection so your automations can read and write the exact data they need.
*Properly configuring the objects and relationships in your Carerix connection with HireData is essential for ensuring your automations work correctly. This guide will walk you through the process of easily managing objects and configuring relationships.*
## Editing your Carerix connection
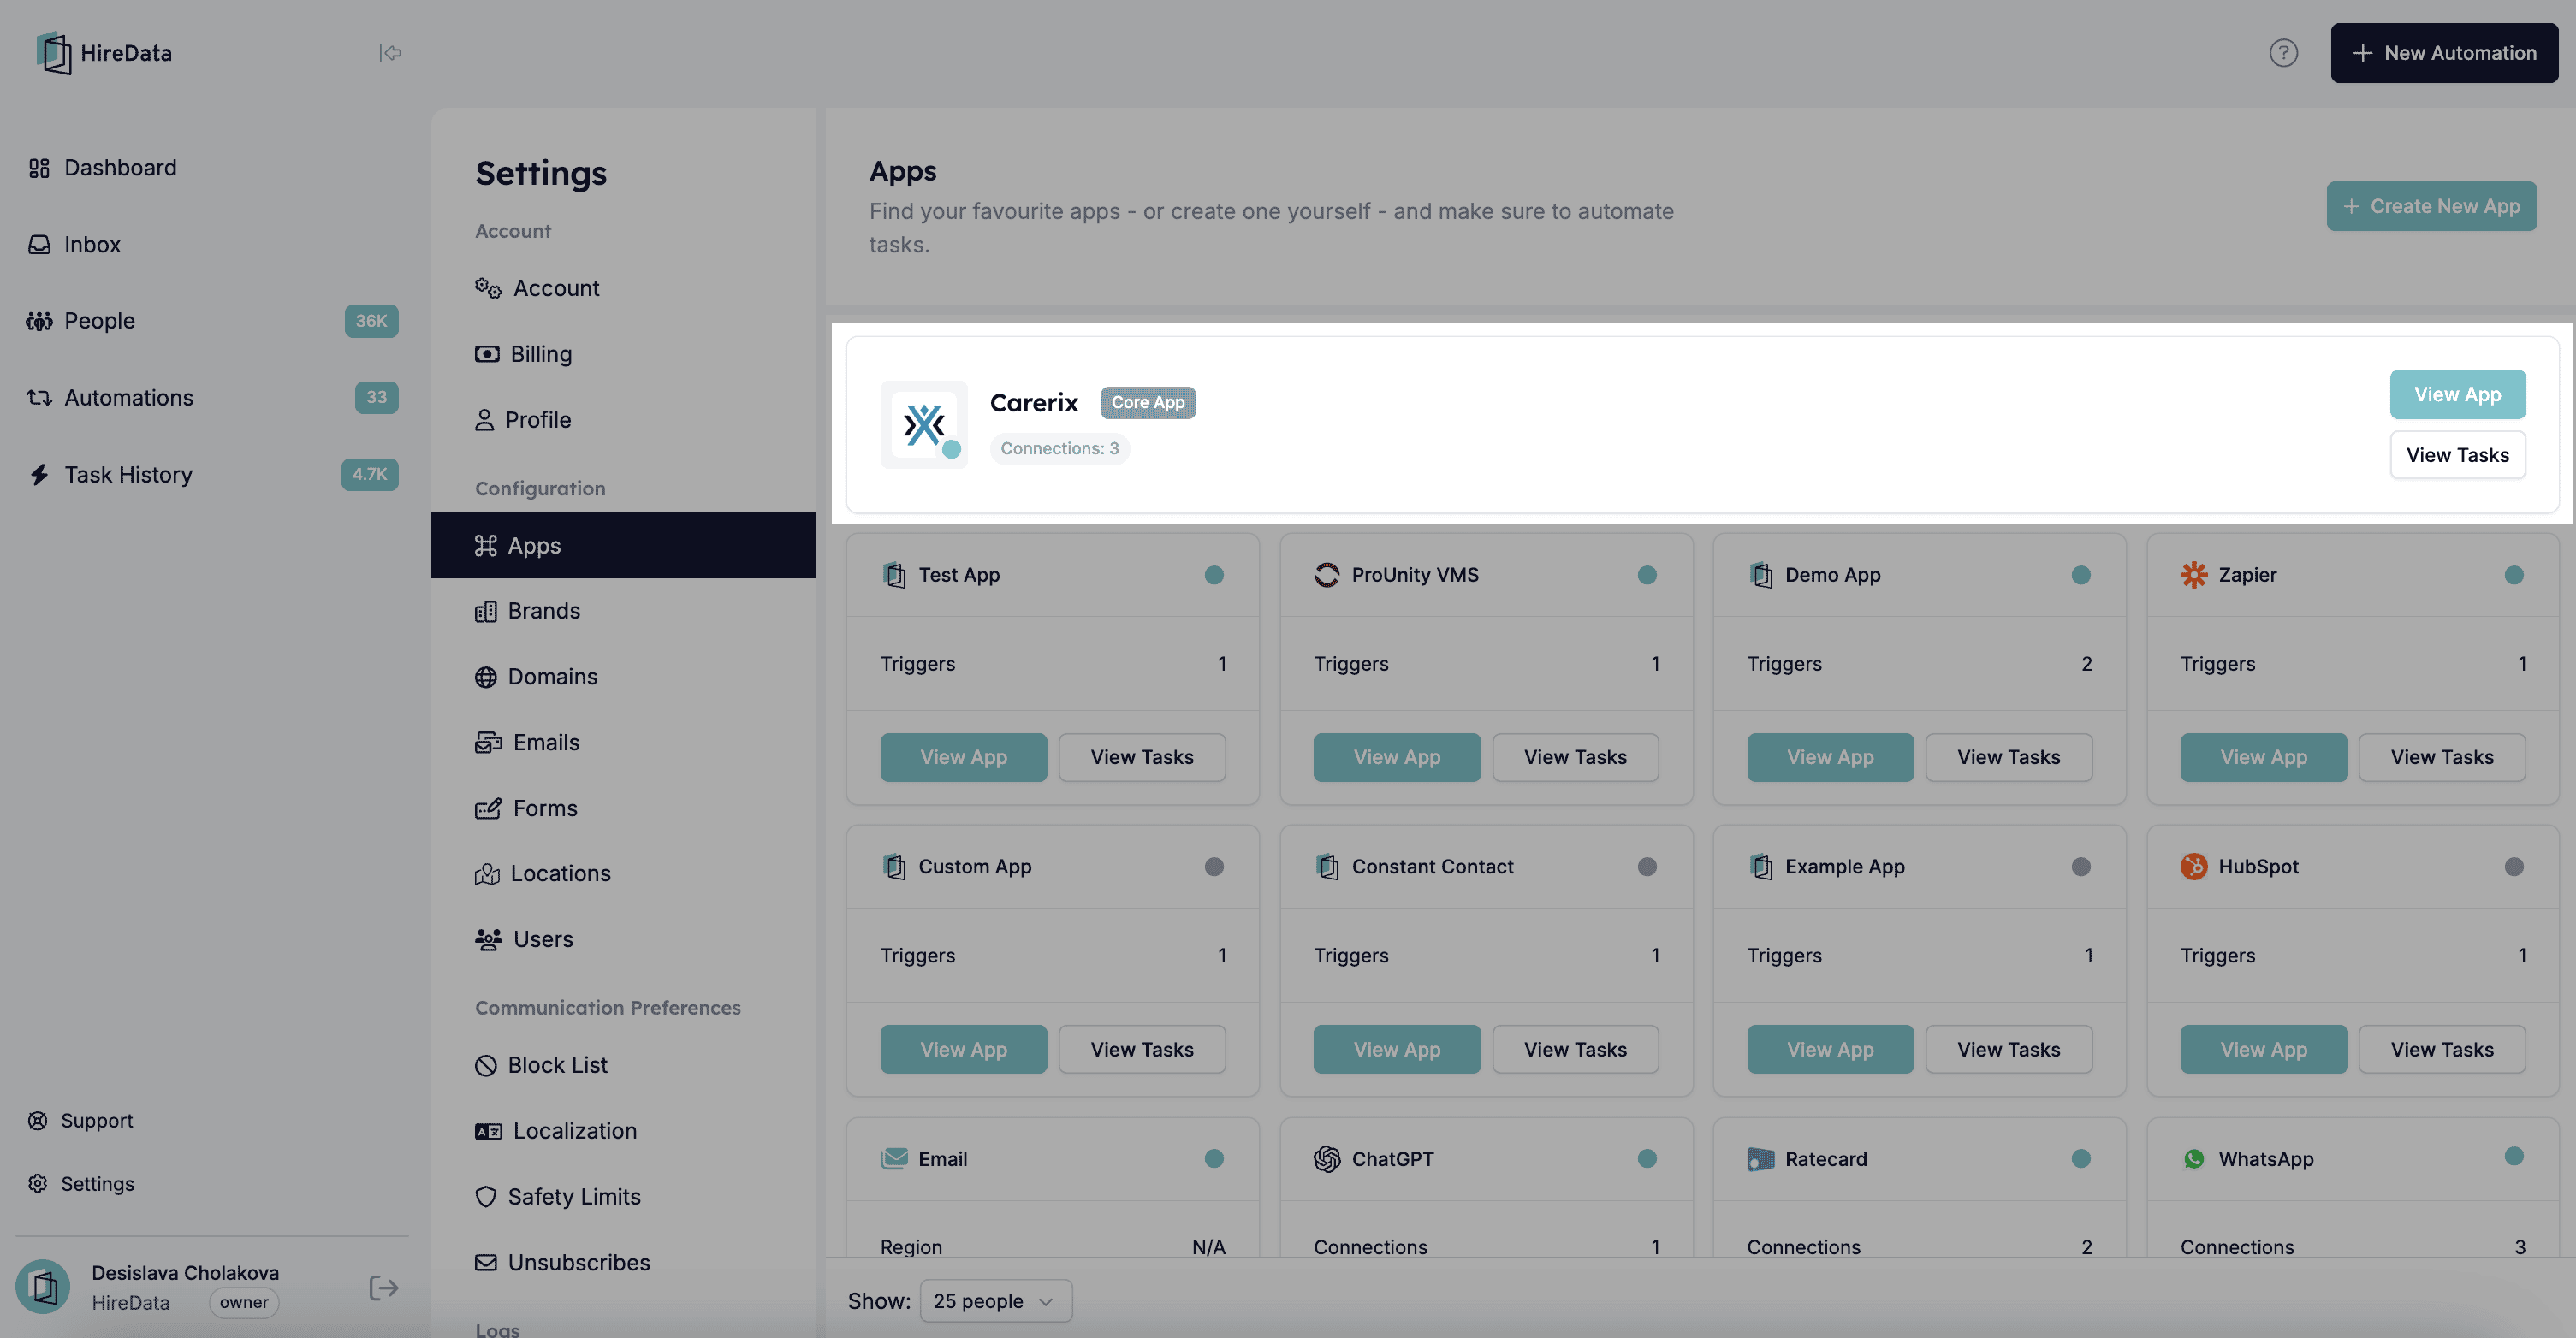
Begin by navigating to the [app section](https://app.hiredata.com/settings/apps) within HireData and open Carerix.
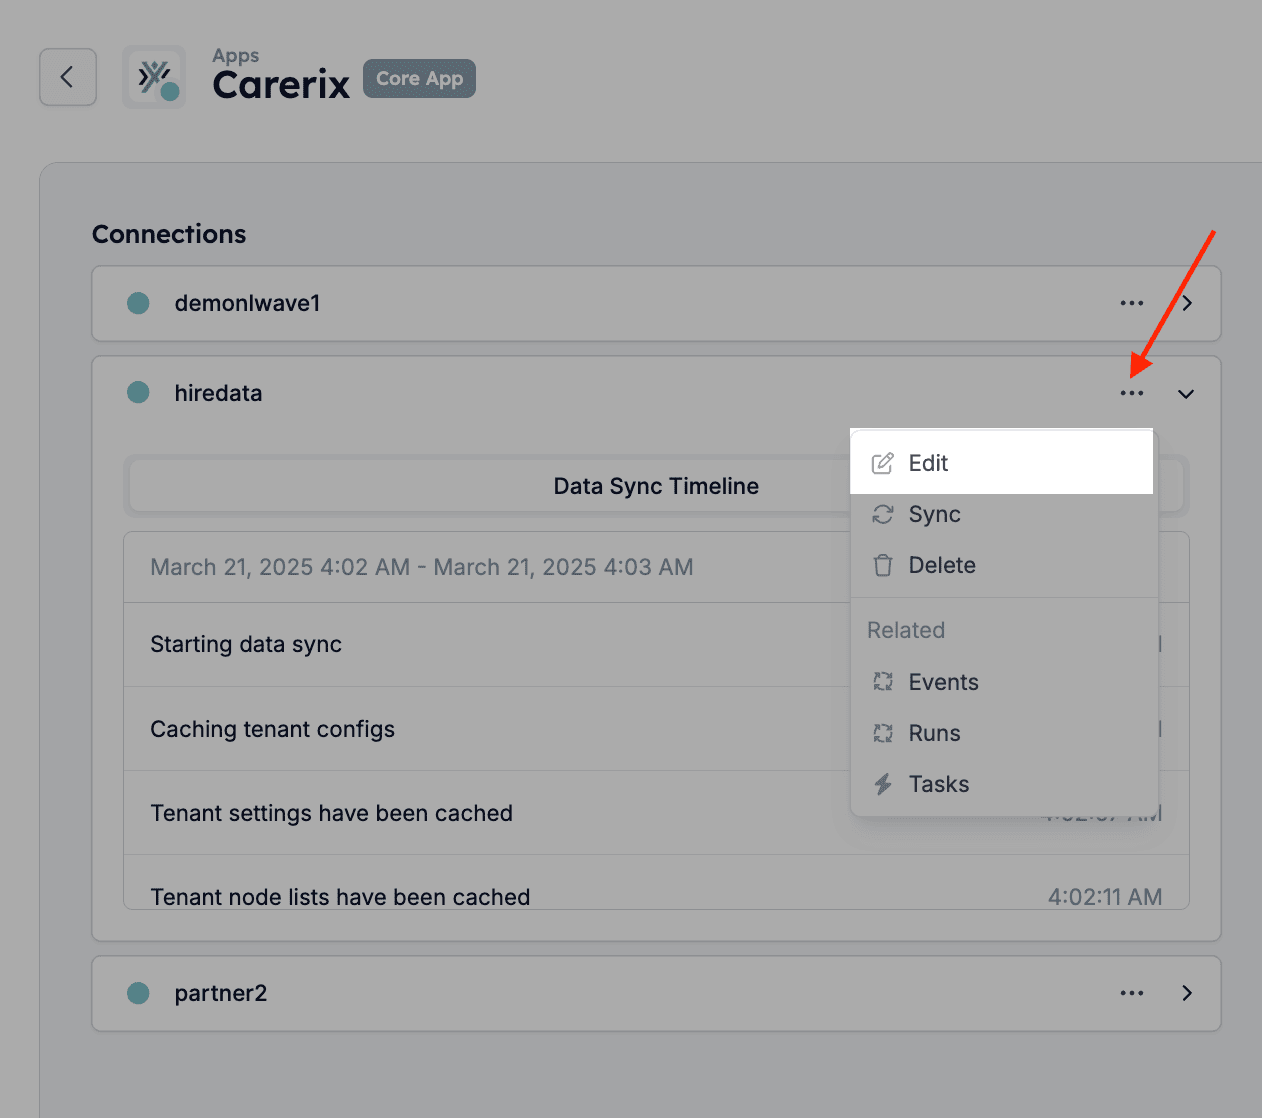
 Then click on \[Edit] from the drop-down menu on the connection you would like to update.
 ## Configuring objects
On the next screen, you will see a list of objects that are synced with your connection.
## Configuring objects
On the next screen, you will see a list of objects that are synced with your connection.
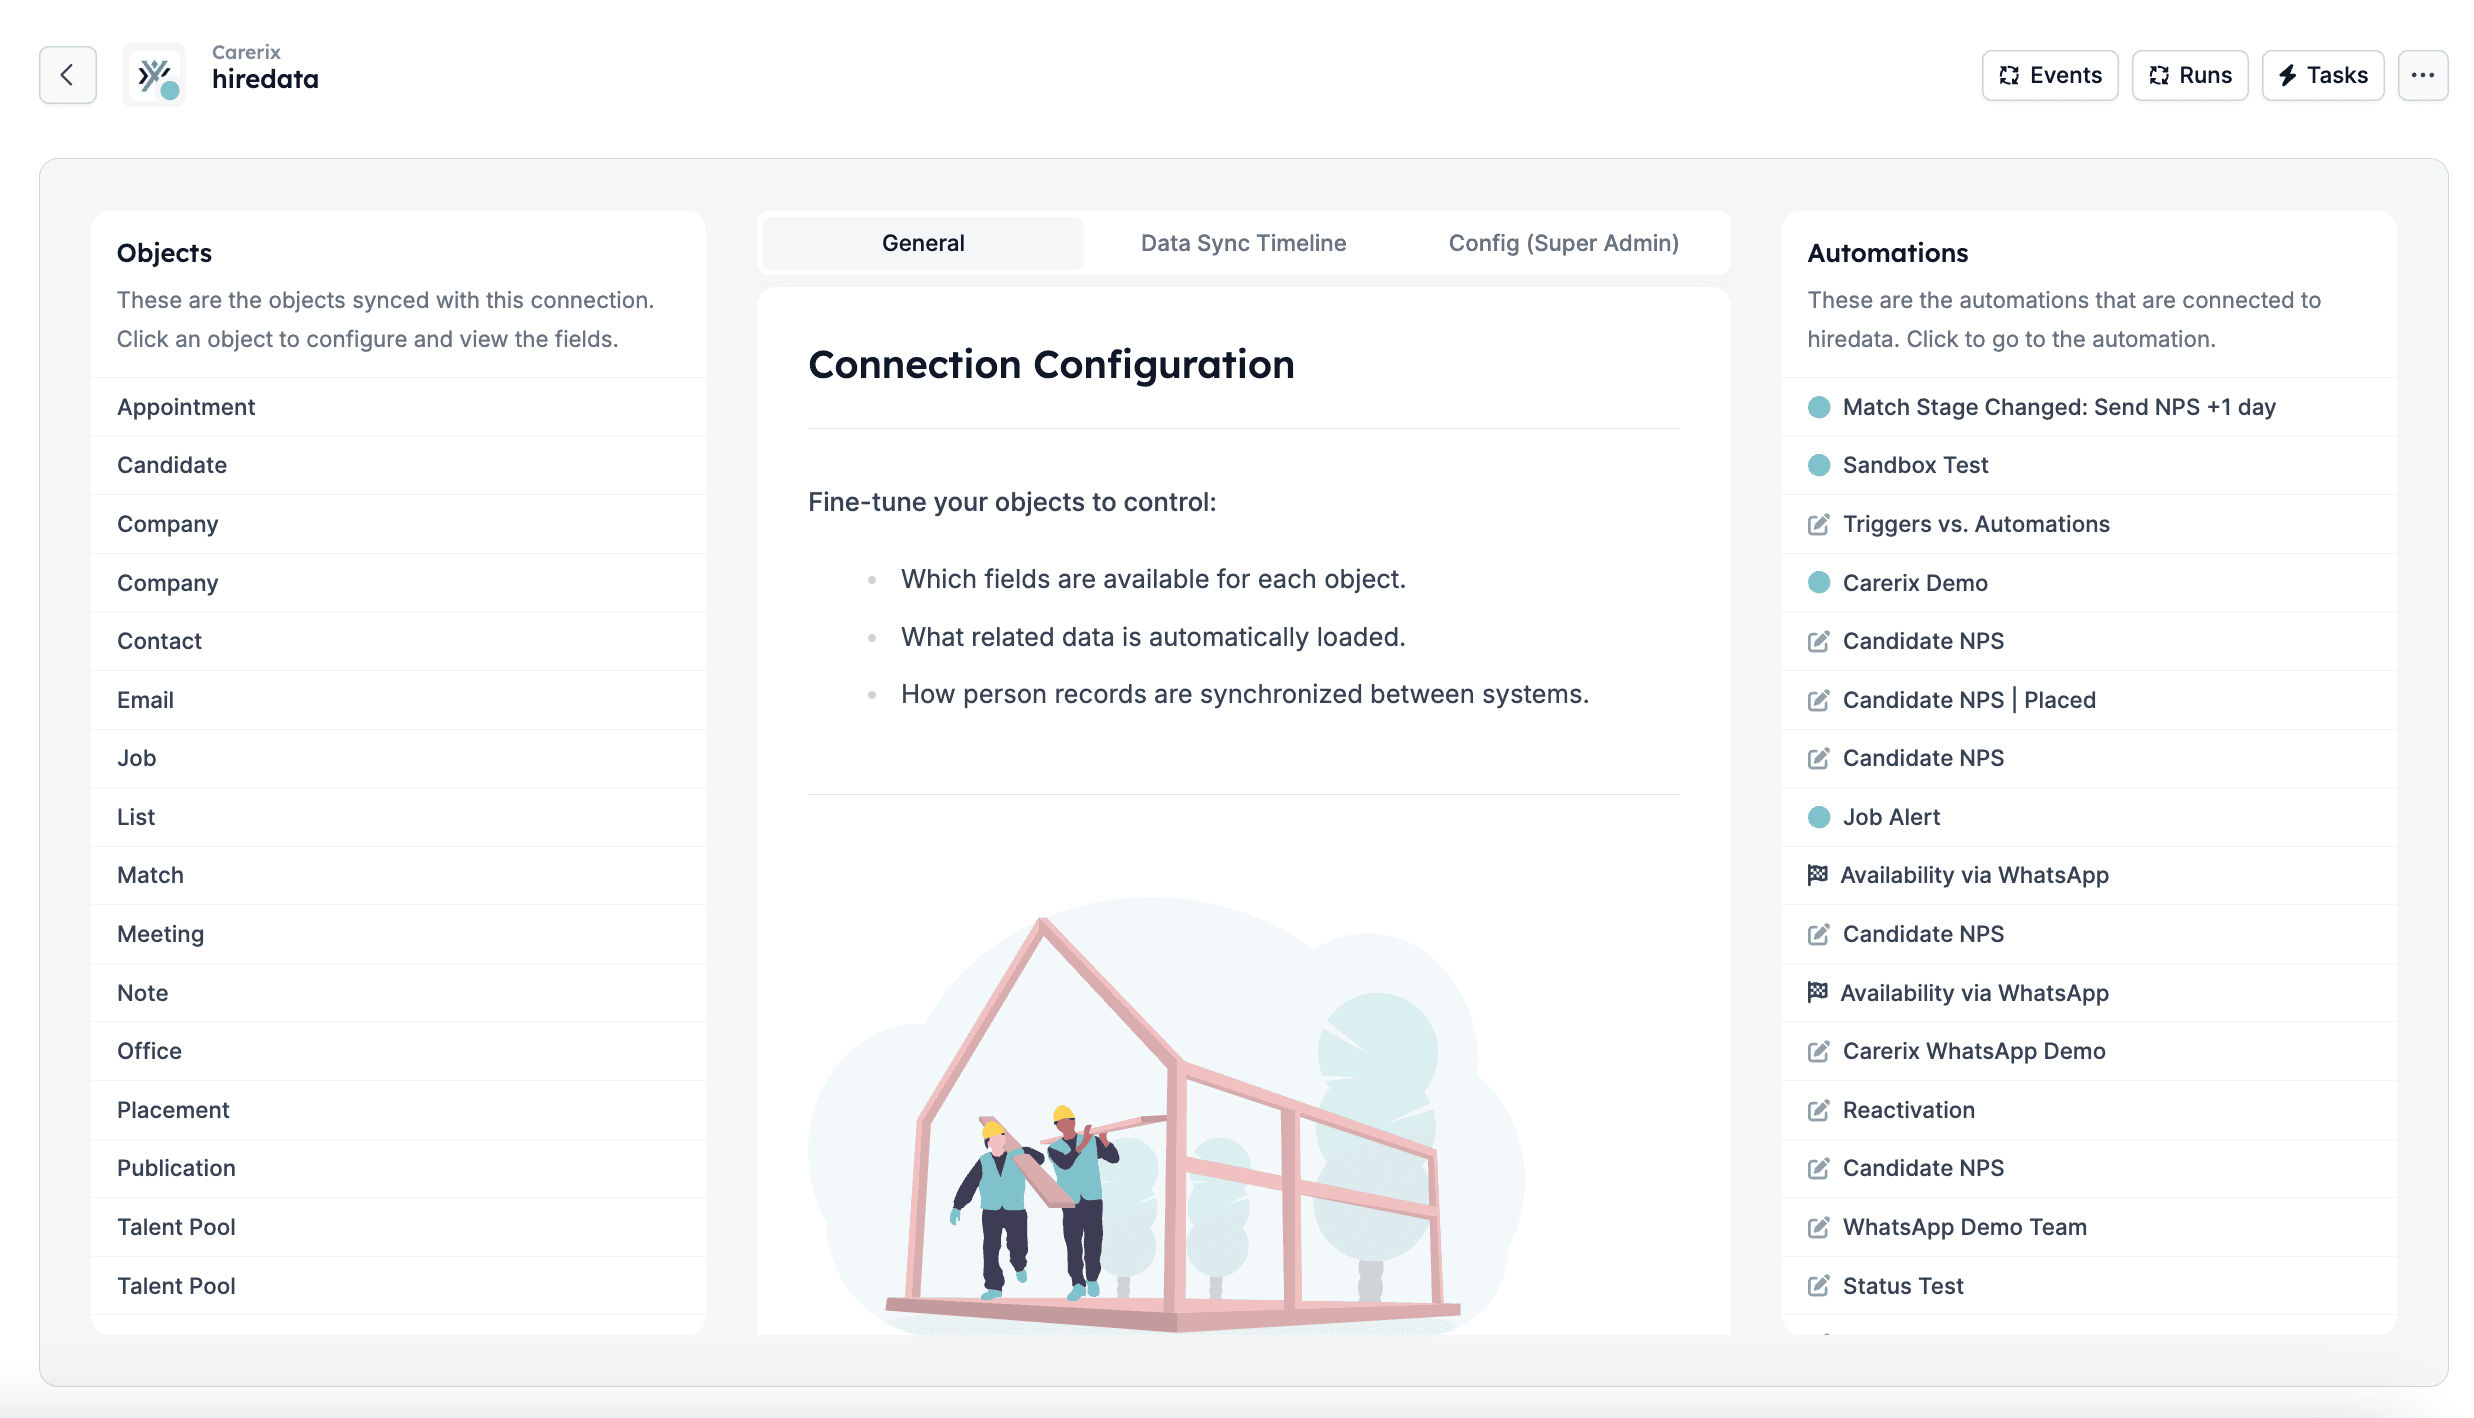 Click on an object (e.g., Appointment, Candidate, Meeting) to configure its fields.
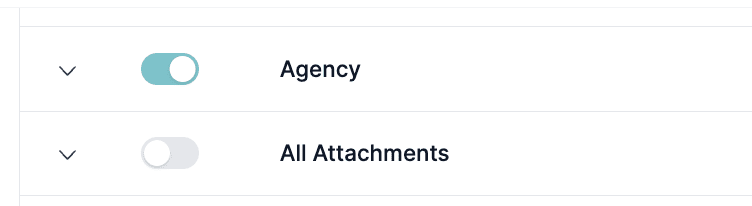
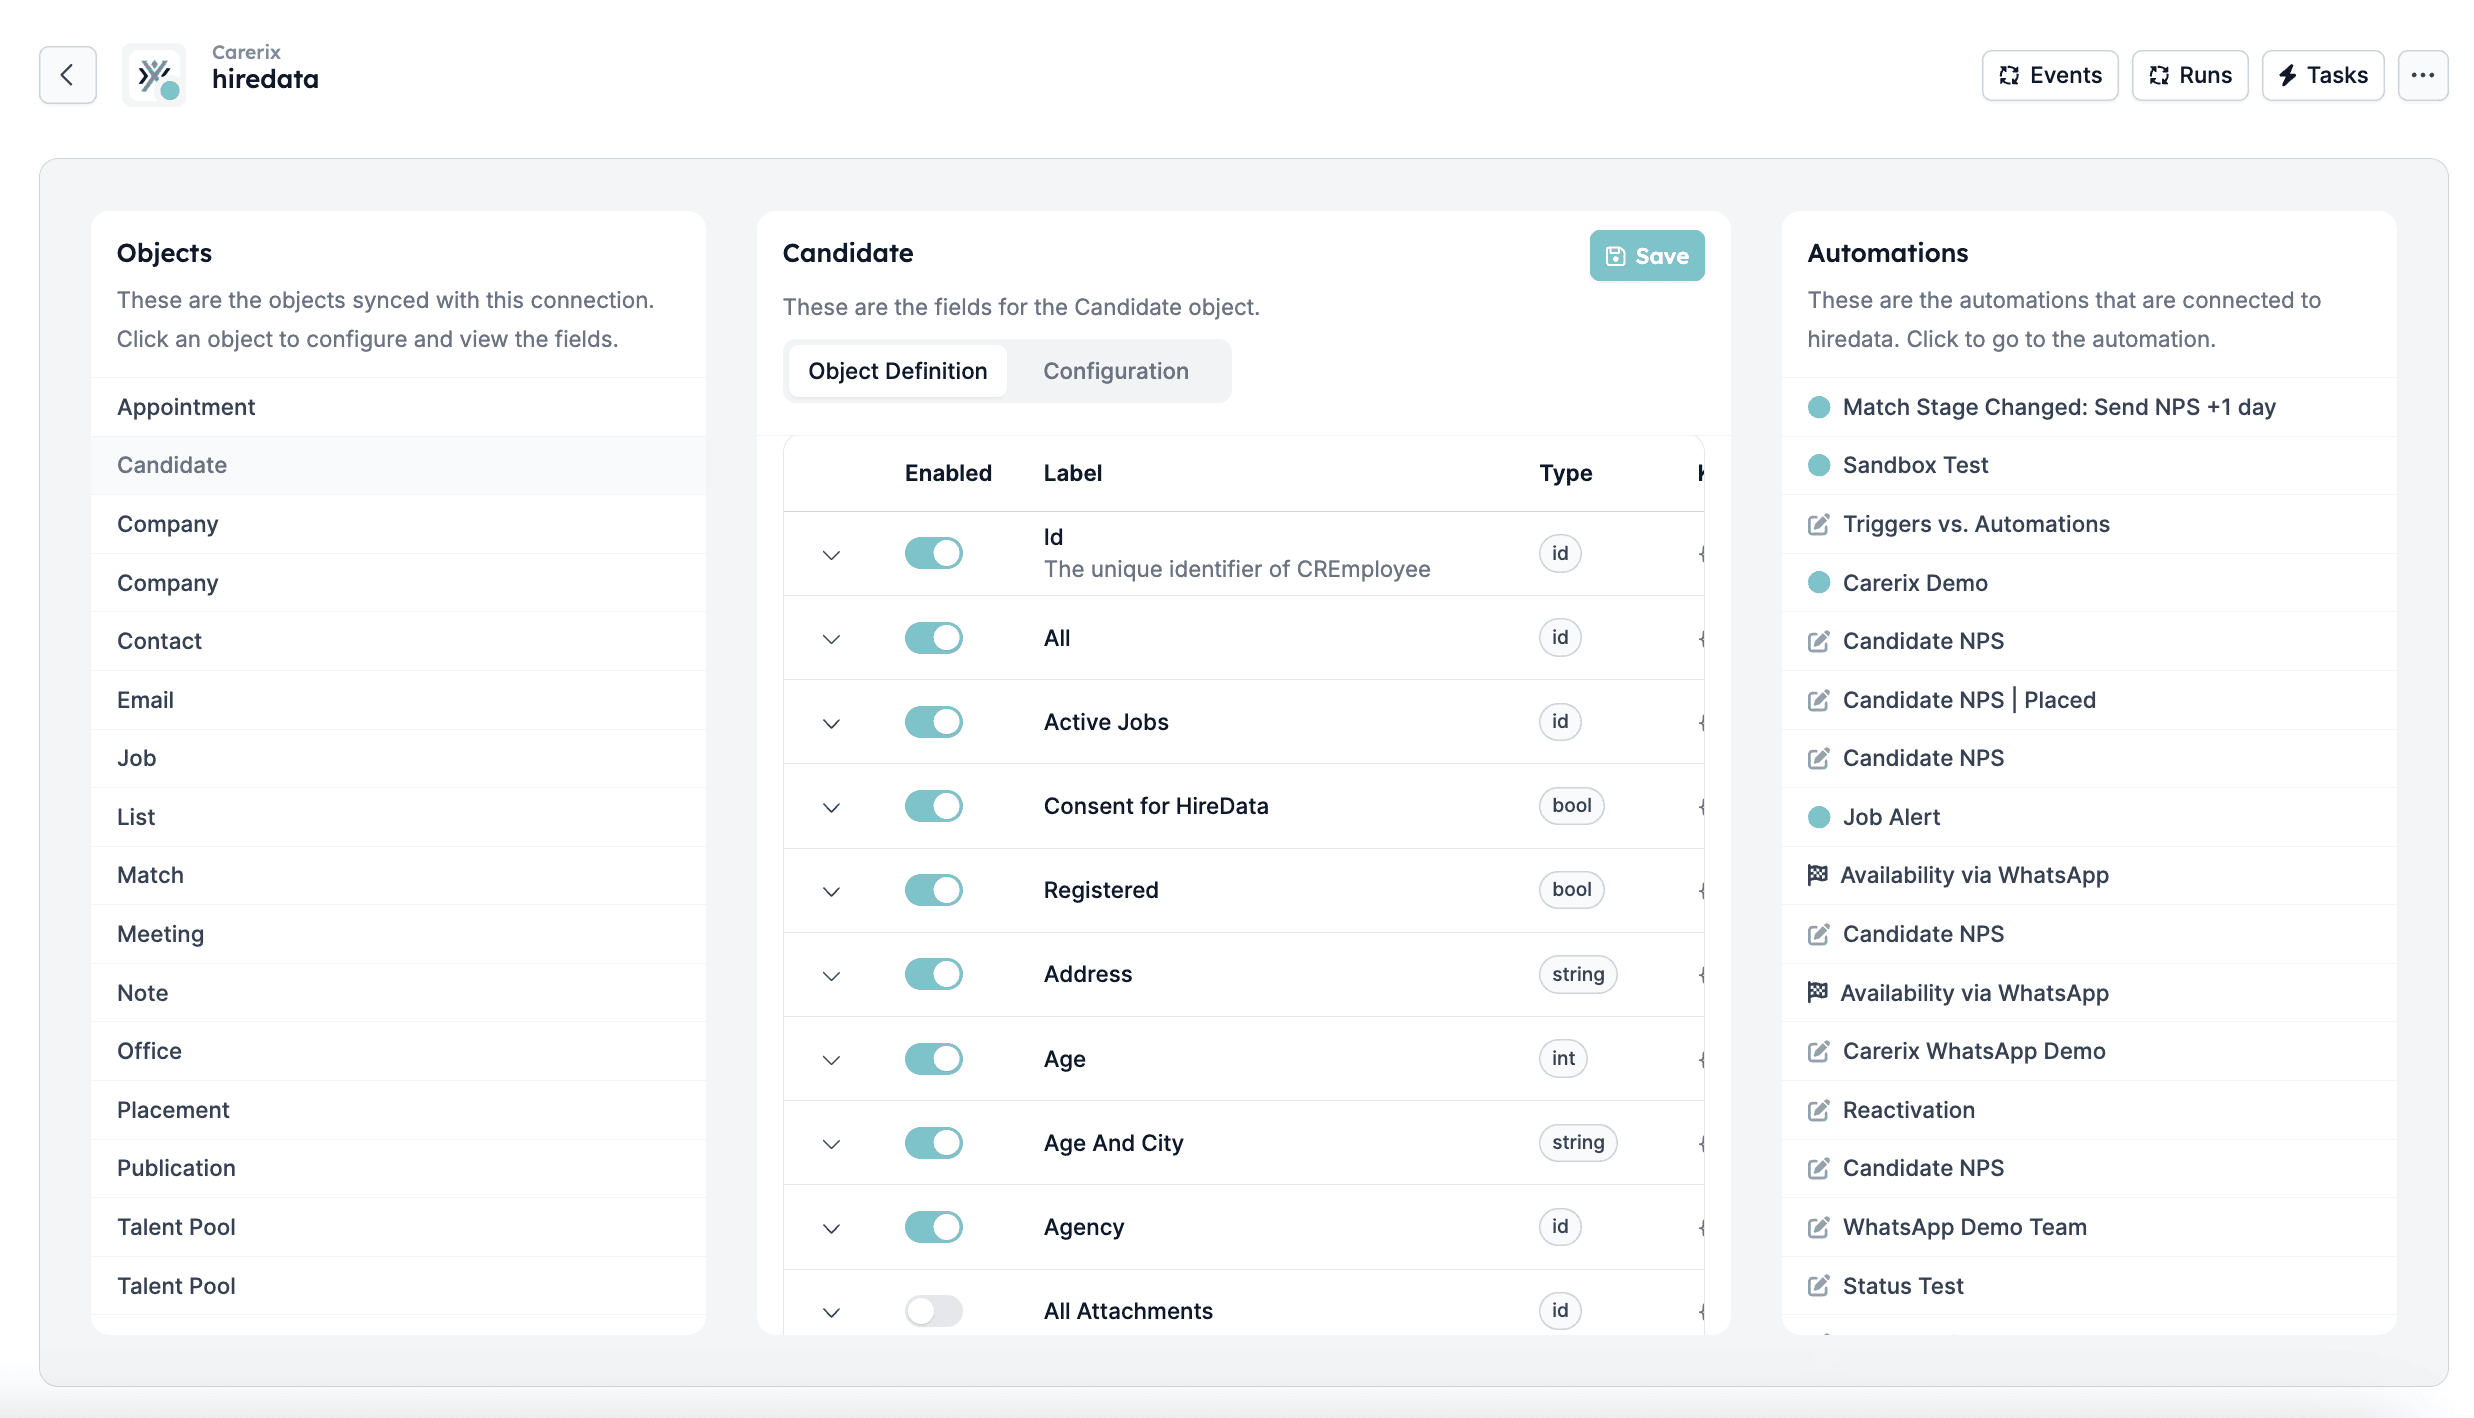 After selecting any of the objects, you will see a list of fields associated with it. Toggle the **switch on** for the fields you want to sync. After you do this and save the changes, these fields will be available for your automations.
 ## Configuring relationships
Here you can also define the relationships for your objects that will be used in your automations.
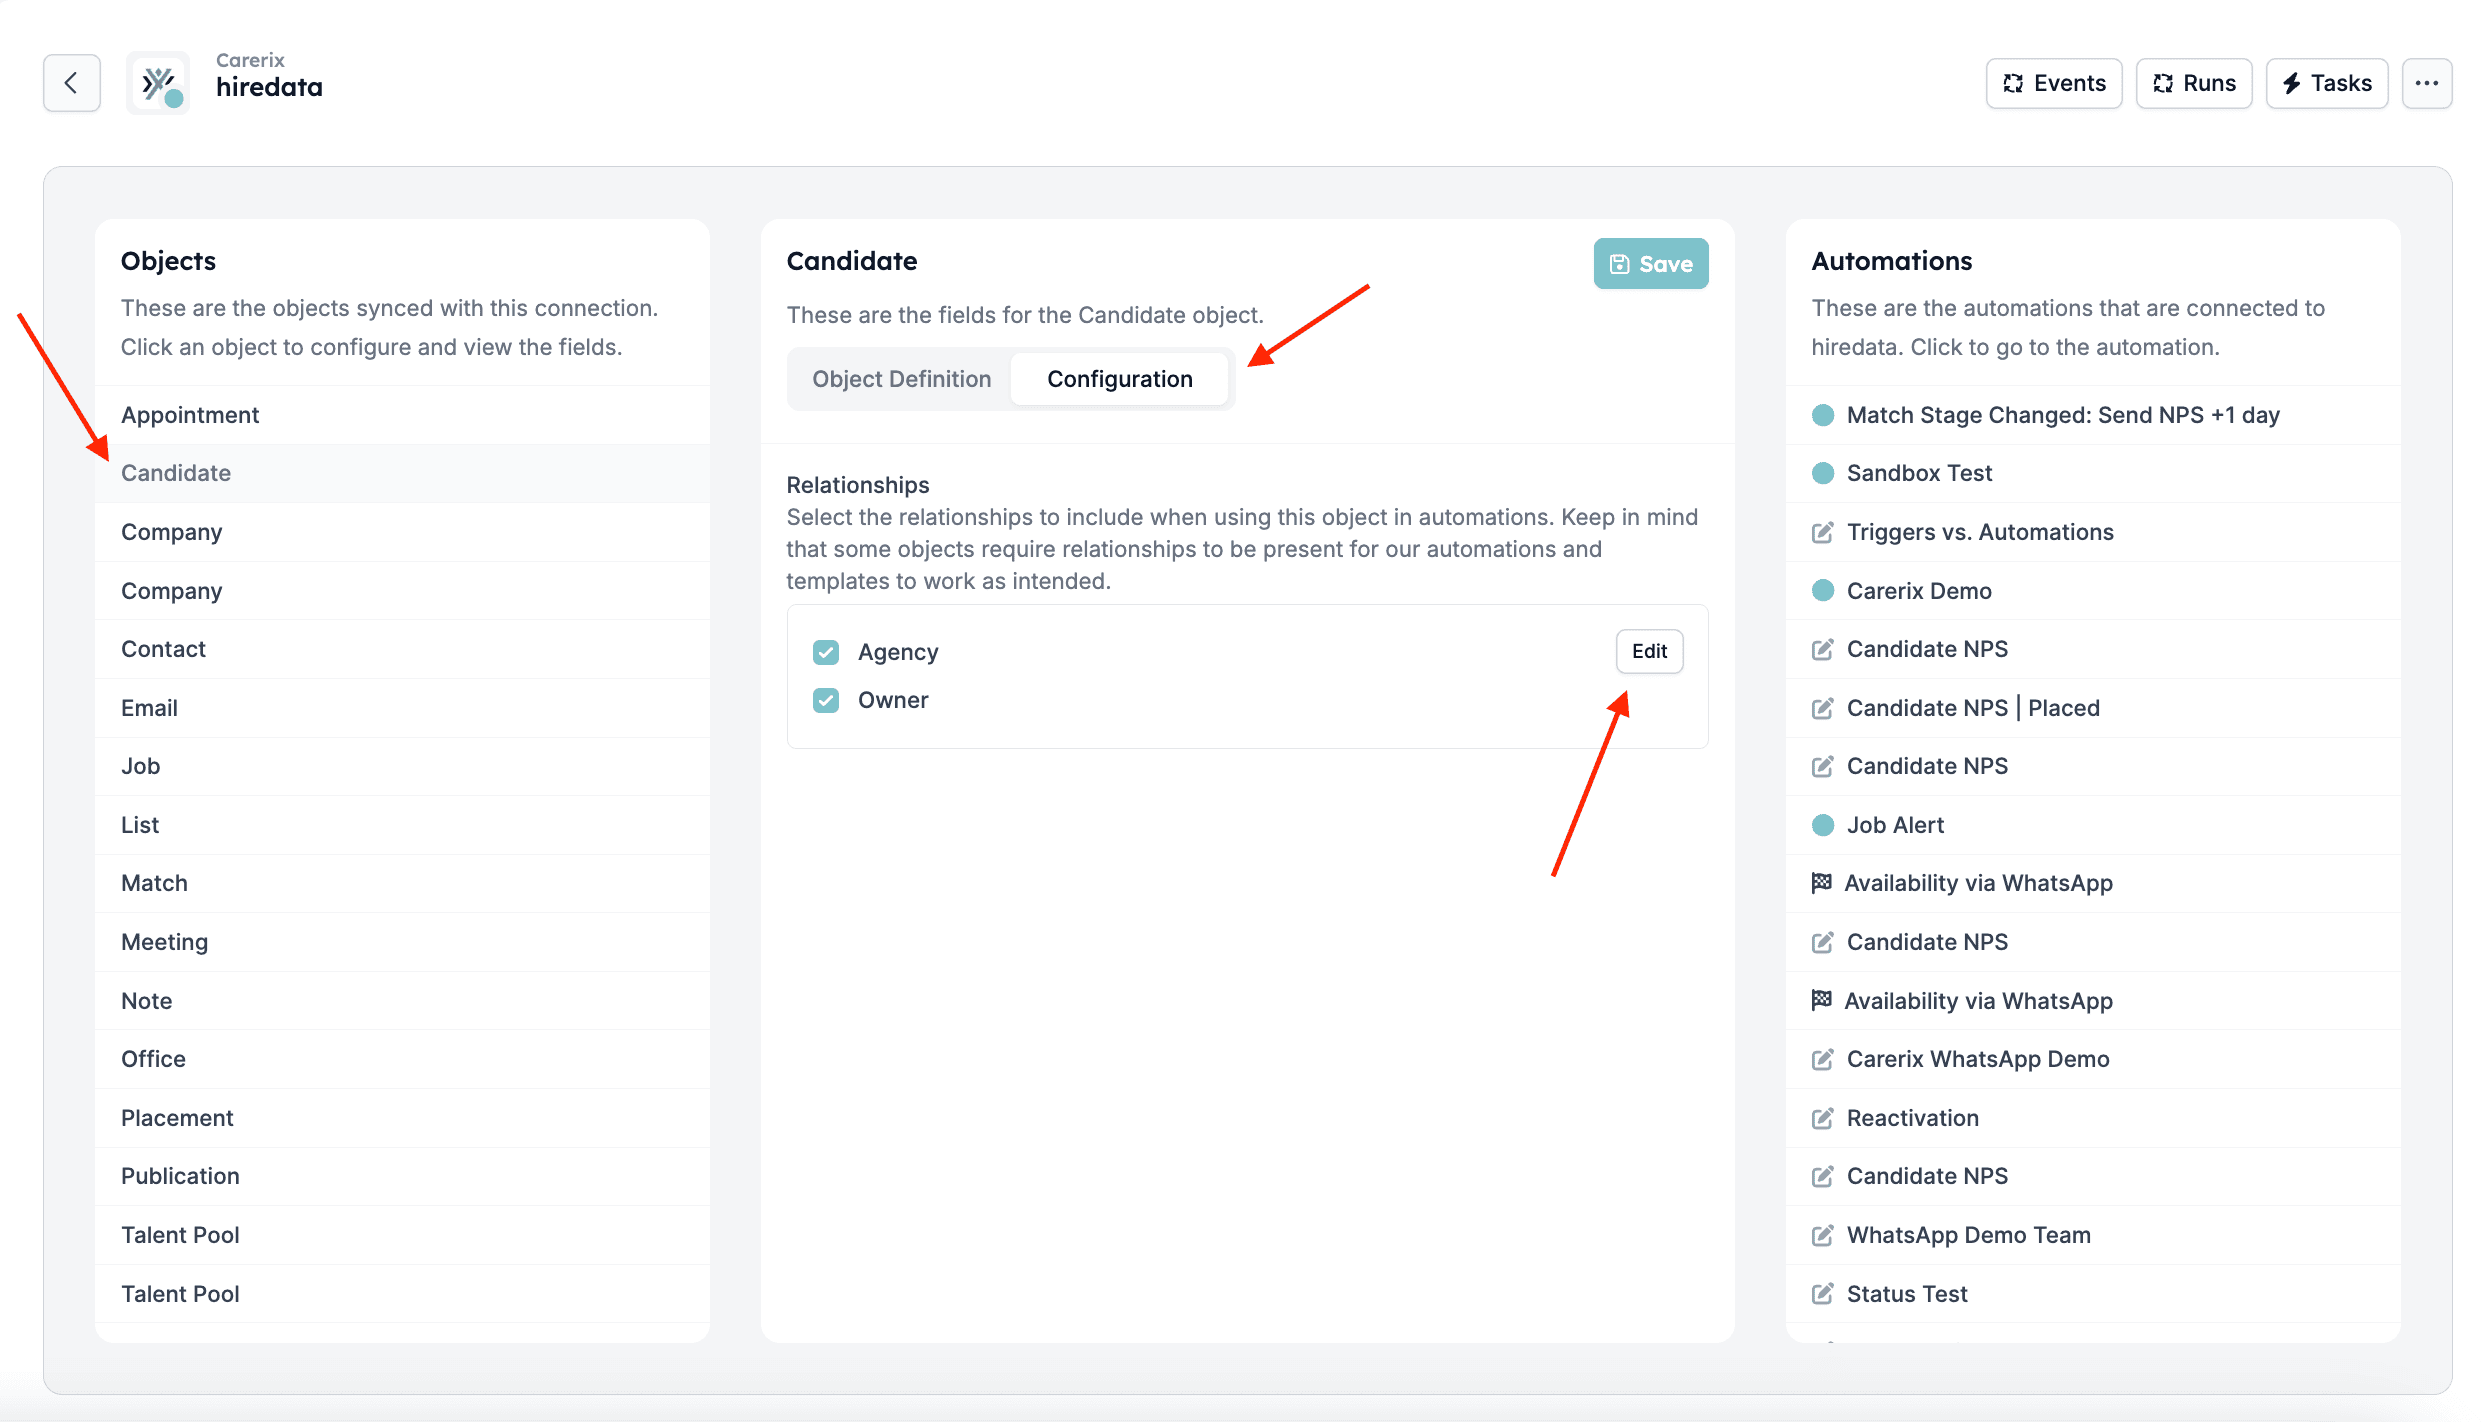
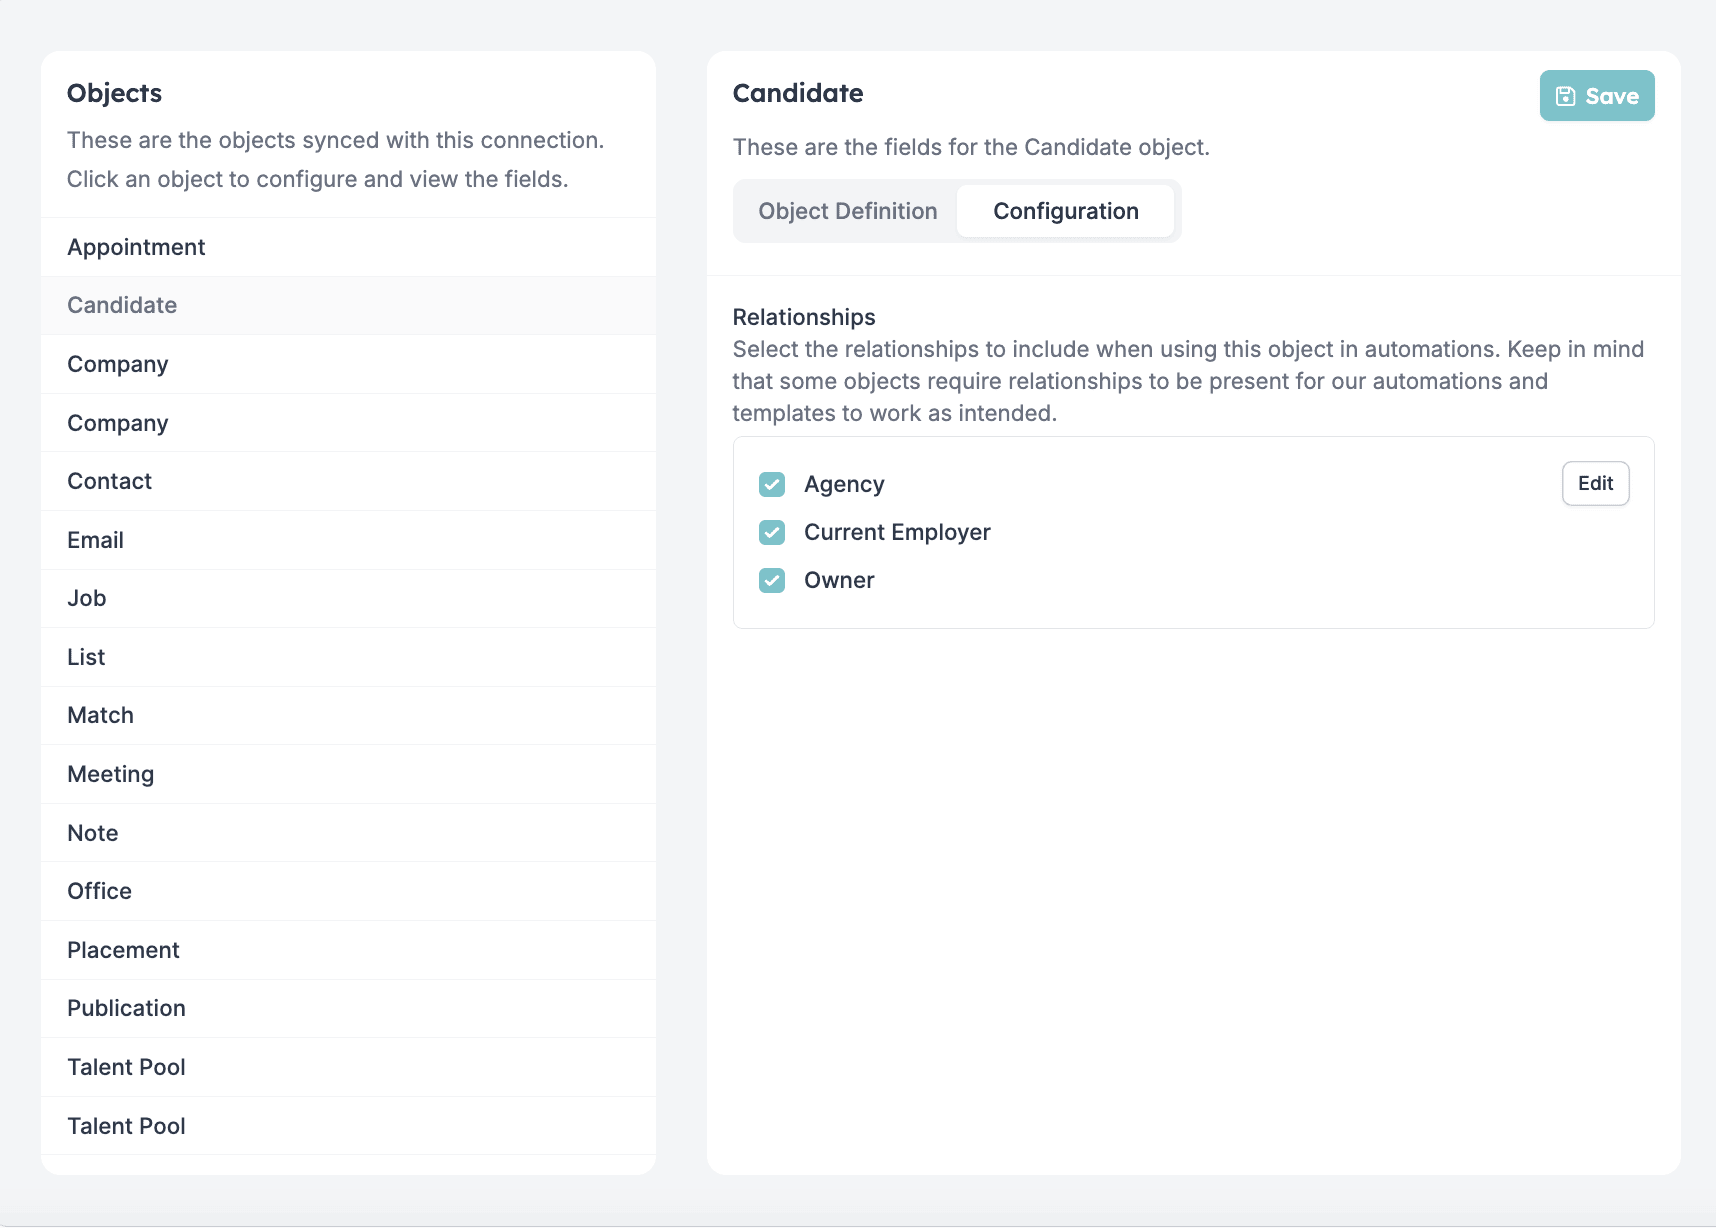
In the **Objects** panel on the left, select the object you would like to update and click on the **Configuration** tab, where you will see the current relationships. Click on \[Edit] to update them.
## Configuring relationships
Here you can also define the relationships for your objects that will be used in your automations.
In the **Objects** panel on the left, select the object you would like to update and click on the **Configuration** tab, where you will see the current relationships. Click on \[Edit] to update them.
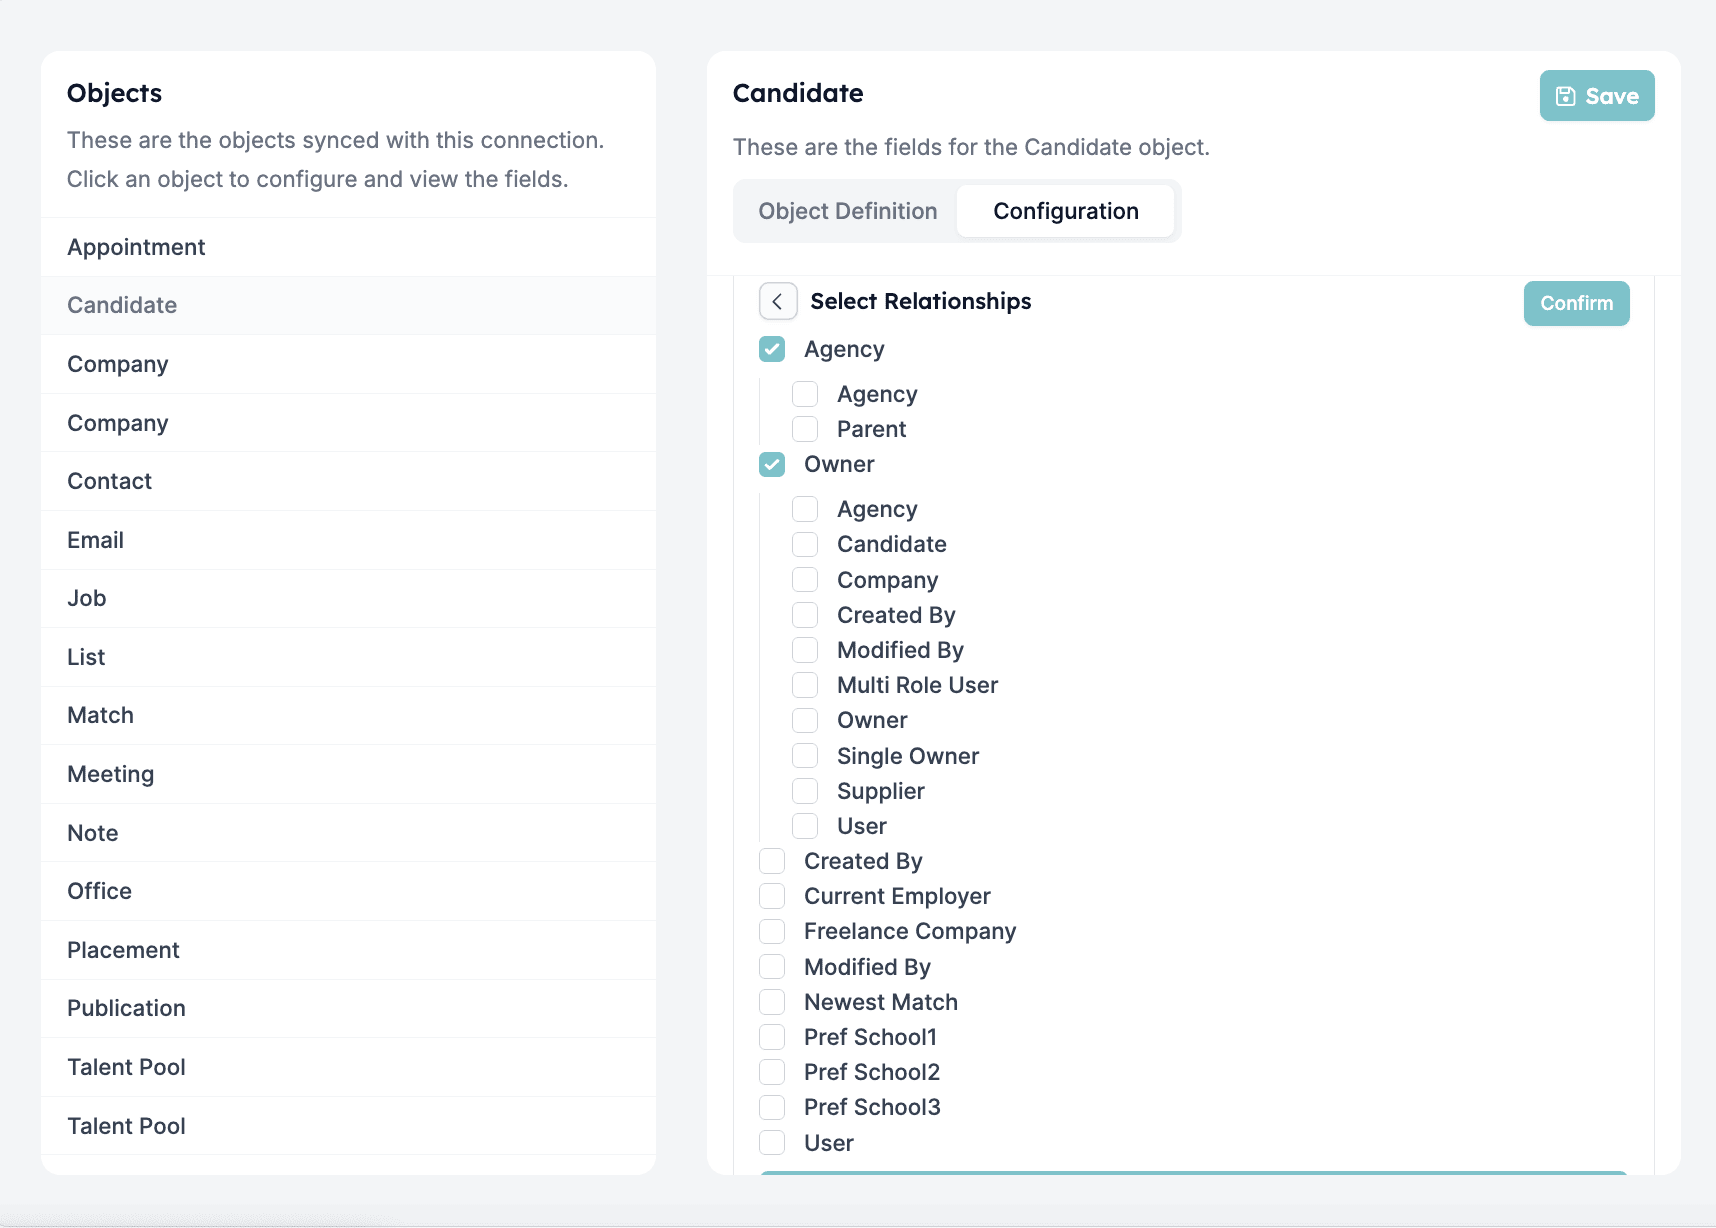
 Select any of the relationships that you need for your automations.
 Lastly, review your selection and confirm it.
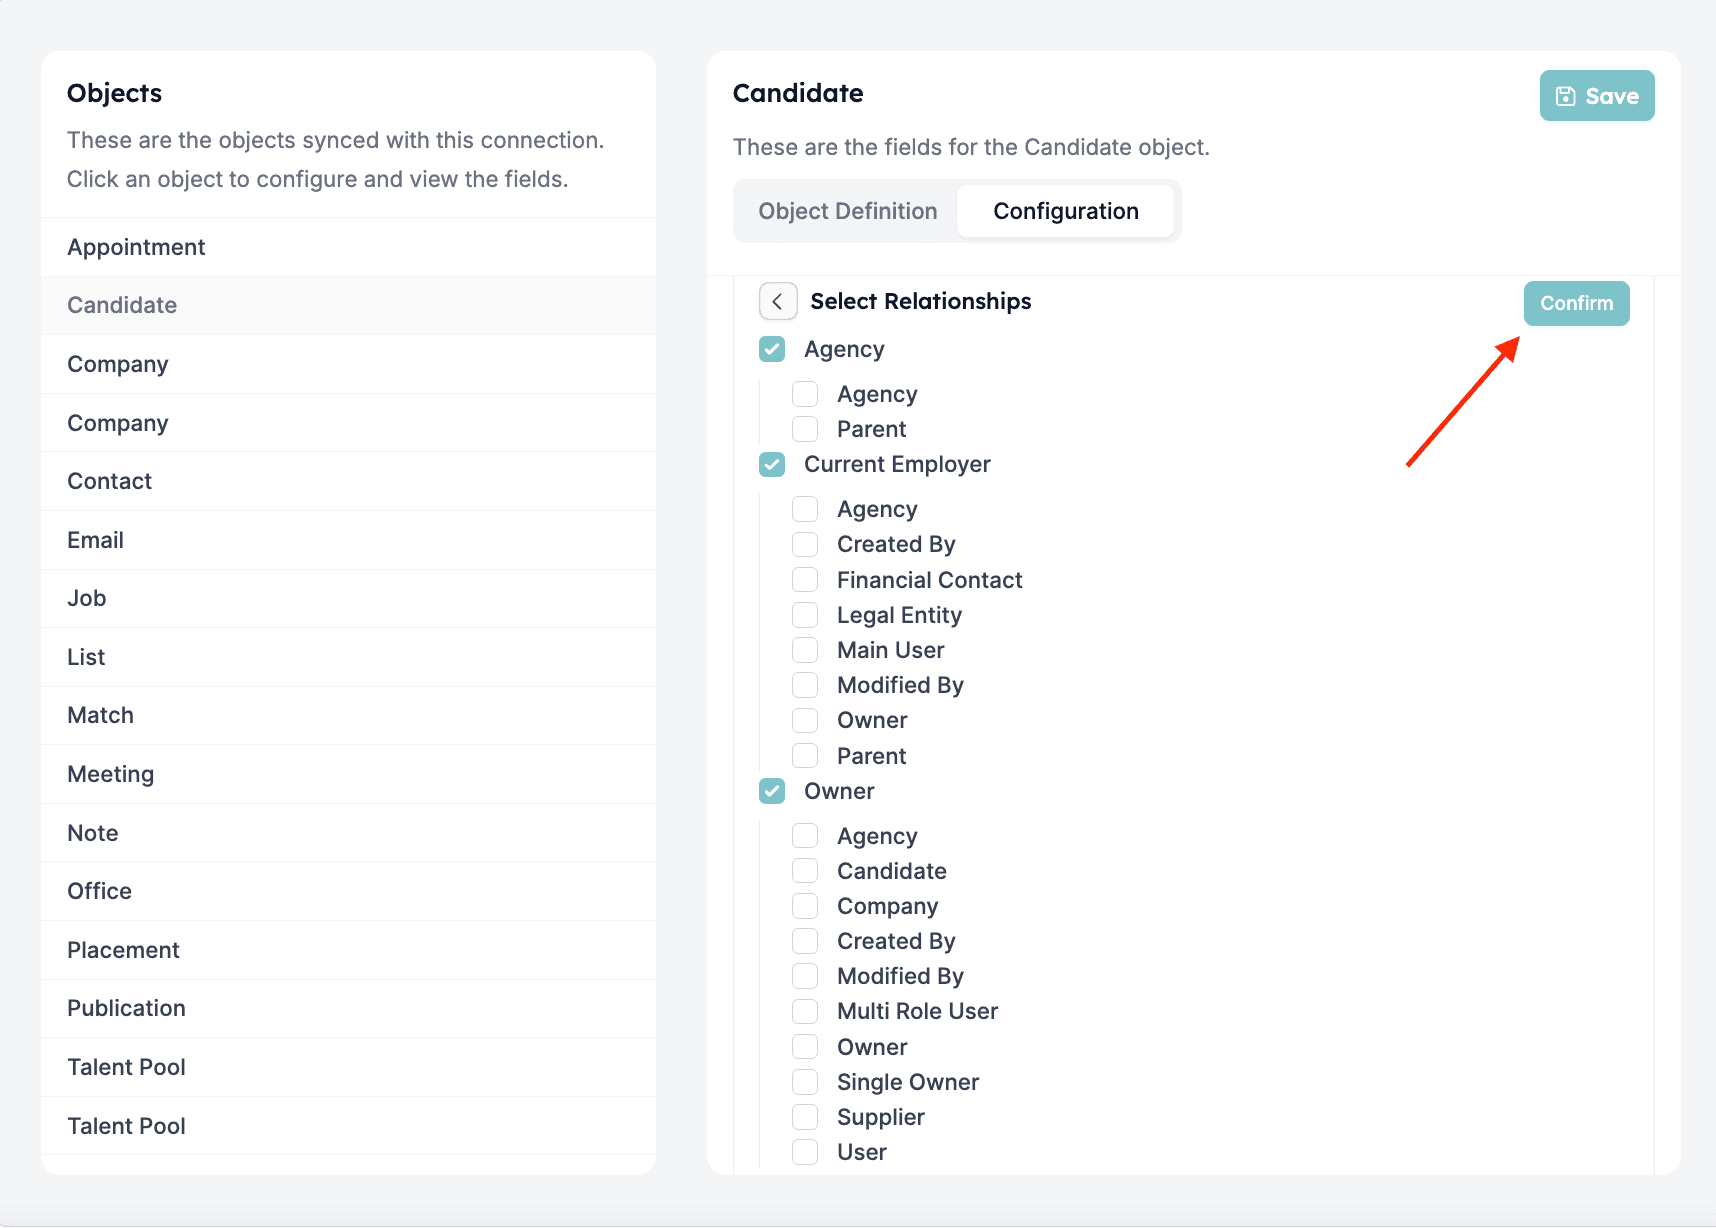 The newly added relationships should be visible on the next screen.
 By configuring the objects and relationship fields in your Carerix connection, you ensure that the right data is available for use in your HireData automations. These relationships and objects can be leveraged in automation filters, for selecting senders and recipients in email or WhatsApp messages, and for defining specific conditions that trigger actions.
Proper setup allows for seamless data flow between Carerix and HireData, enhancing the precision and efficiency of your automated workflows.
💡 **Pro** **Tip:** Only enable the fields required for your automation to optimize data synchronisation.
## Related topics
- [Carerix Integration Overview](/apps/carerix/overview.md)
- [Create a Carerix automation in HireData](/apps/carerix/create-a-carerix-automation-in-hiredata.md)
- [Update fields in Carerix with HireData](/apps/carerix/update-fields-in-carerix-with-hiredata.md)
- [Create a Vincere automation in HireData](/apps/vincere/create-a-vincere-automation-in-hiredata.md)
- [Create an OTYS automation in HireData](/apps/otys/create-an-otys-automation-in-hiredata.md)
By configuring the objects and relationship fields in your Carerix connection, you ensure that the right data is available for use in your HireData automations. These relationships and objects can be leveraged in automation filters, for selecting senders and recipients in email or WhatsApp messages, and for defining specific conditions that trigger actions.
Proper setup allows for seamless data flow between Carerix and HireData, enhancing the precision and efficiency of your automated workflows.
💡 **Pro** **Tip:** Only enable the fields required for your automation to optimize data synchronisation.
## Related topics
- [Carerix Integration Overview](/apps/carerix/overview.md)
- [Create a Carerix automation in HireData](/apps/carerix/create-a-carerix-automation-in-hiredata.md)
- [Update fields in Carerix with HireData](/apps/carerix/update-fields-in-carerix-with-hiredata.md)
- [Create a Vincere automation in HireData](/apps/vincere/create-a-vincere-automation-in-hiredata.md)
- [Create an OTYS automation in HireData](/apps/otys/create-an-otys-automation-in-hiredata.md)