> ## Documentation Index
> Fetch the complete documentation index at: https://help.hiredata.com/llms.txt
> Use this file to discover all available pages before exploring further.
# Schedule a task in Carerix with HireData
> Automatically schedule tasks and follow-ups in Carerix through HireData, so recruiters always know what to do next and never miss a candidate action.
*Welcome to our comprehensive guide on how to create a "Schedule task" in Carerix with HireData. Follow the instructions below to learn the process so you can manage it yourself. At the end, you will also find a video tutorial for additional support.*
You should already have created an automation for Carerix - see how to do this [here](/apps/carerix/create-a-carerix-automation-in-hiredata).
## Step 1: Create a task
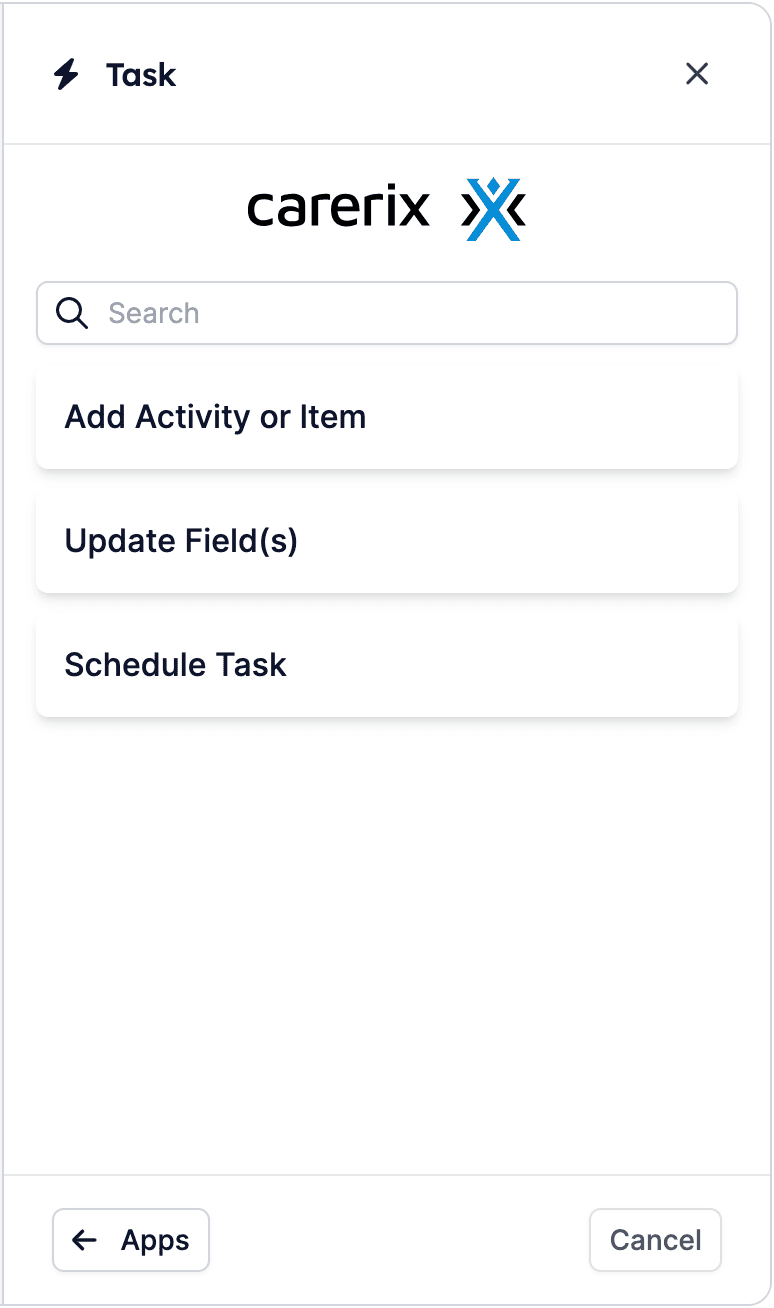
Click the \[+] to open the Building Blocks menu, then on \[Task] and finally select the \[Carerix] app. You will see all of the automated tasks that we currently support through Carerix:
* Add Activity or Item
* Update Field(s)
* Schedule task
Select the task you want to create.
 ## Step 2: Set it up
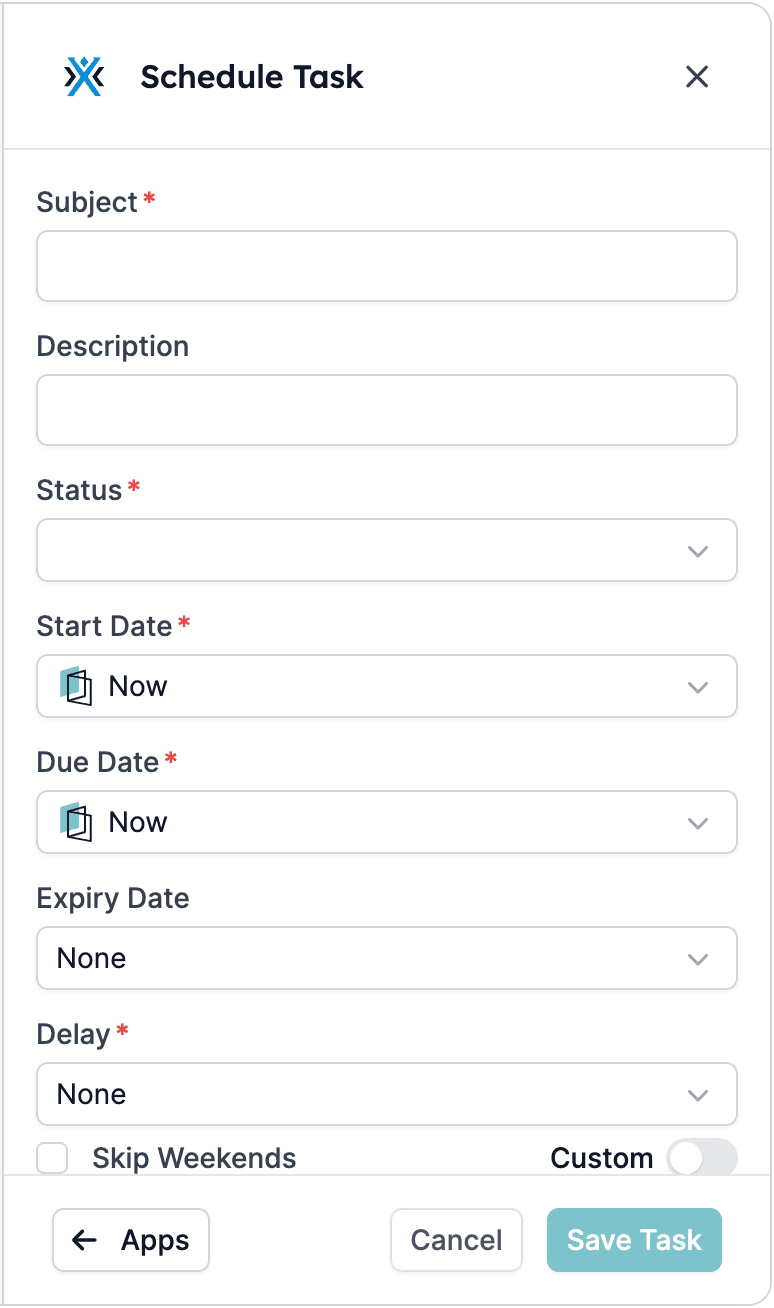
In this guide, we will focus on creating a "Schedule task". After you click on the \[Schedule Task] button, you need to fill in a few fields.
## Step 2: Set it up
In this guide, we will focus on creating a "Schedule task". After you click on the \[Schedule Task] button, you need to fill in a few fields.
 ***2.1. Choose the owner of the task***
The first thing you need to do after creating the task is make sure the owner is the same as the owner of the match. To do that, select \[ID] in the \[Match Owner] box and \[Match: Owner (User)] in the \[With] box after that. That way, the task will be assigned to this person.
***2.1. Choose the owner of the task***
The first thing you need to do after creating the task is make sure the owner is the same as the owner of the match. To do that, select \[ID] in the \[Match Owner] box and \[Match: Owner (User)] in the \[With] box after that. That way, the task will be assigned to this person.
 ***2.2. Set a start and a due date***
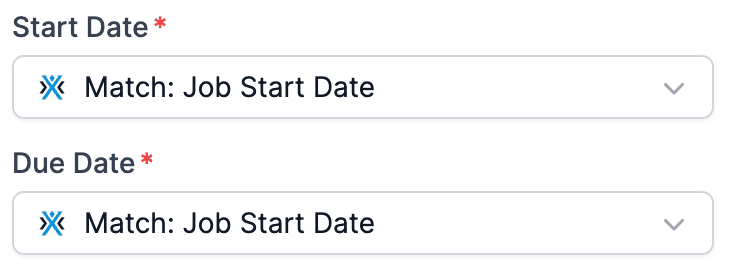
Depending on when you want the task to start and be completed, you can set a \[Start date] as well as a \[Due Date].
***2.2. Set a start and a due date***
Depending on when you want the task to start and be completed, you can set a \[Start date] as well as a \[Due Date].
 ***2.3. Include a subject***
In the \[Subject] area, you can add variables. There are two ways to do that. The first one is to open the variables on the right via the **\{}** button. Then type any keyword of the variable to find it quicker, and simply click on it to copy.
***2.3. Include a subject***
In the \[Subject] area, you can add variables. There are two ways to do that. The first one is to open the variables on the right via the **\{}** button. Then type any keyword of the variable to find it quicker, and simply click on it to copy.
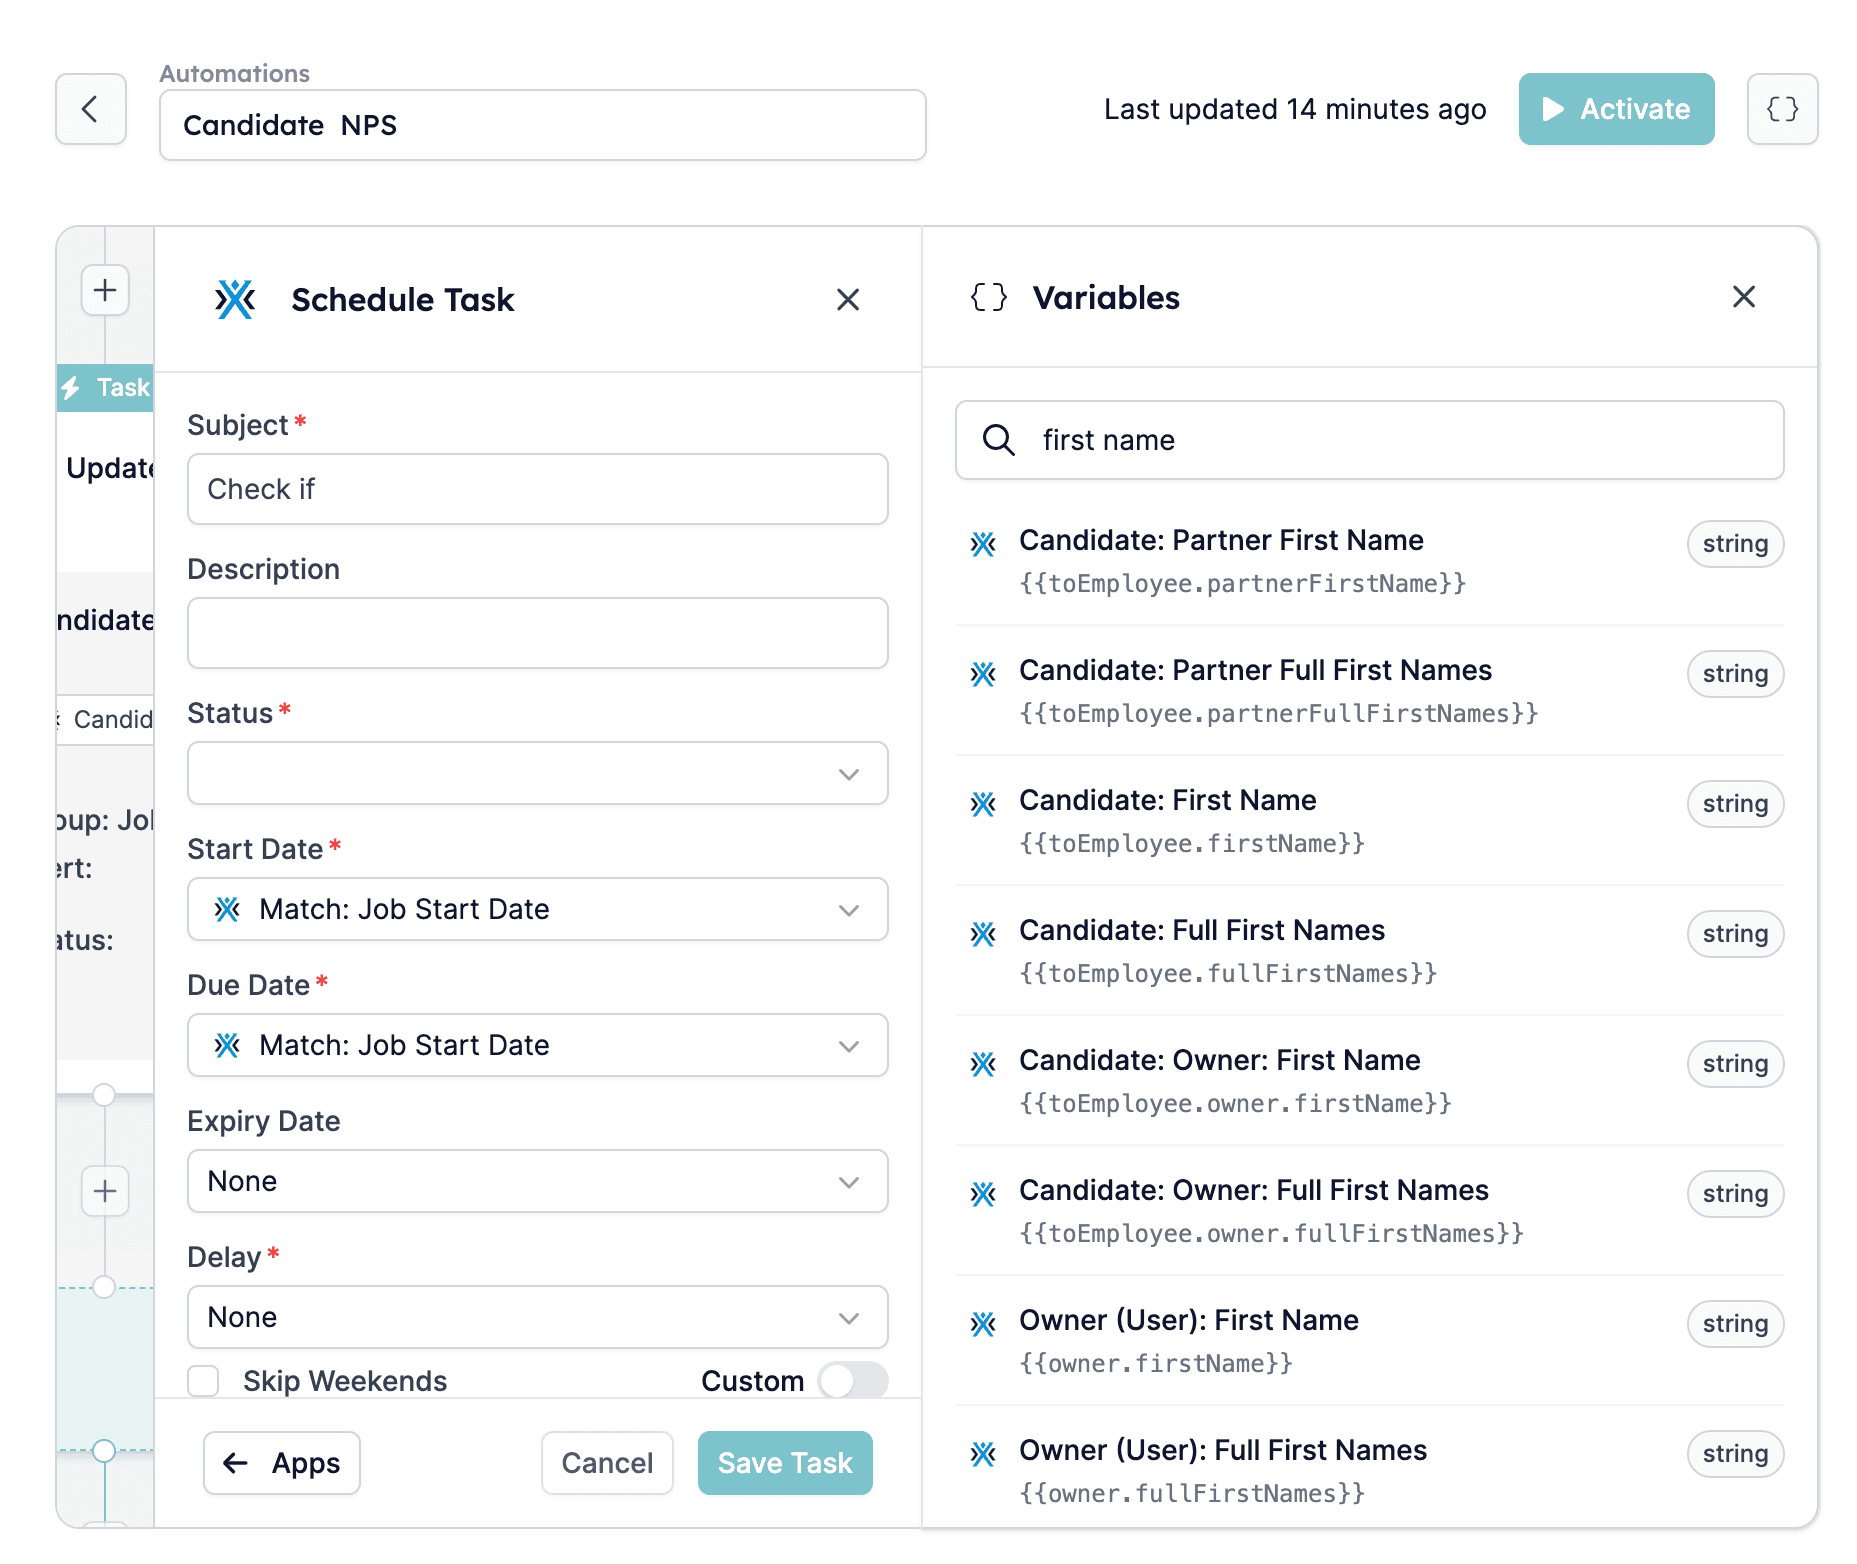 The other way to do this is to type "\{\{" followed by the variable's name in the subject field.
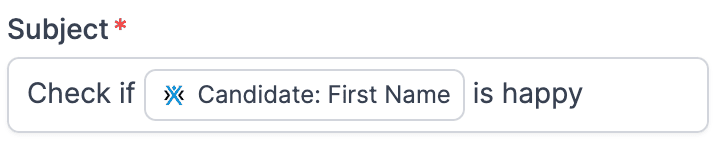
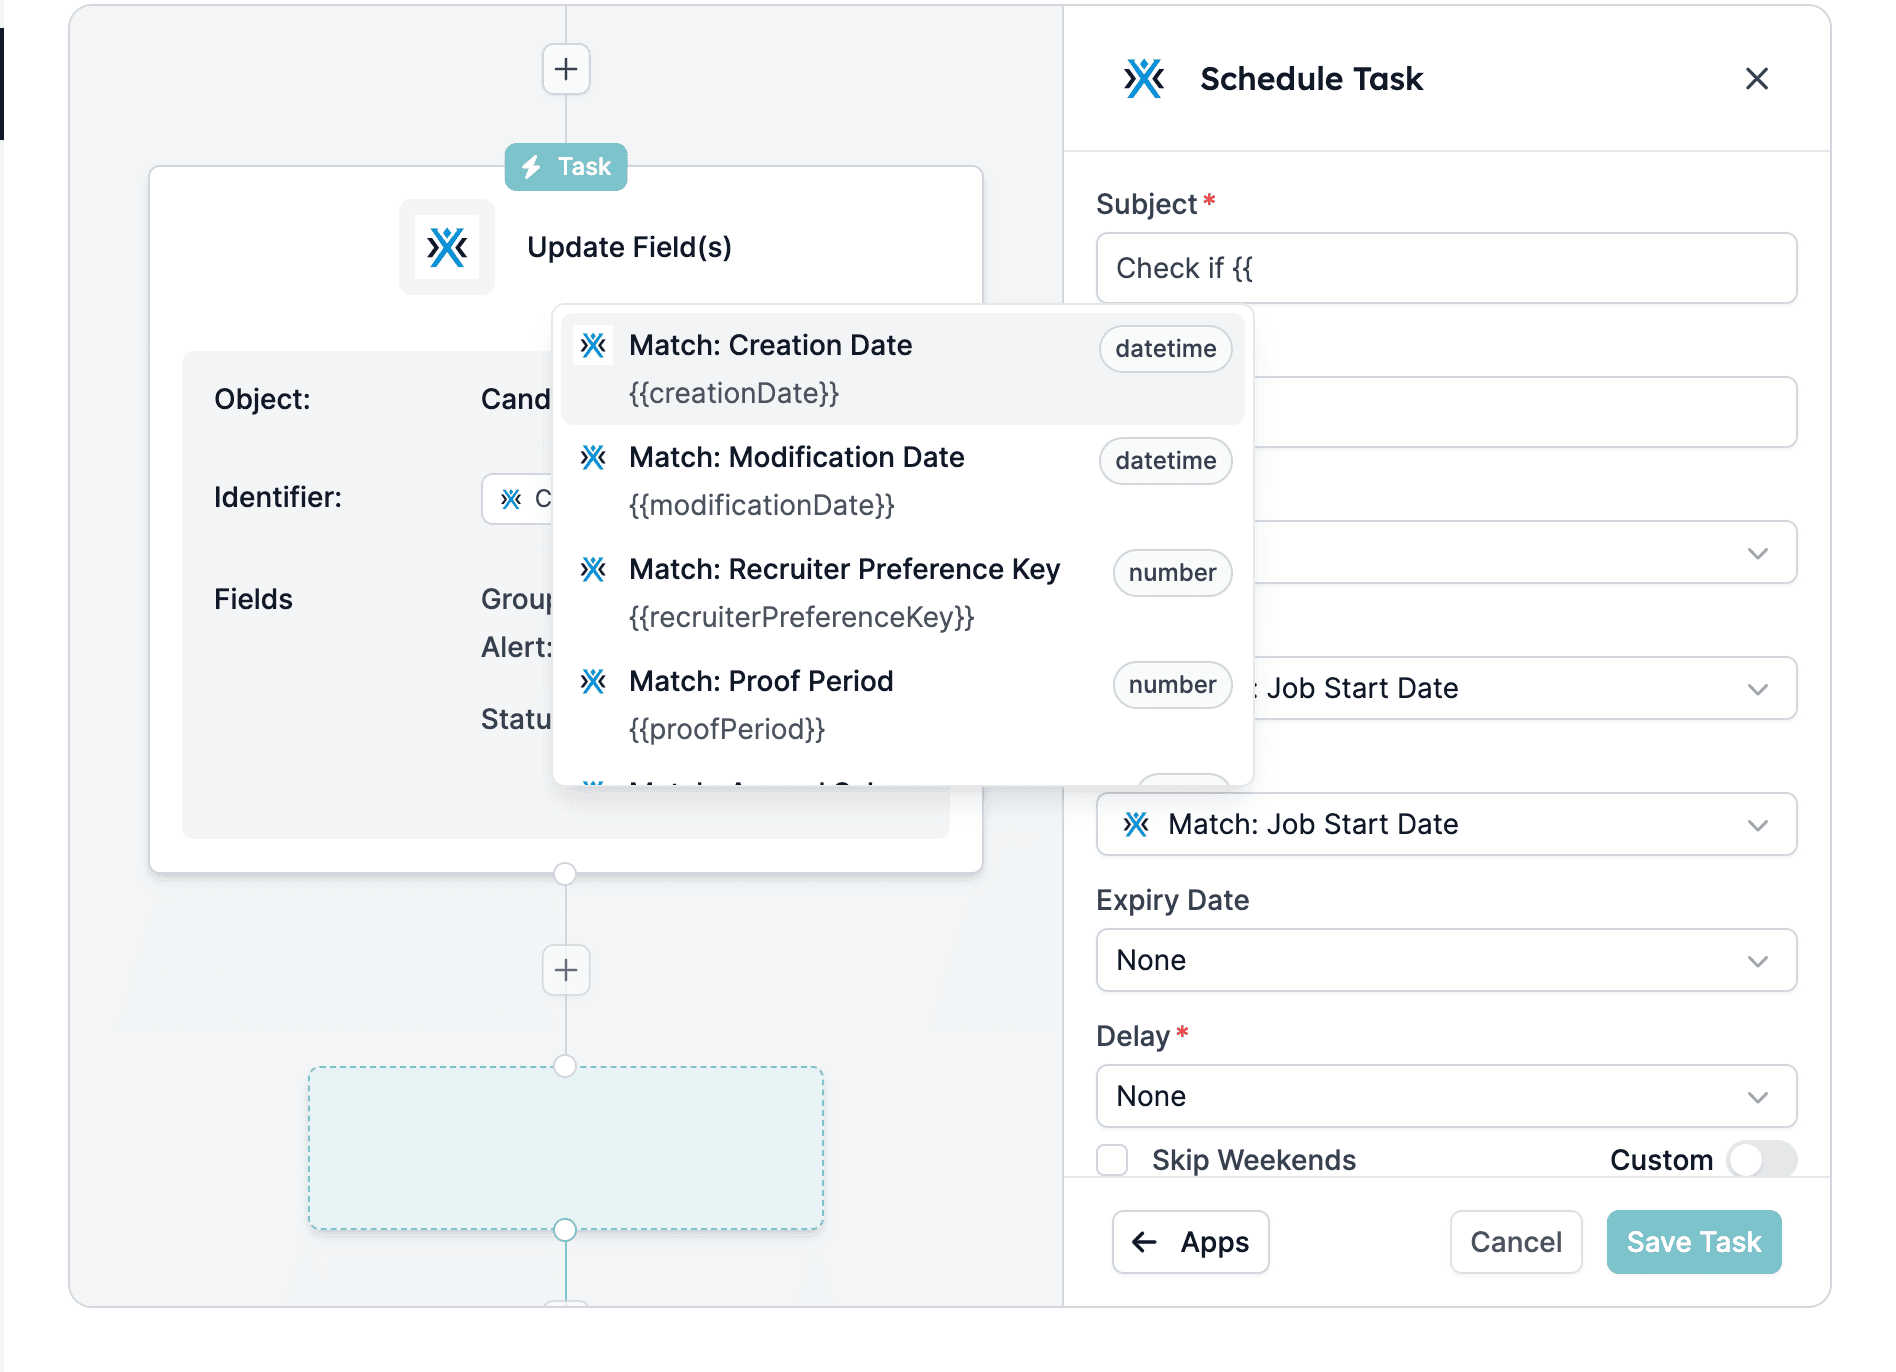 For example, if you want to check if the candidate is happy, you need to type "Check if \{\{CandidateFirstName is happy".
 ***2.4. Write a description***
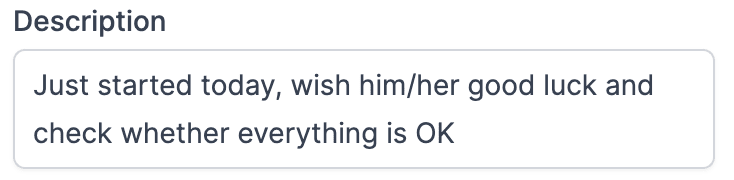
Write a brief description of the task - this shouldn't be longer than one sentence.
***2.4. Write a description***
Write a brief description of the task - this shouldn't be longer than one sentence.
 ***2.5. Select the status of the task***
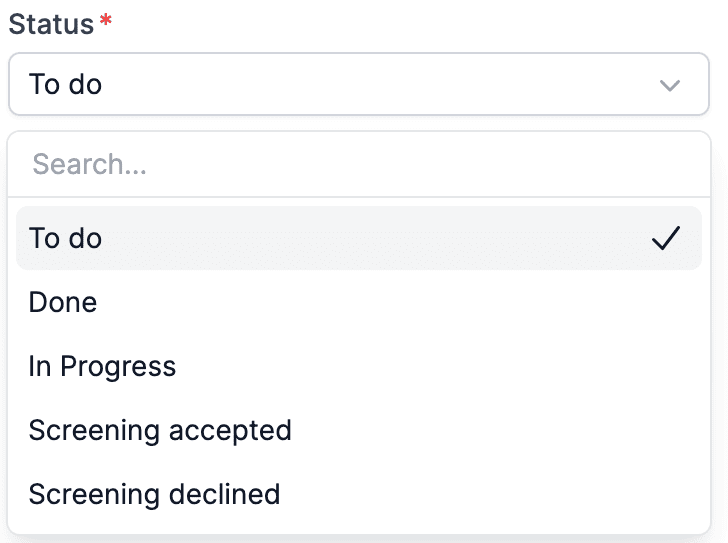
It can be:
* To do
* In progress
* Done
* Screening accepted
* Screening declined
***2.5. Select the status of the task***
It can be:
* To do
* In progress
* Done
* Screening accepted
* Screening declined
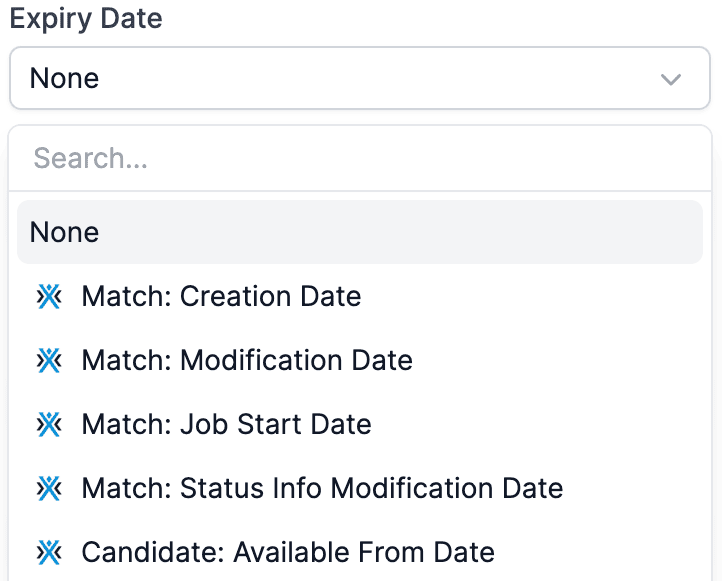
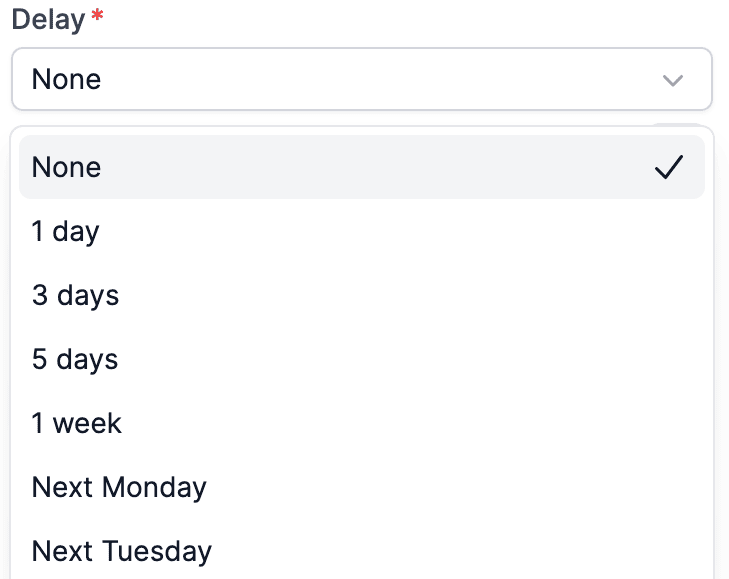
 ***2.6. Add expiration date or a delay***
This is optional, so if you don't want to add them, you can skip this part.
***2.6. Add expiration date or a delay***
This is optional, so if you don't want to add them, you can skip this part.
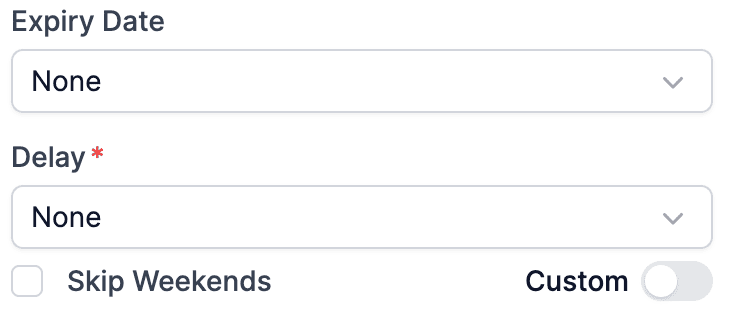 ***2.6.1. Setting an expiration date for the task***
 ***2.6.2. Setting a delay for the task***
 ***2.7. Match the candidate***
Make sure to match the correct candidate to this task so it also matches the candidate's file in Carerix.
***2.7. Match the candidate***
Make sure to match the correct candidate to this task so it also matches the candidate's file in Carerix.
 ***2.8. Save the task***
Click on \[Save Task] at the bottom of the Building Blocks menu.
***2.8. Save the task***
Click on \[Save Task] at the bottom of the Building Blocks menu.
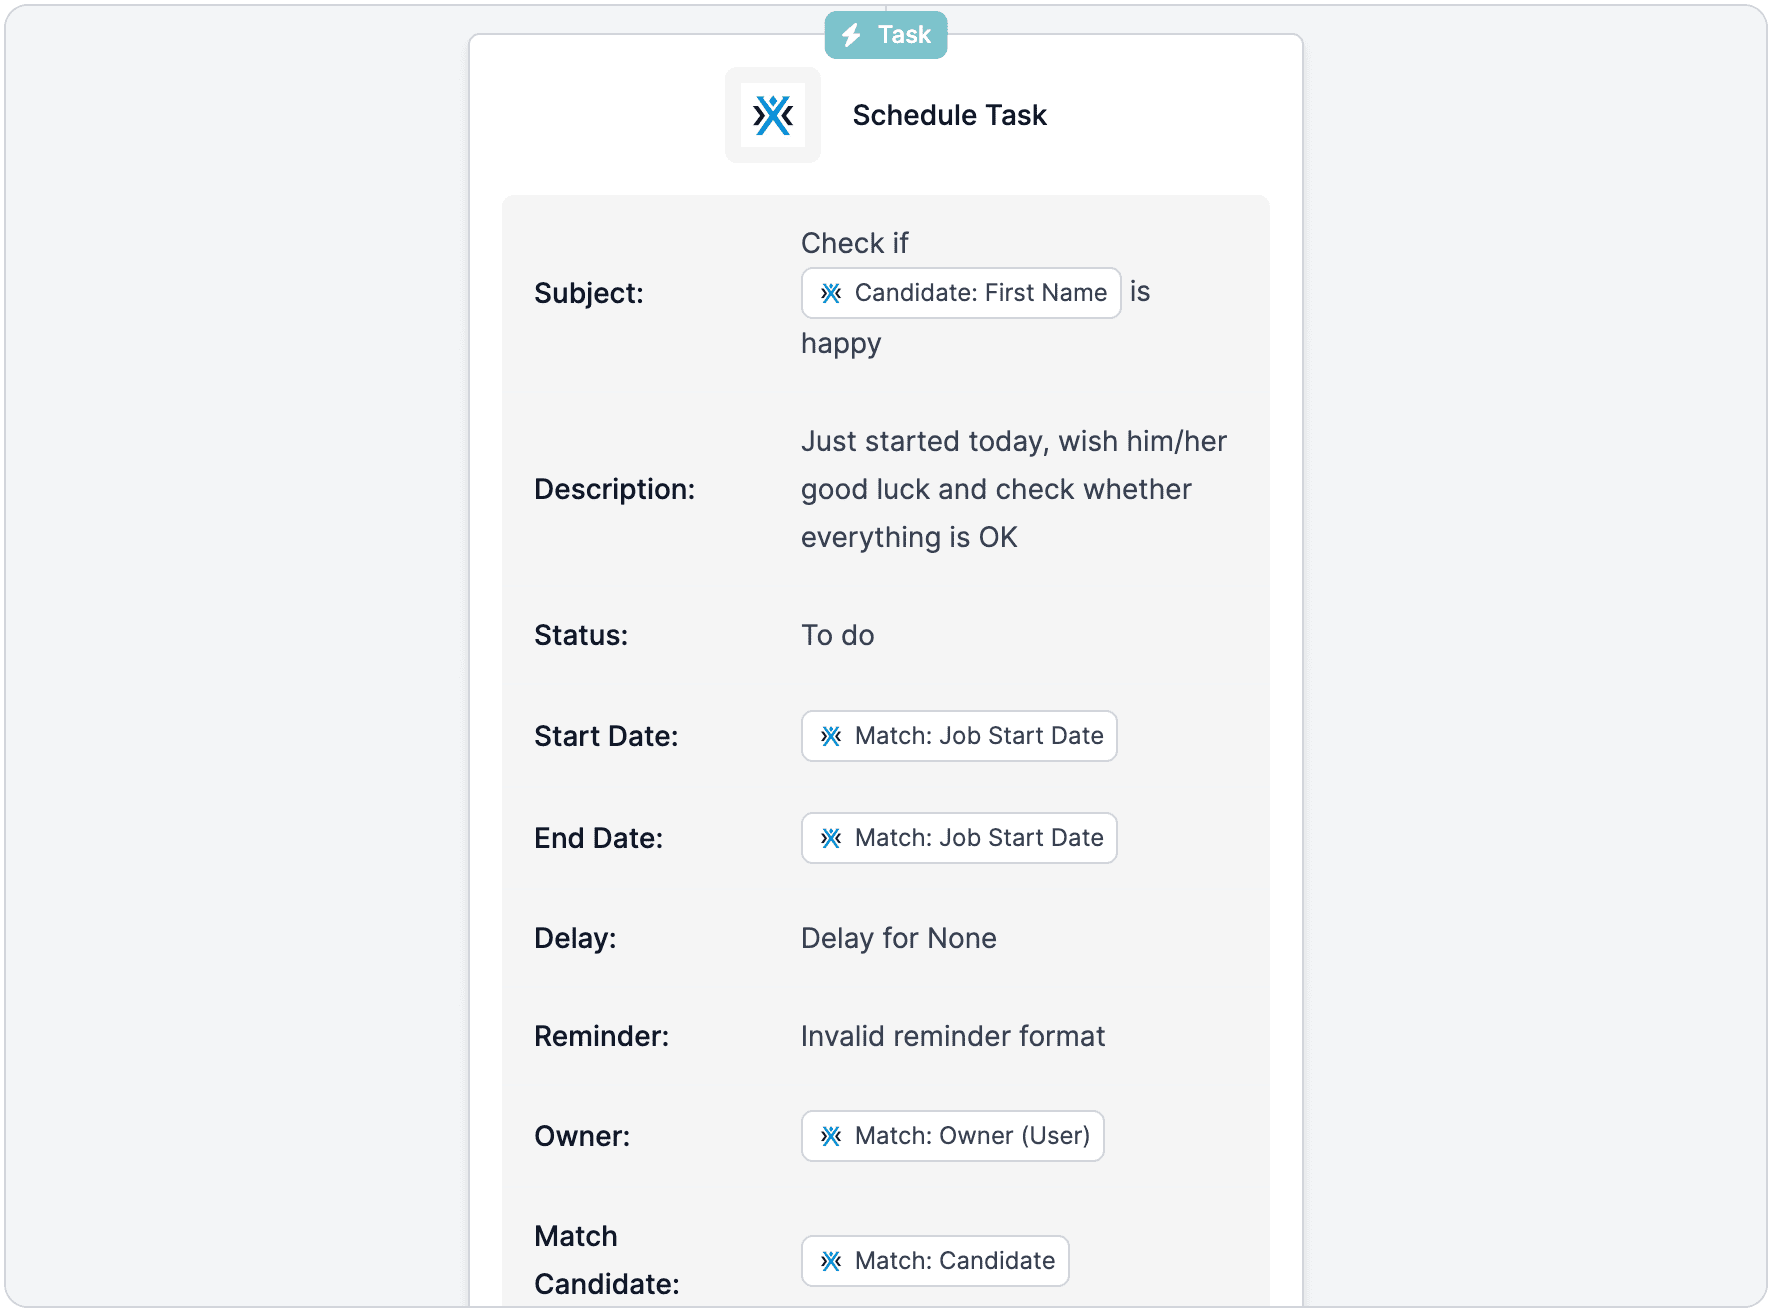
 ## Step 3: Review the task
Review the summary of the task in the automation.
## Step 3: Review the task
Review the summary of the task in the automation.
 ***
## Video guide
## Related topics
- [Schedule a task in Vincere with HireData](/apps/vincere/schedule-a-task-in-vincere-with-hiredata.md)
- [Logging WhatsApp conversations in Carerix with HireData](/apps/carerix/logging-whatsapp-conversations-in-carerix-with-hiredata.md)
- [Logging Email Messages on Carerix with HireData](/apps/carerix/logging-email-messages-on-carerix-with-hiredata.md)
- [Manually sync Carerix with HireData](/apps/carerix/manually-sync-carerix-with-hiredata.md)
- [Create a Carerix automation in HireData](/apps/carerix/create-a-carerix-automation-in-hiredata.md)
***
## Video guide
## Related topics
- [Schedule a task in Vincere with HireData](/apps/vincere/schedule-a-task-in-vincere-with-hiredata.md)
- [Logging WhatsApp conversations in Carerix with HireData](/apps/carerix/logging-whatsapp-conversations-in-carerix-with-hiredata.md)
- [Logging Email Messages on Carerix with HireData](/apps/carerix/logging-email-messages-on-carerix-with-hiredata.md)
- [Manually sync Carerix with HireData](/apps/carerix/manually-sync-carerix-with-hiredata.md)
- [Create a Carerix automation in HireData](/apps/carerix/create-a-carerix-automation-in-hiredata.md)