> ## Documentation Index
> Fetch the complete documentation index at: https://help.hiredata.com/llms.txt
> Use this file to discover all available pages before exploring further.
# Setting Up an Email Template in HireData
> Build reusable email templates in HireData with dynamic variables and brand styling, then plug them into your recruitment automations and newsletters.
*Welcome to our guide on how to create custom email templates to use in your automations. These templates can include personalised fields, a branded signature, and dynamic content. Continue to learn how to set up an email from scratch in HireData.*
## Step 1: Create a New Email
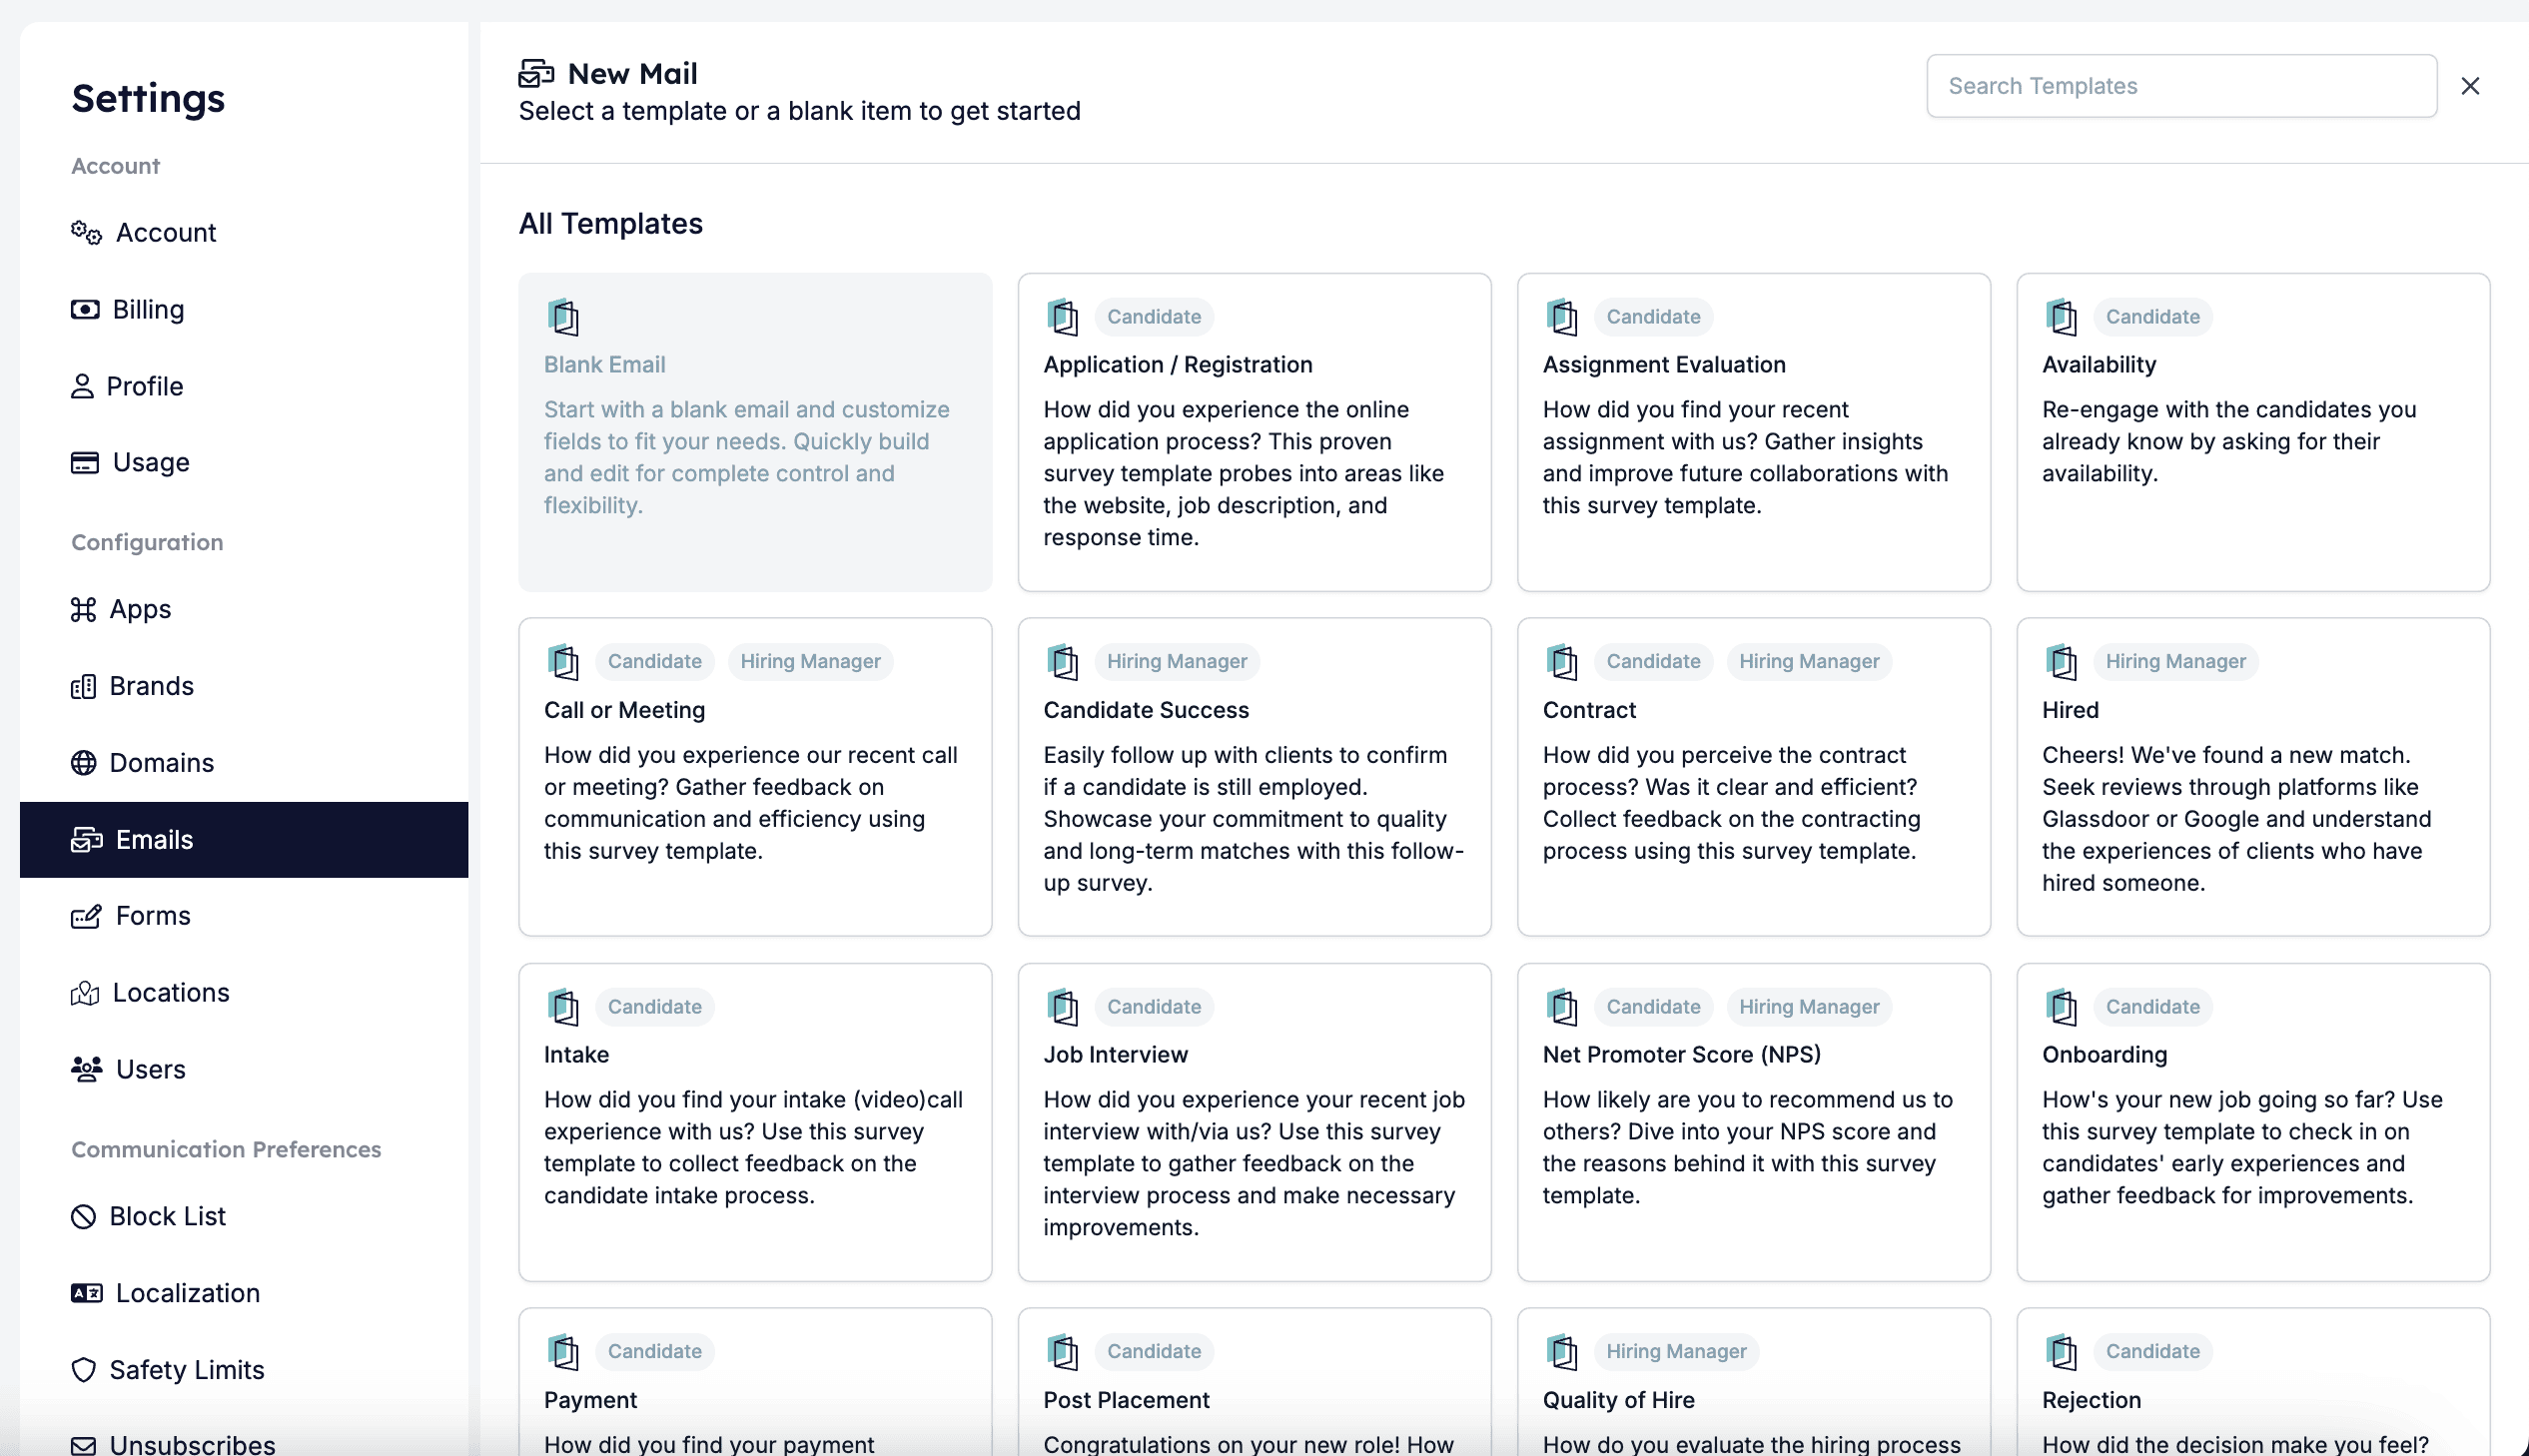
Open the **Emails** page from the **Settings** and click on the \[New Email] button. You can use any of the available email templates that we have created for you, or create a **Blank Email**.
 ## Step 2: Set up the Email Content
### 2.1. Select Branding
Each email template in HireData can inherit styling, colours, logos, and footer content from your **Brand** settings.
In the top-right corner of the editor, you'll see a dropdown labelled **Brand**, where you can select a branding you've already added to HireData for your email (e.g., "HireData").
## Step 2: Set up the Email Content
### 2.1. Select Branding
Each email template in HireData can inherit styling, colours, logos, and footer content from your **Brand** settings.
In the top-right corner of the editor, you'll see a dropdown labelled **Brand**, where you can select a branding you've already added to HireData for your email (e.g., "HireData").
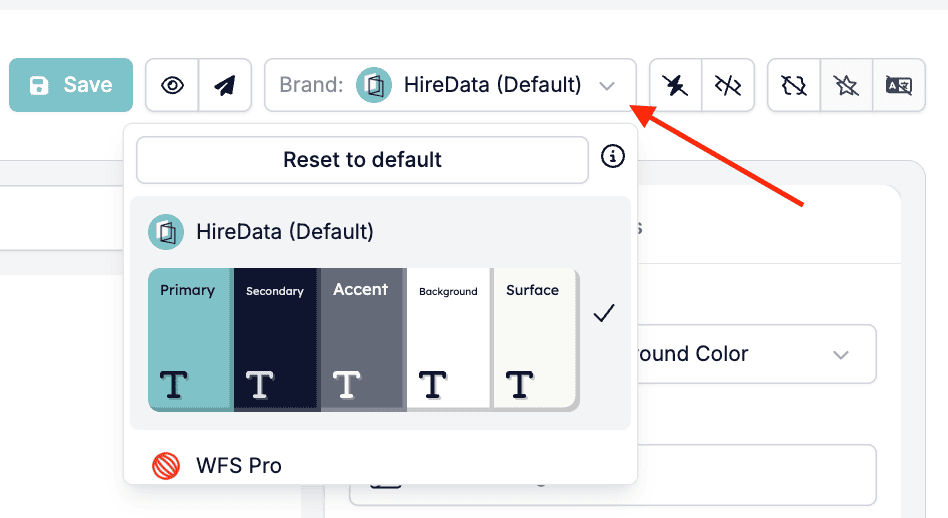 Selecting a brand ensures your email uses the correct logo, theme colours, and fonts.
### 2.2. Add Email Subject
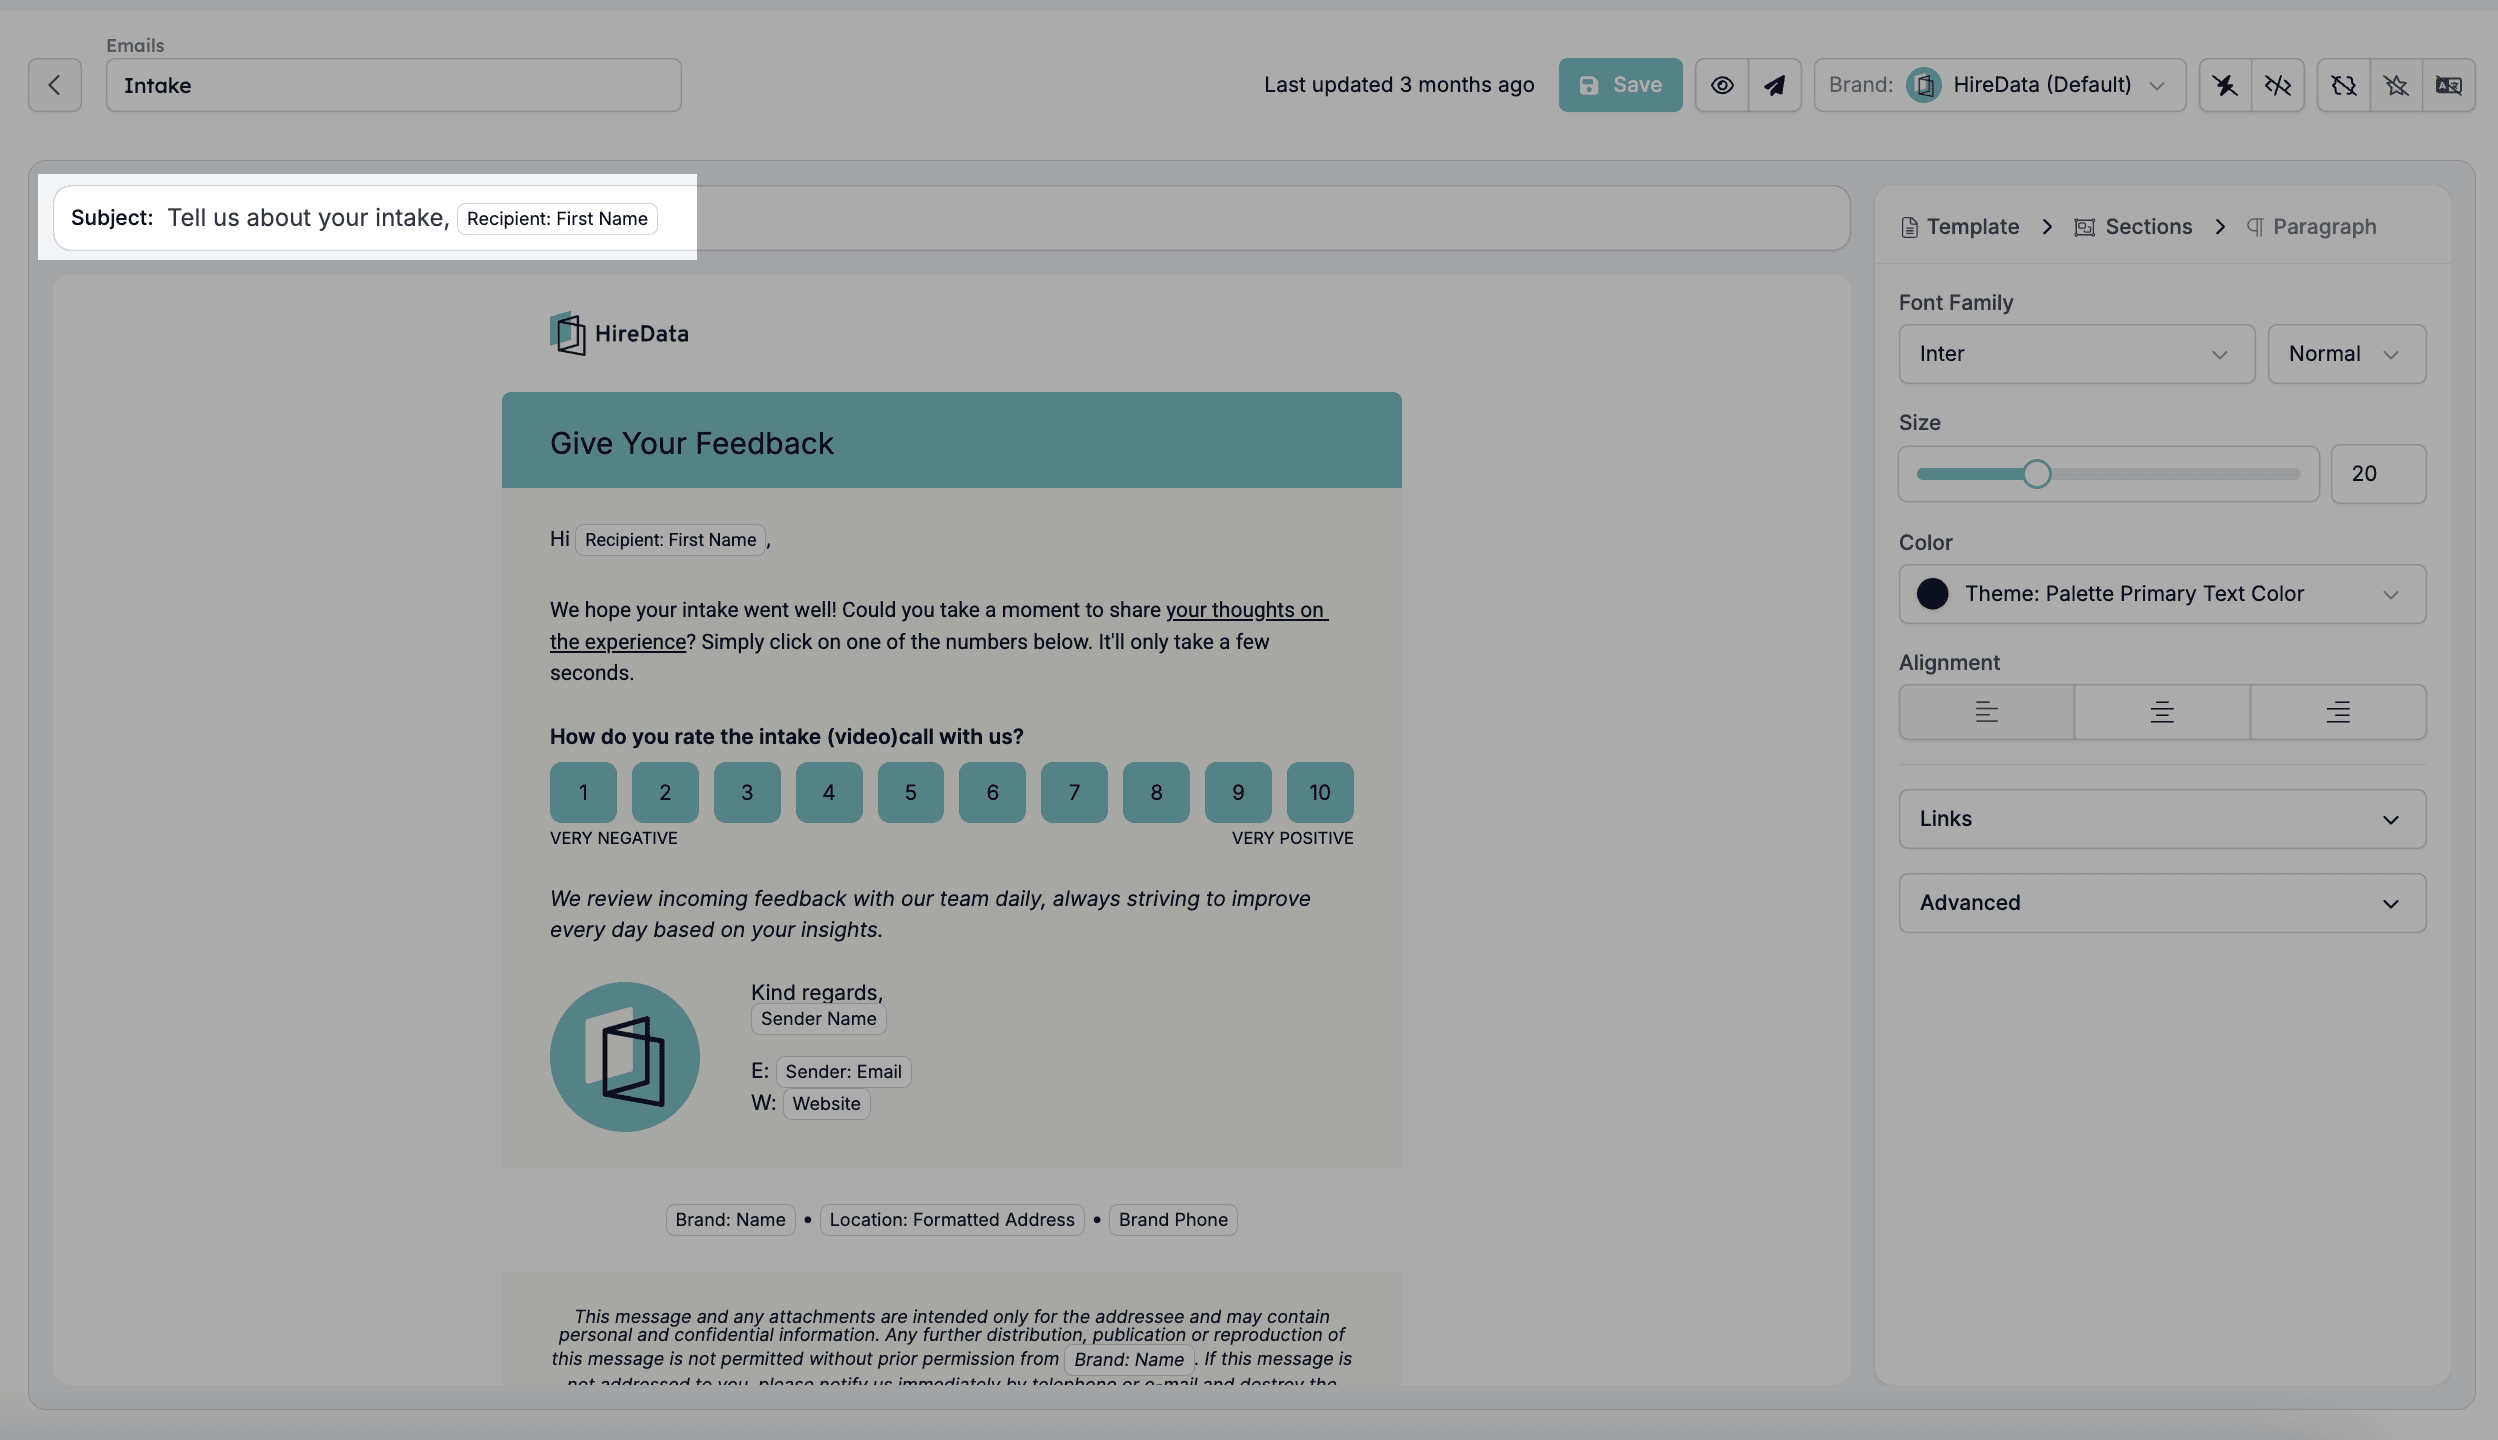
At the top of the template editor, you'll find the **Subject** field. This is the subject line that will appear in the recipient's inbox. You can include static text or dynamic fields for personalisation.
Selecting a brand ensures your email uses the correct logo, theme colours, and fonts.
### 2.2. Add Email Subject
At the top of the template editor, you'll find the **Subject** field. This is the subject line that will appear in the recipient's inbox. You can include static text or dynamic fields for personalisation.
 💡 **Tips:**
* Make your subject clear and relevant to encourage recipients to open the email.
* Keep it under 50 characters if possible.
* Use dynamic fields to personalise content (such as first name or job title).
* Avoid spammy words.
### 2.3. Email Body
This is the main content area where you write the message the recipient will see.
💡 **Tips:**
* Make your subject clear and relevant to encourage recipients to open the email.
* Keep it under 50 characters if possible.
* Use dynamic fields to personalise content (such as first name or job title).
* Avoid spammy words.
### 2.3. Email Body
This is the main content area where you write the message the recipient will see.
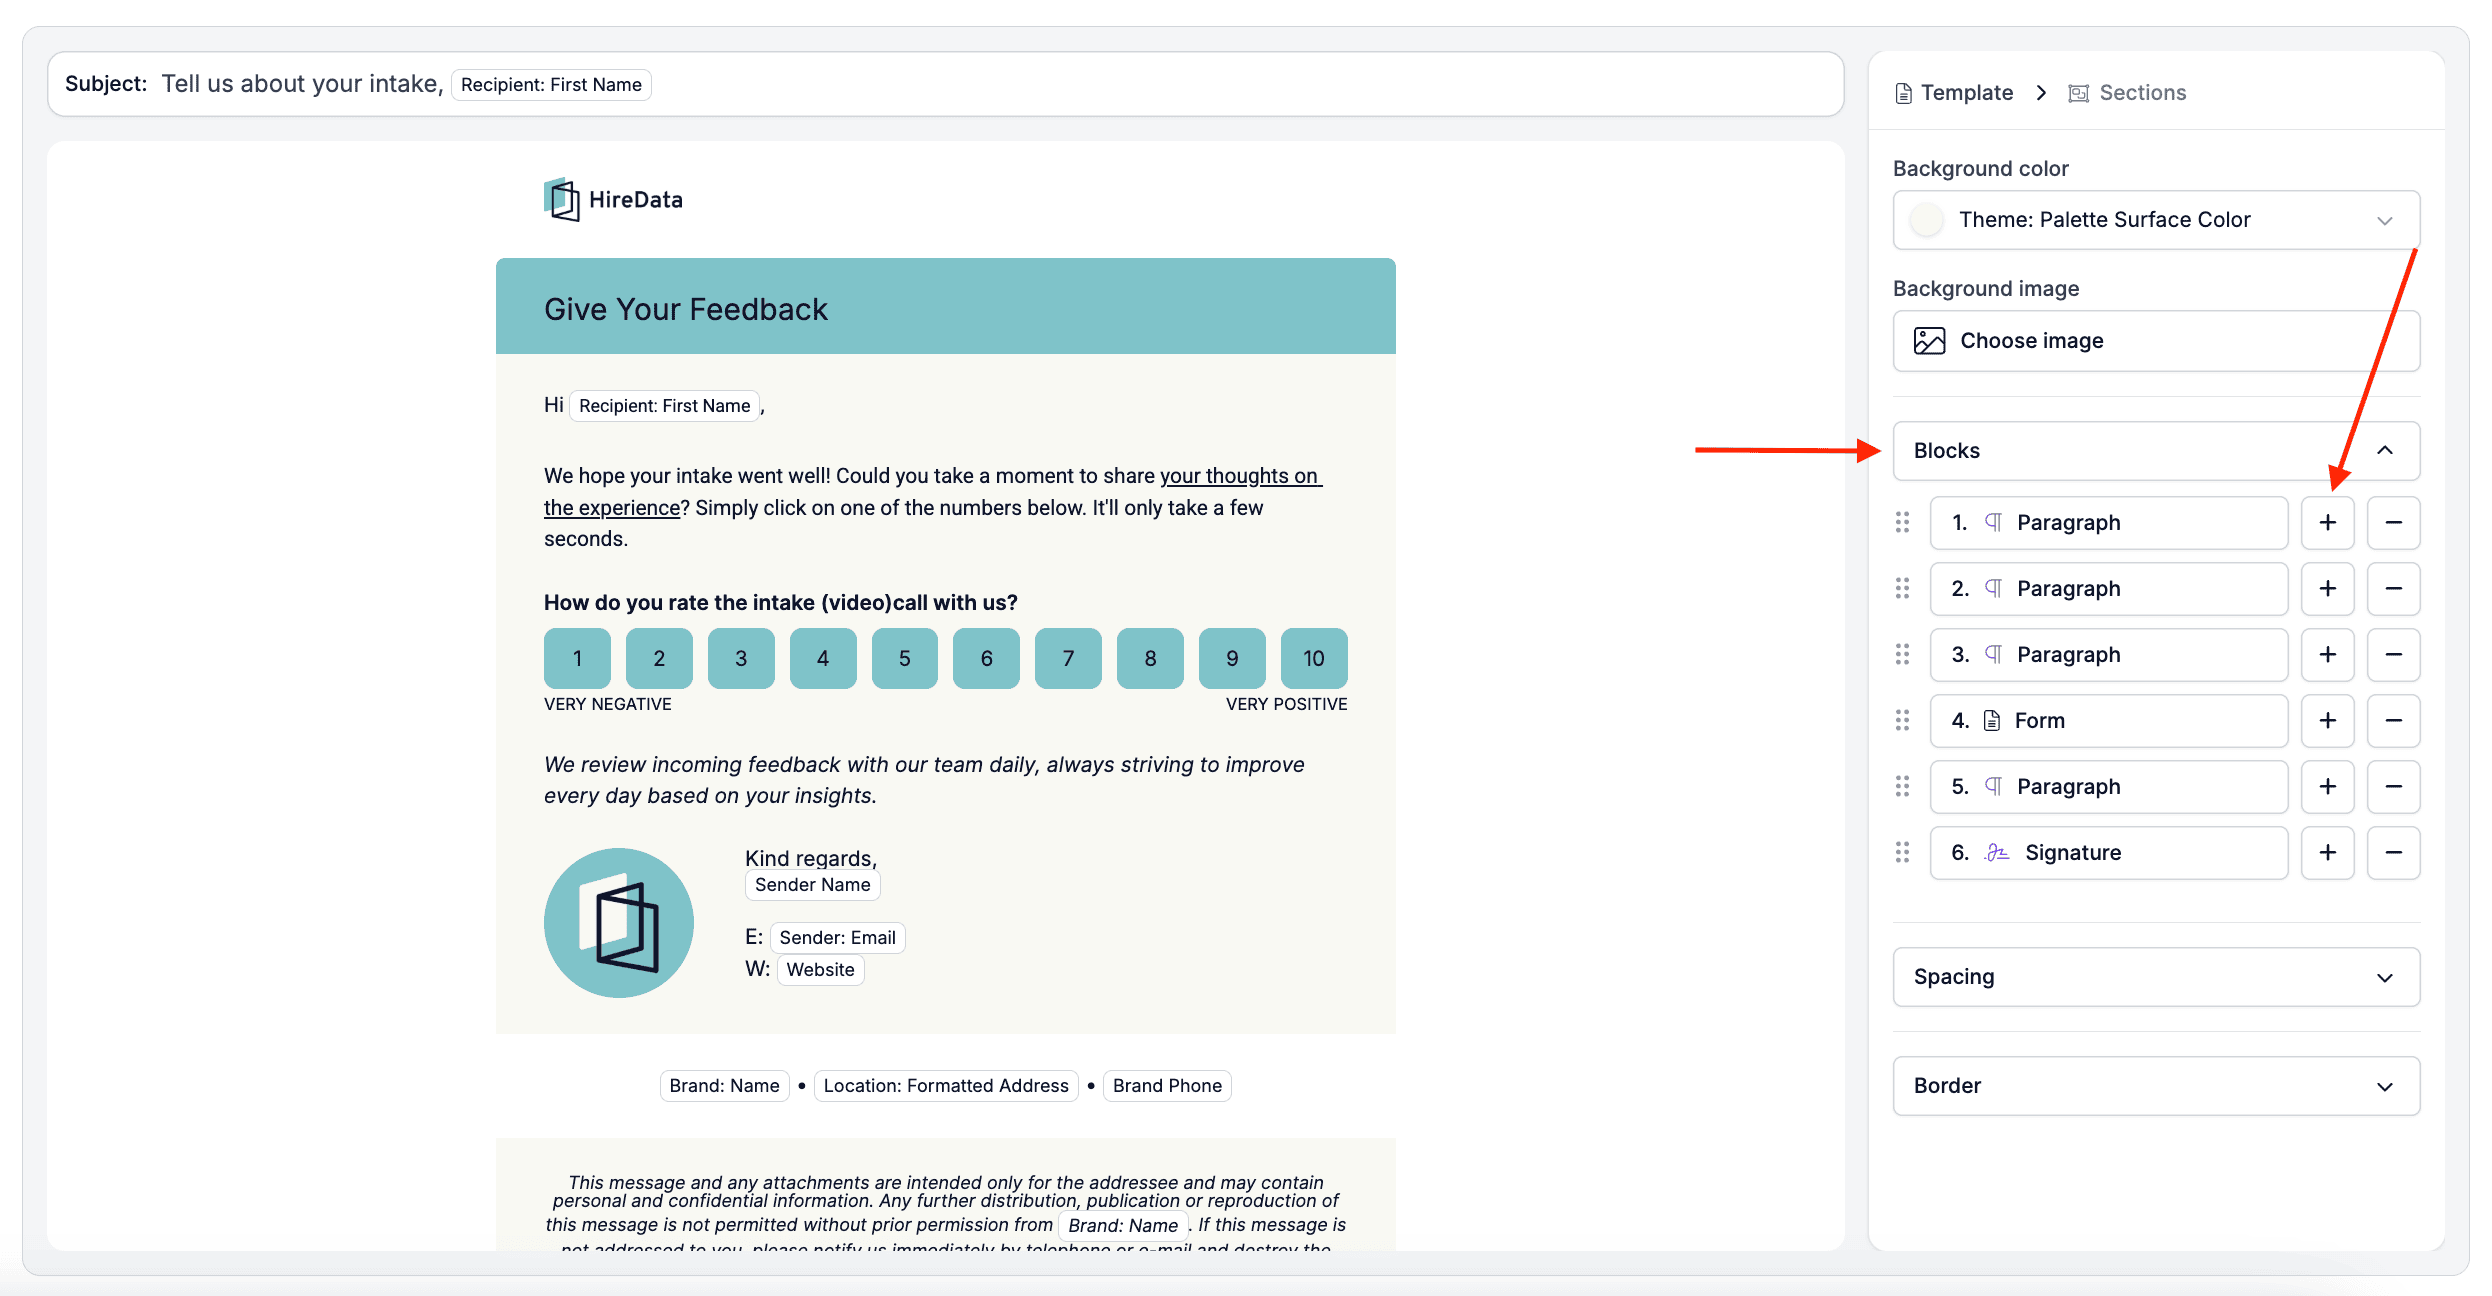
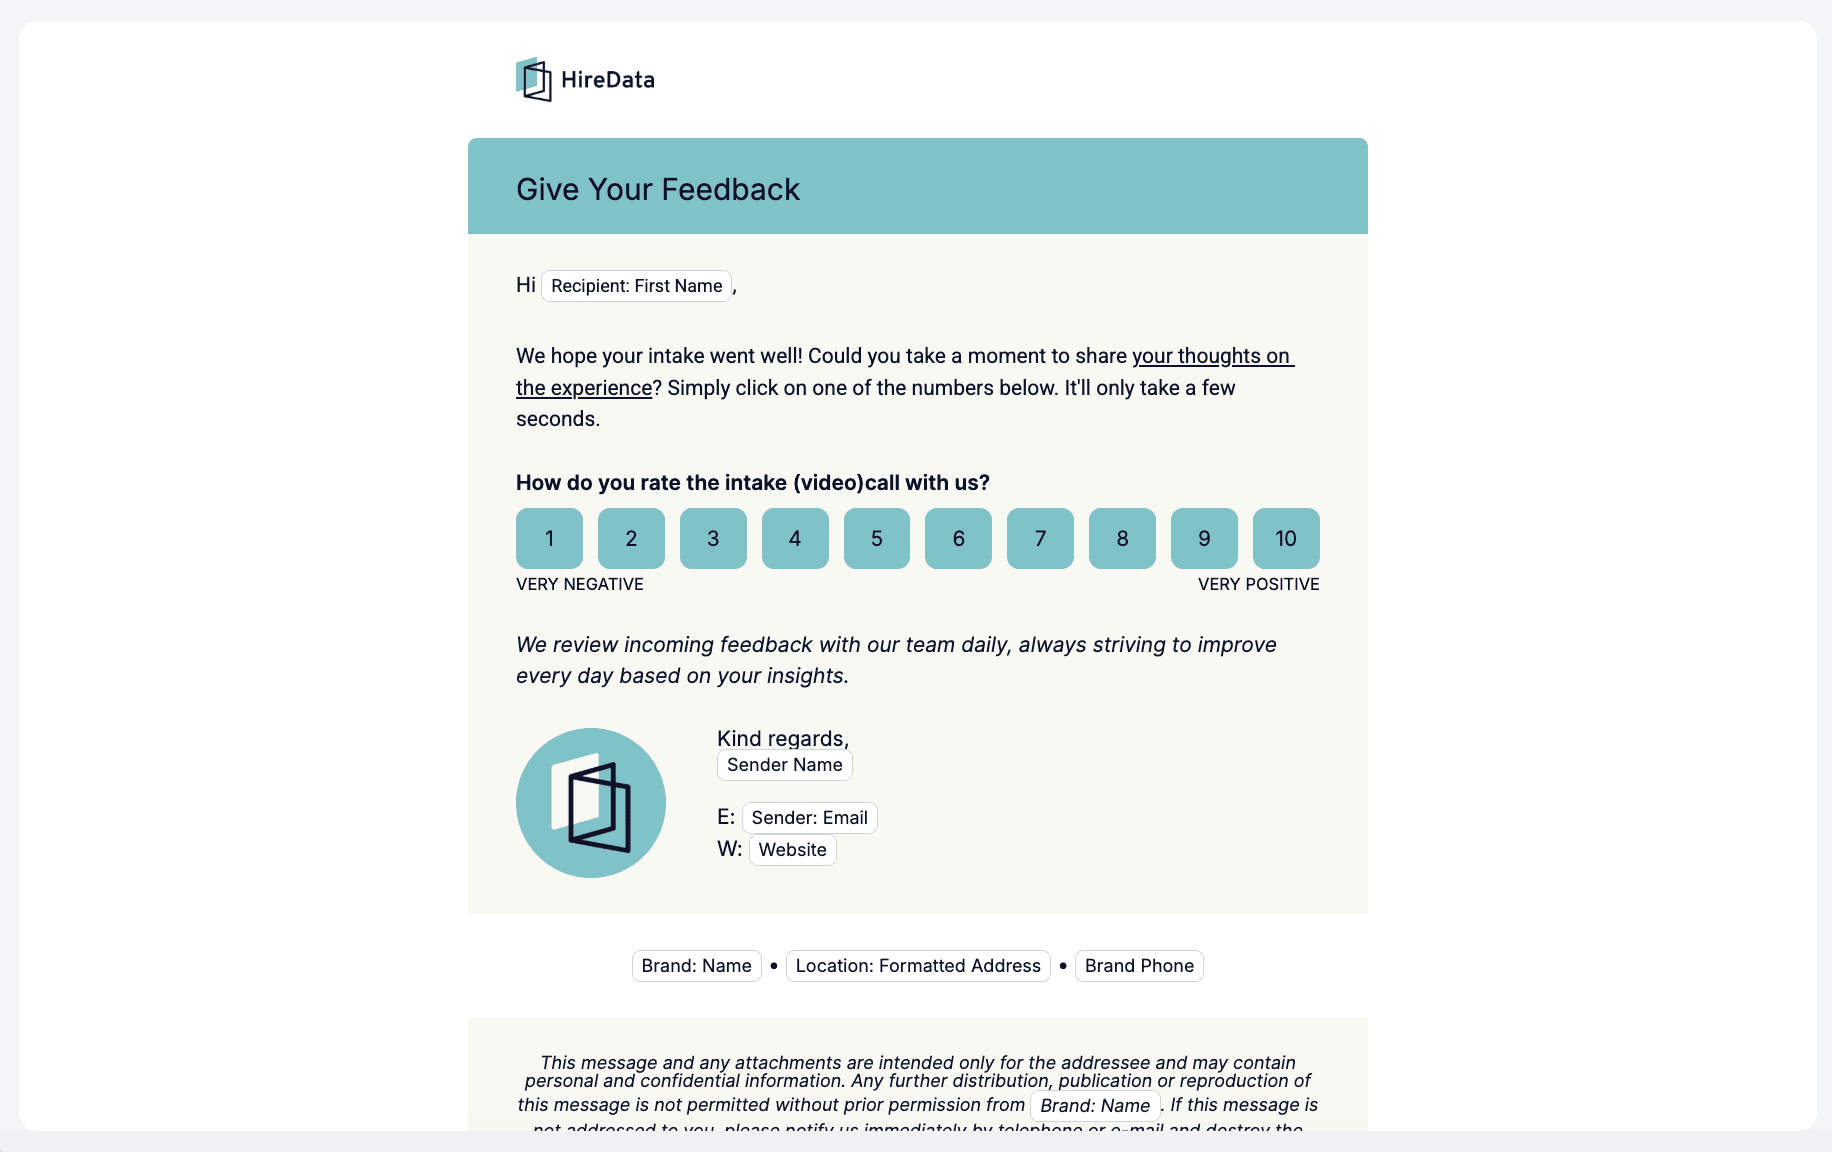 The email body is divided into **Blocks** (paragraphs), which you can customise individually:
#### 1. Add a new block from the **Blocks** menu by clicking on the \[+] icon
The email body is divided into **Blocks** (paragraphs), which you can customise individually:
#### 1. Add a new block from the **Blocks** menu by clicking on the \[+] icon
 #### 2. Click inside the existing block as if you are about to type something to add your content
#### 3. Include dynamic placeholders (e.g., \{\{Recipient: First Name}}, \{\{Sender: Email}}) to personalise the message
### 2.4. Add a Form (optional)
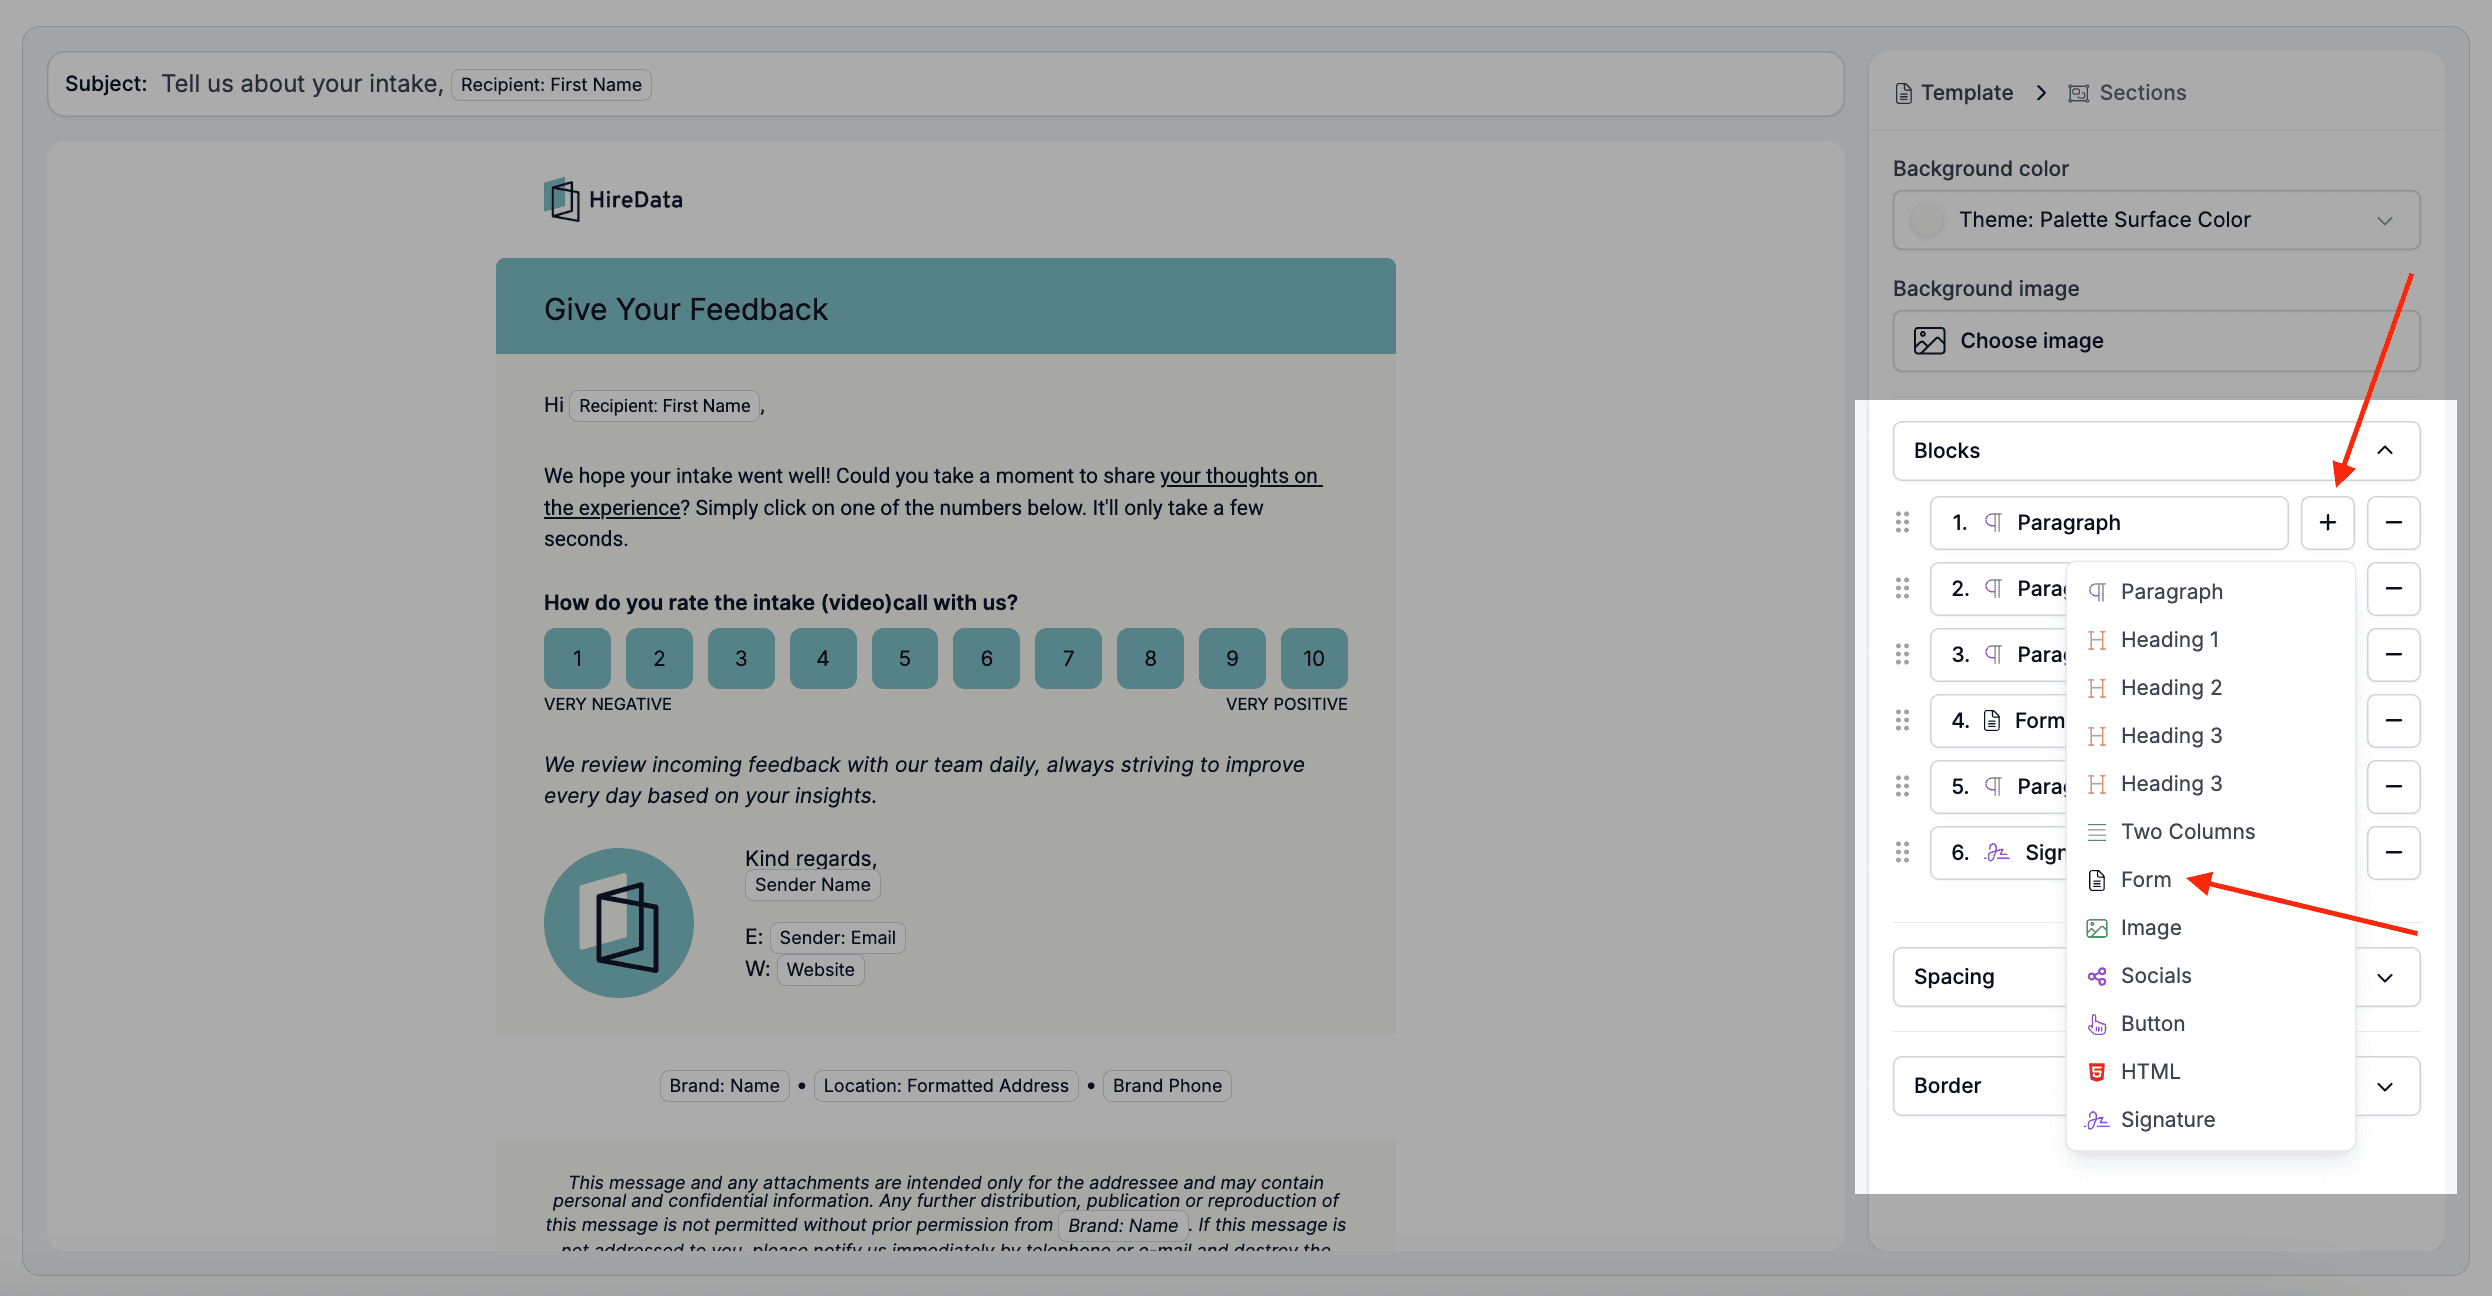
If your email should collect responses (e.g., company feedback, confirmation of availability, etc.), you can add a form, again by clicking on the \[+] in the **Blocks** section and selecting "Form" from the list:
#### 2. Click inside the existing block as if you are about to type something to add your content
#### 3. Include dynamic placeholders (e.g., \{\{Recipient: First Name}}, \{\{Sender: Email}}) to personalise the message
### 2.4. Add a Form (optional)
If your email should collect responses (e.g., company feedback, confirmation of availability, etc.), you can add a form, again by clicking on the \[+] in the **Blocks** section and selecting "Form" from the list:
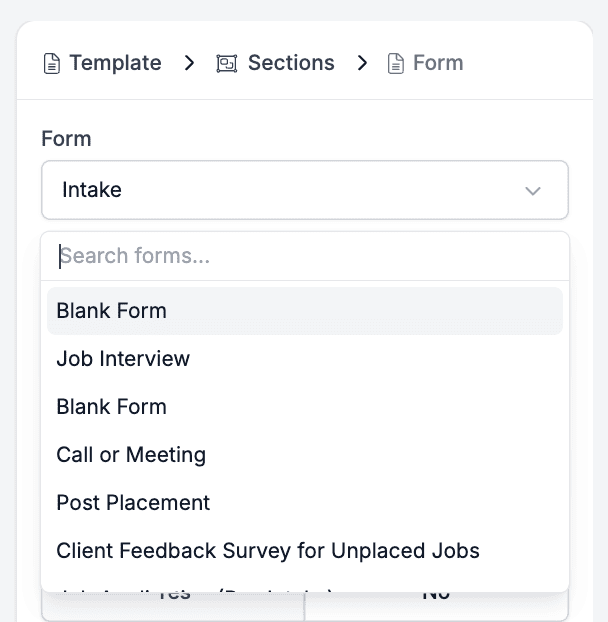
 You can select from the form templates or [create your own](/content/creating-a-form-in-hiredata):
 Click on the Form's block to open the editor and adjust the formatting:
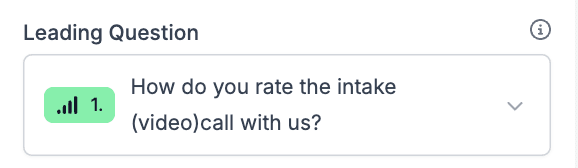
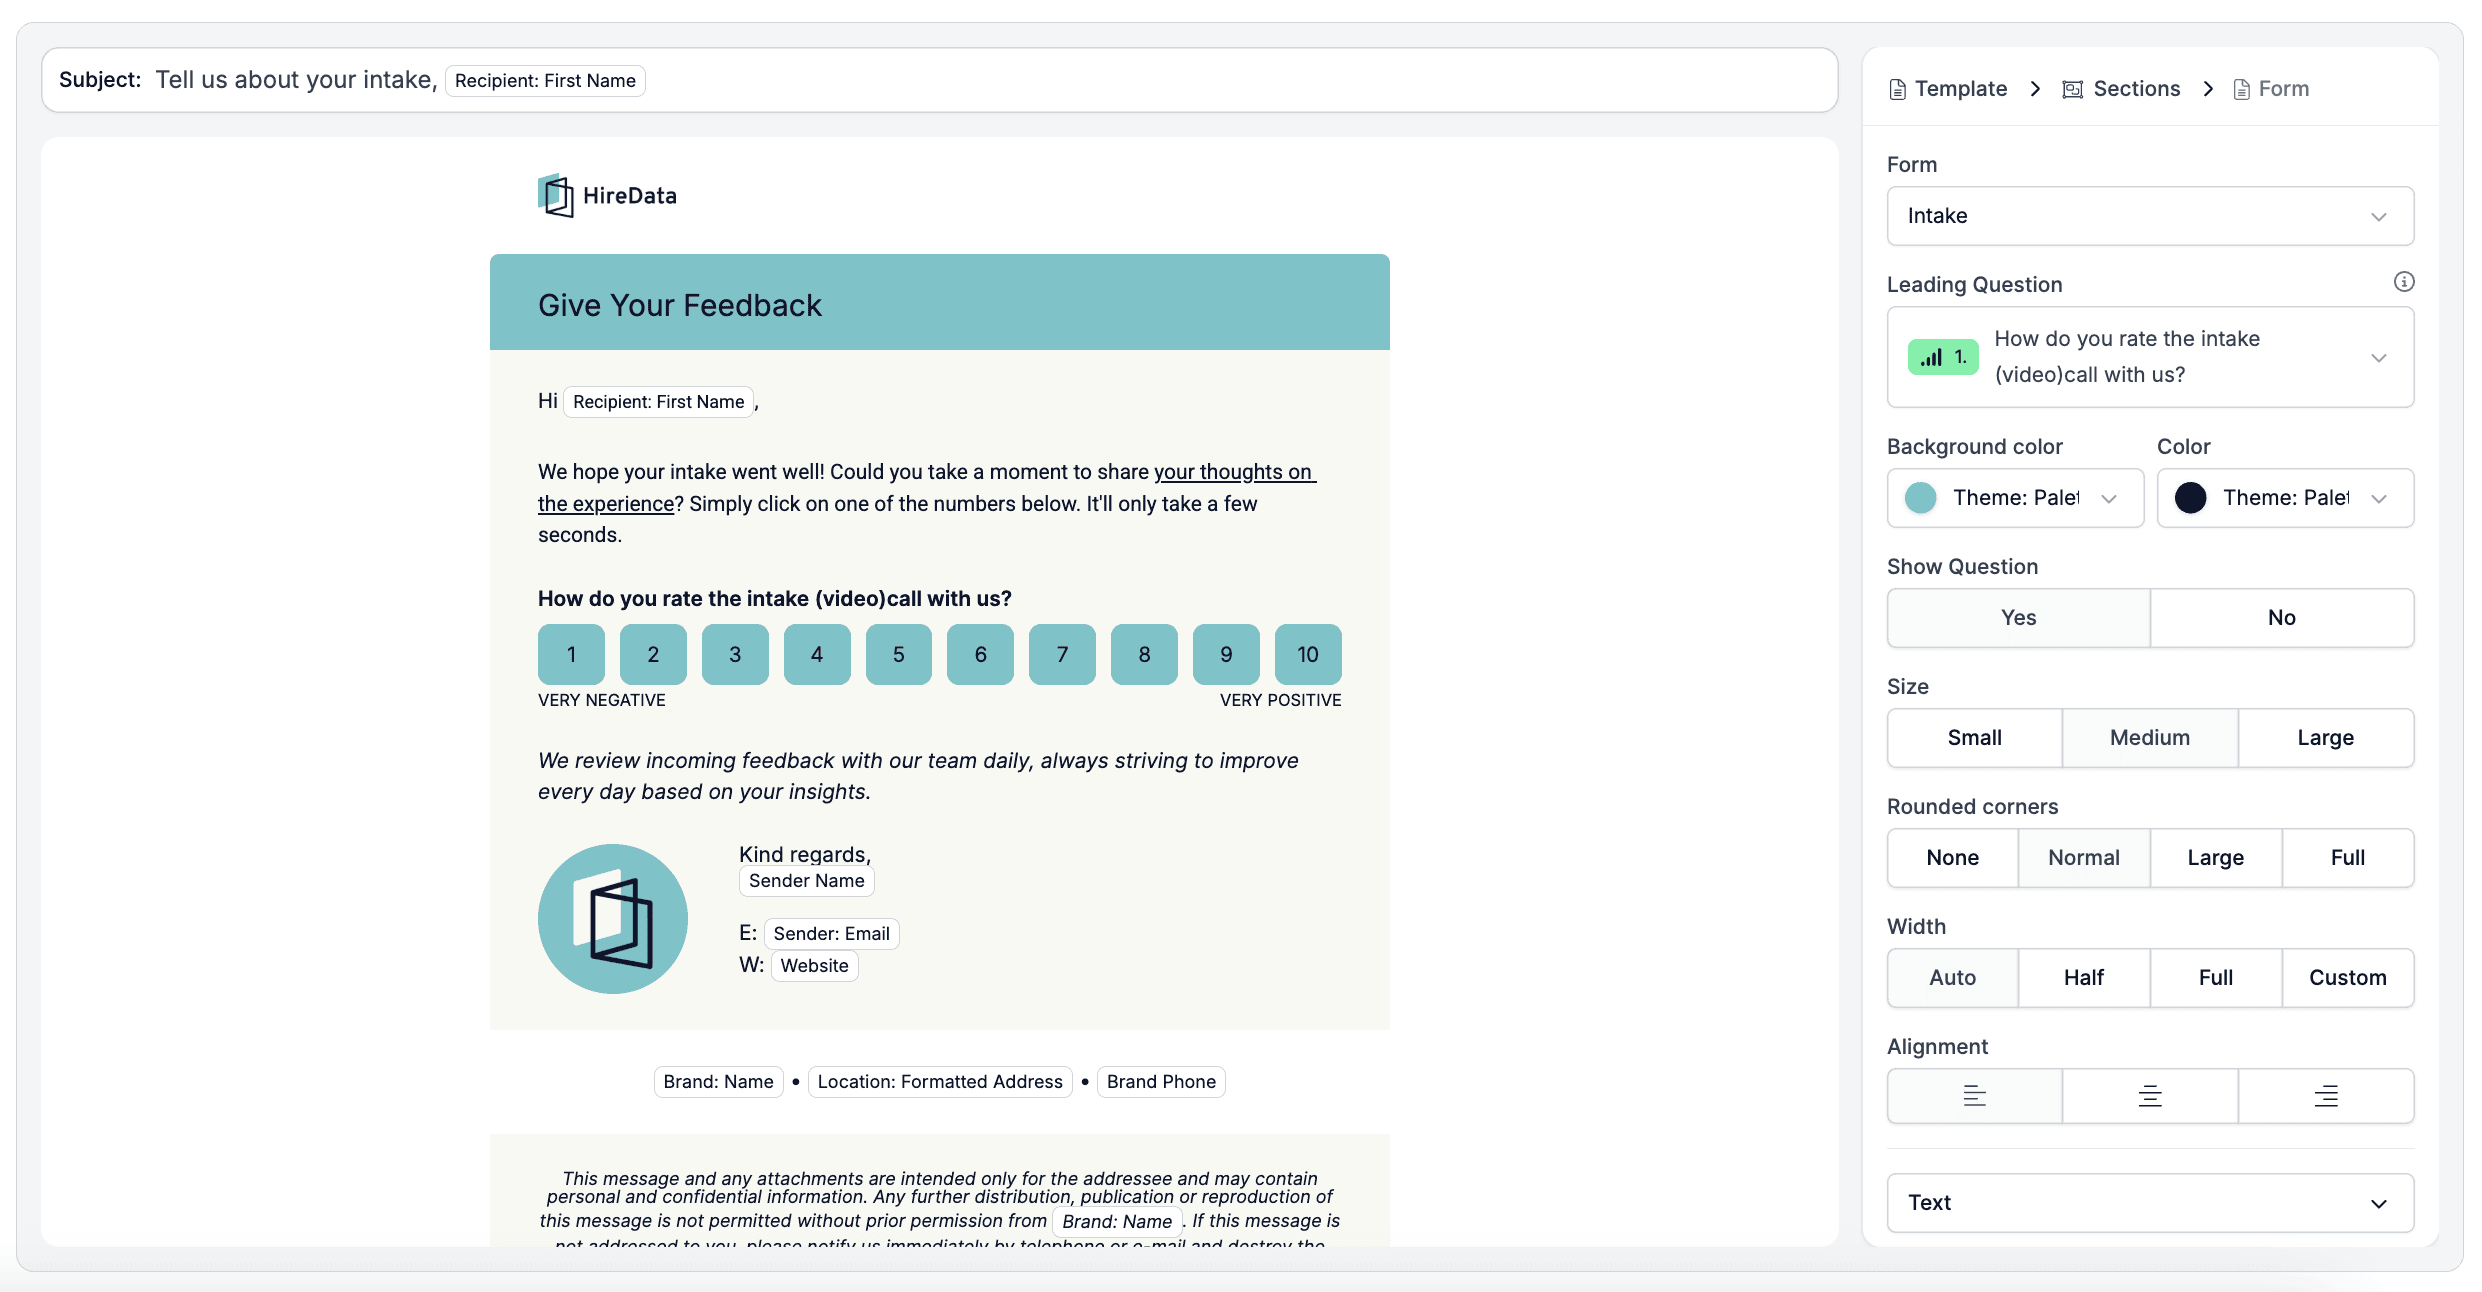 You can also make the first question visible in the email to encourage recipients to proceed to the next questions:
 ### 2.5. Customise the Email Signature
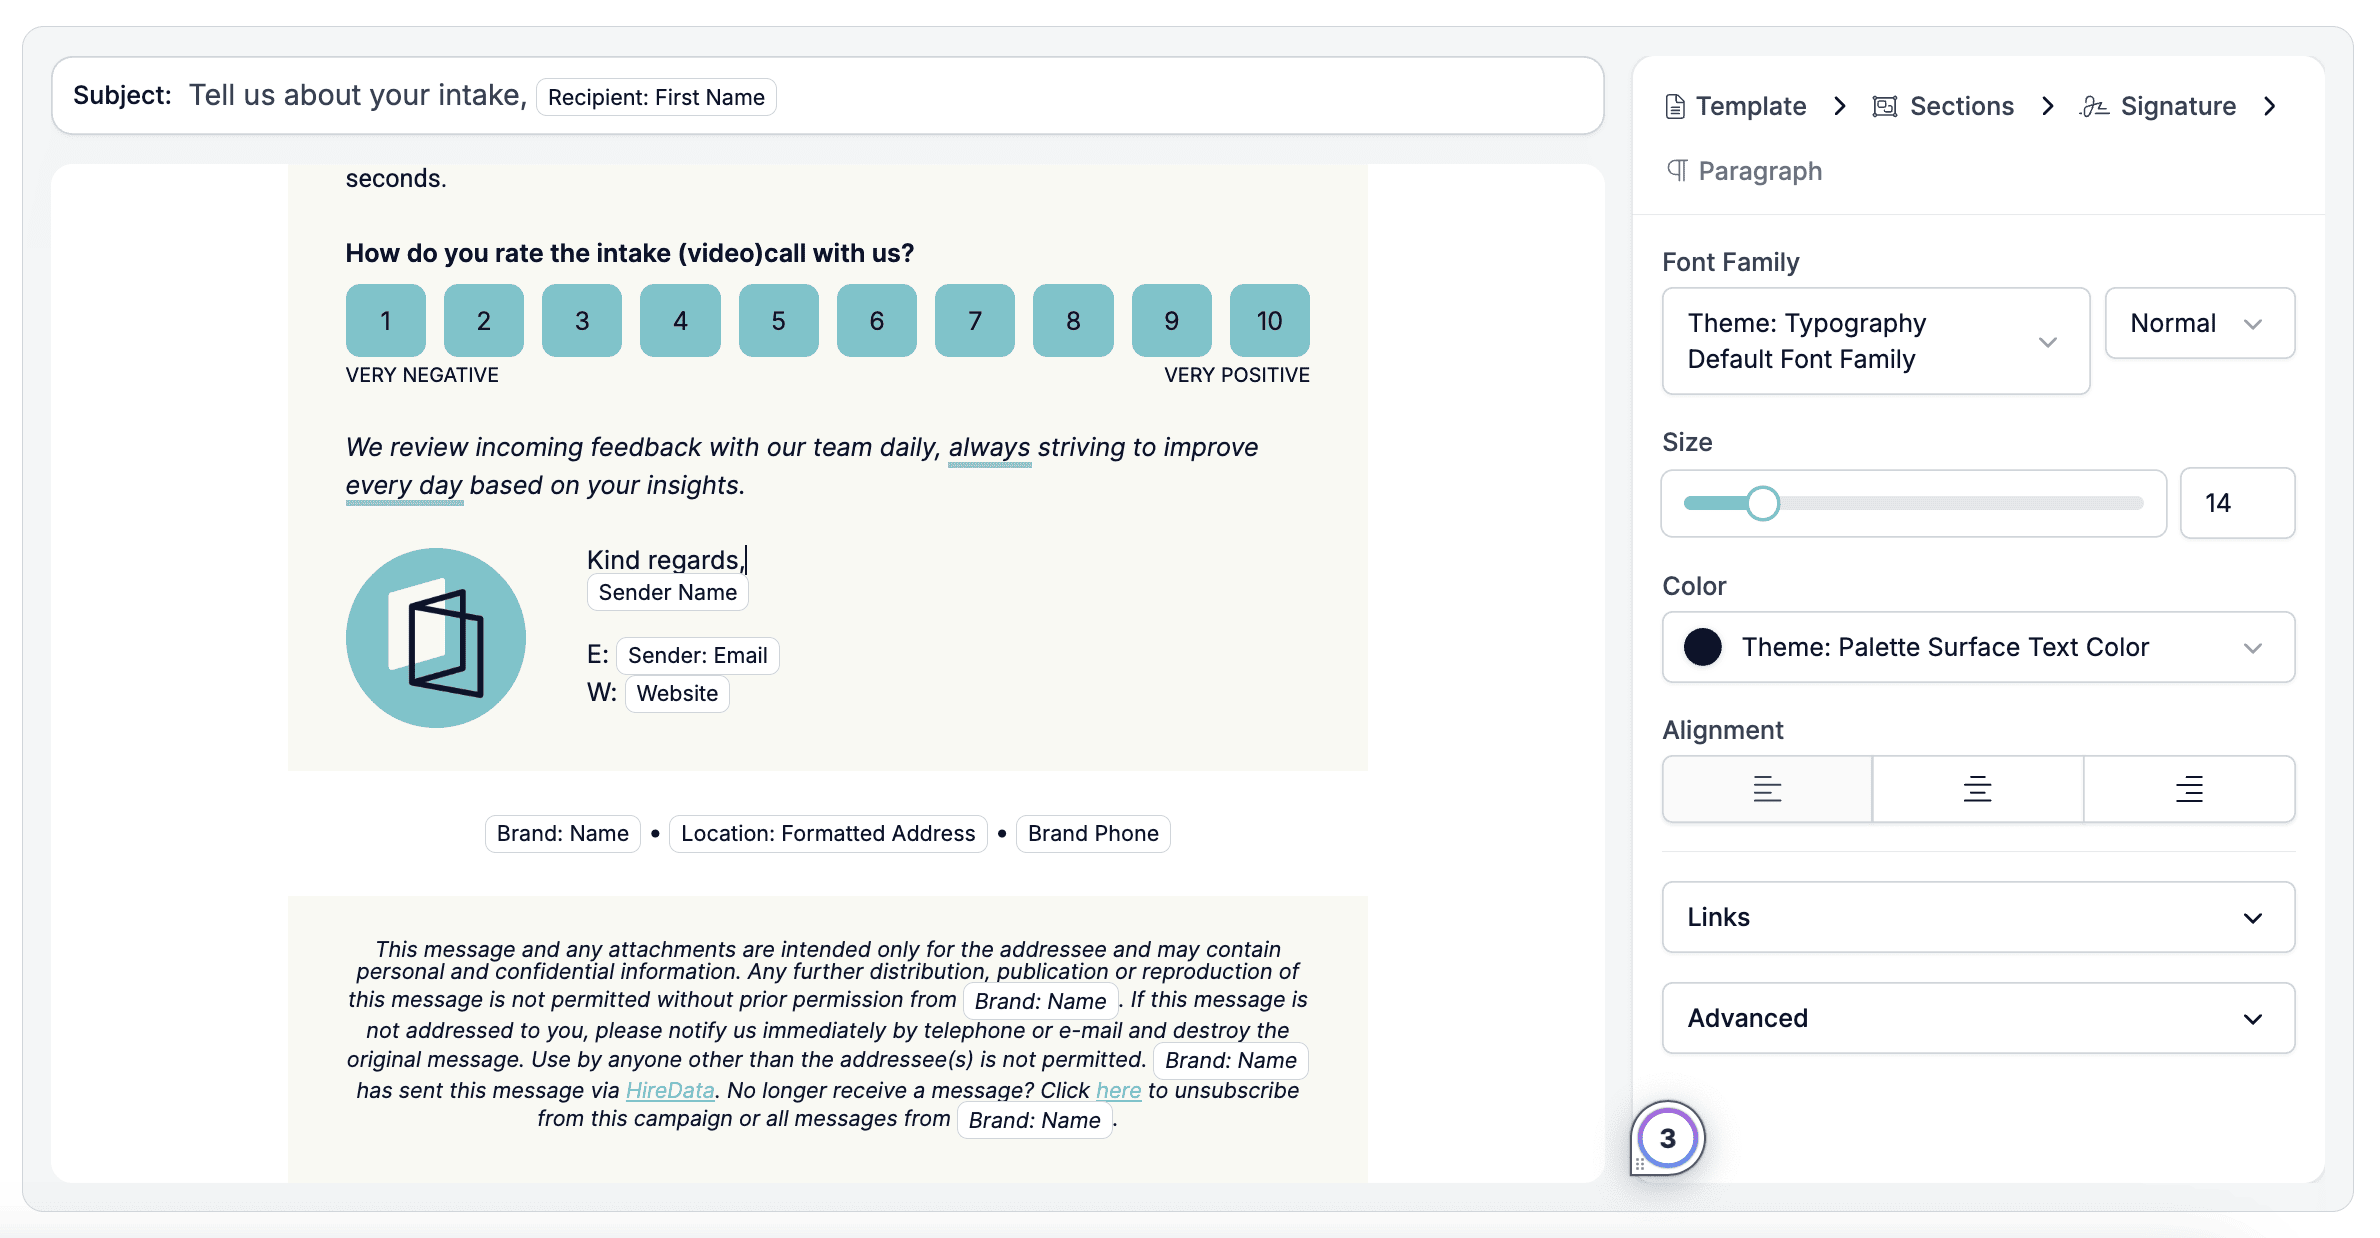
The signature block is usually pre-filled with placeholders and branding elements, including:
* Sender's name and email
* Company website
* Logo/Sender's profile photo
* Contact details such as the company's address and phone number
To edit, click on the signature section and modify the text or layout.
### 2.5. Customise the Email Signature
The signature block is usually pre-filled with placeholders and branding elements, including:
* Sender's name and email
* Company website
* Logo/Sender's profile photo
* Contact details such as the company's address and phone number
To edit, click on the signature section and modify the text or layout.
 ### 2.6. Legal Disclaimer and Unsubscribe Link
At the bottom of the template, there's a built-in disclaimer that includes:
* Confidentiality notice
* Unsubscribe link
### 2.6. Legal Disclaimer and Unsubscribe Link
At the bottom of the template, there's a built-in disclaimer that includes:
* Confidentiality notice
* Unsubscribe link
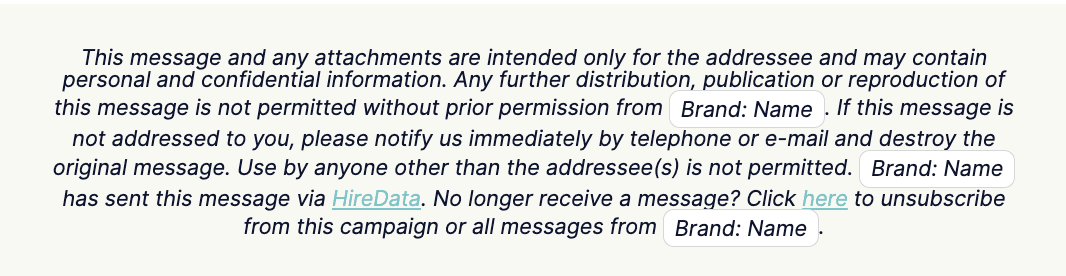 You can edit this block, but make sure to keep the unsubscribe link, as it ensures compliance with privacy laws.
## Step 3: Email Formatting
Once your email content is in place, it's time to style it. Good formatting helps your message look clean, professional, and aligned with your brand identity.
You can customise the appearance using the options in the right-hand panel of the email editor, including background colour, text font and size, element alignment, borders, spacing, etc.
## Step 4: Use the Template in Your Automations
Once your email is complete, click **Save**, and you will be able to preview it and use it in your automations.
## 💡 Best Practices
* **Keep it short and focused.** Use headings and spacing to break content into readable chunks.
* **Use consistent branding.** Apply your brand's logo, colours, and font styles to match other communications.
* **Test before use.** Use the preview button or send a test email to verify personalisation and formatting.
***
## Video guide
## Related topics
- [Logging Email Messages on Carerix with HireData](/apps/carerix/logging-email-messages-on-carerix-with-hiredata.md)
- [WhatsApp Template Categories in HireData](/apps/messaging/whatsapp/whatsapp-template-categories-in-hiredata.md)
- [How to Verify a Domain in HireData to Send Emails](/settings/domains/how-to-verify-a-domain-in-hiredata-to-send-emails.md)
- [How to Edit WhatsApp Message Templates in HireData](/apps/messaging/whatsapp/how-to-edit-whatsapp-message-templates.md)
- [Create a Vincere automation in HireData](/apps/vincere/create-a-vincere-automation-in-hiredata.md)
You can edit this block, but make sure to keep the unsubscribe link, as it ensures compliance with privacy laws.
## Step 3: Email Formatting
Once your email content is in place, it's time to style it. Good formatting helps your message look clean, professional, and aligned with your brand identity.
You can customise the appearance using the options in the right-hand panel of the email editor, including background colour, text font and size, element alignment, borders, spacing, etc.
## Step 4: Use the Template in Your Automations
Once your email is complete, click **Save**, and you will be able to preview it and use it in your automations.
## 💡 Best Practices
* **Keep it short and focused.** Use headings and spacing to break content into readable chunks.
* **Use consistent branding.** Apply your brand's logo, colours, and font styles to match other communications.
* **Test before use.** Use the preview button or send a test email to verify personalisation and formatting.
***
## Video guide
## Related topics
- [Logging Email Messages on Carerix with HireData](/apps/carerix/logging-email-messages-on-carerix-with-hiredata.md)
- [WhatsApp Template Categories in HireData](/apps/messaging/whatsapp/whatsapp-template-categories-in-hiredata.md)
- [How to Verify a Domain in HireData to Send Emails](/settings/domains/how-to-verify-a-domain-in-hiredata-to-send-emails.md)
- [How to Edit WhatsApp Message Templates in HireData](/apps/messaging/whatsapp/how-to-edit-whatsapp-message-templates.md)
- [Create a Vincere automation in HireData](/apps/vincere/create-a-vincere-automation-in-hiredata.md)