> ## Documentation Index
> Fetch the complete documentation index at: https://help.hiredata.com/llms.txt
> Use this file to discover all available pages before exploring further.
# Create an OTYS automation in HireData
> Learn how to create an OTYS automation in HireData: pick a trigger, map fields, and streamline recruitment workflows without writing a single line of code.
*Welcome to our tutorial on setting up an OTYS automation within HireData. With this integration, you can automate tasks such as sending Candidate NPS surveys, thereby improving candidate experiences and streamlining your recruitment processes. Follow along as we demonstrate each step to set up this automation efficiently.*
## Step 1: Setting up the Trigger
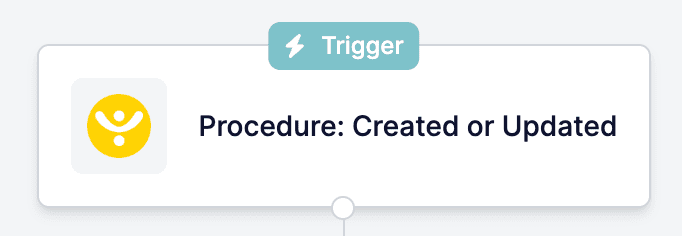
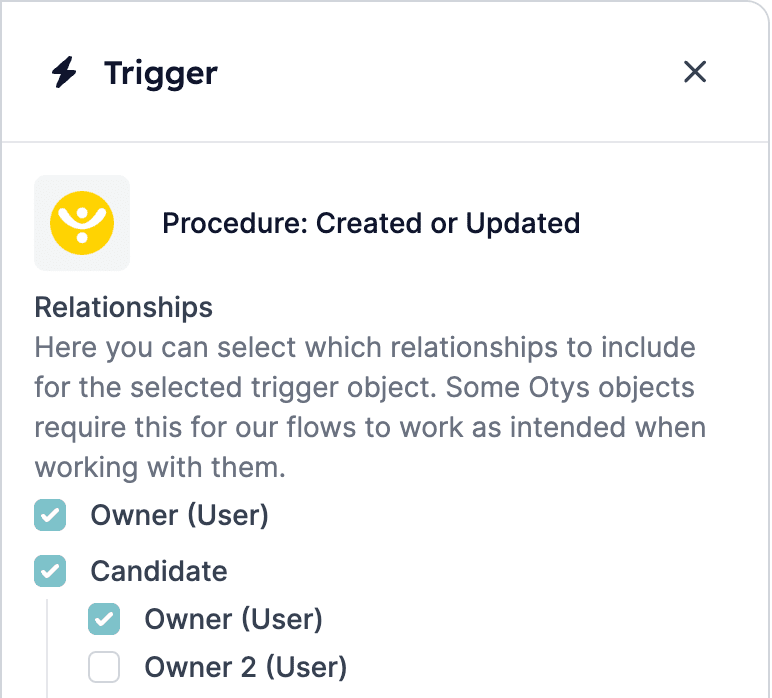
After you've [set up the connection with OTYS](/apps/otys/connect-with-otys), the first step in setting up an OTYS automation is to define the trigger. A trigger makes sure HireData "listens" to certain events occurring within OTYS. Don't forget to select all relationships you'll need later on, e.g. select a candidate when you want to send a survey to them in a further step within the automation. Here's how to do it:
*Example Trigger: Procedure: Created or Updated*
 *Select the related objects you'll need later on in the automation, e.g. a user you want to be the sender of a message and the recipient(s) of that message*
 ## Step 2: Adding a Filter
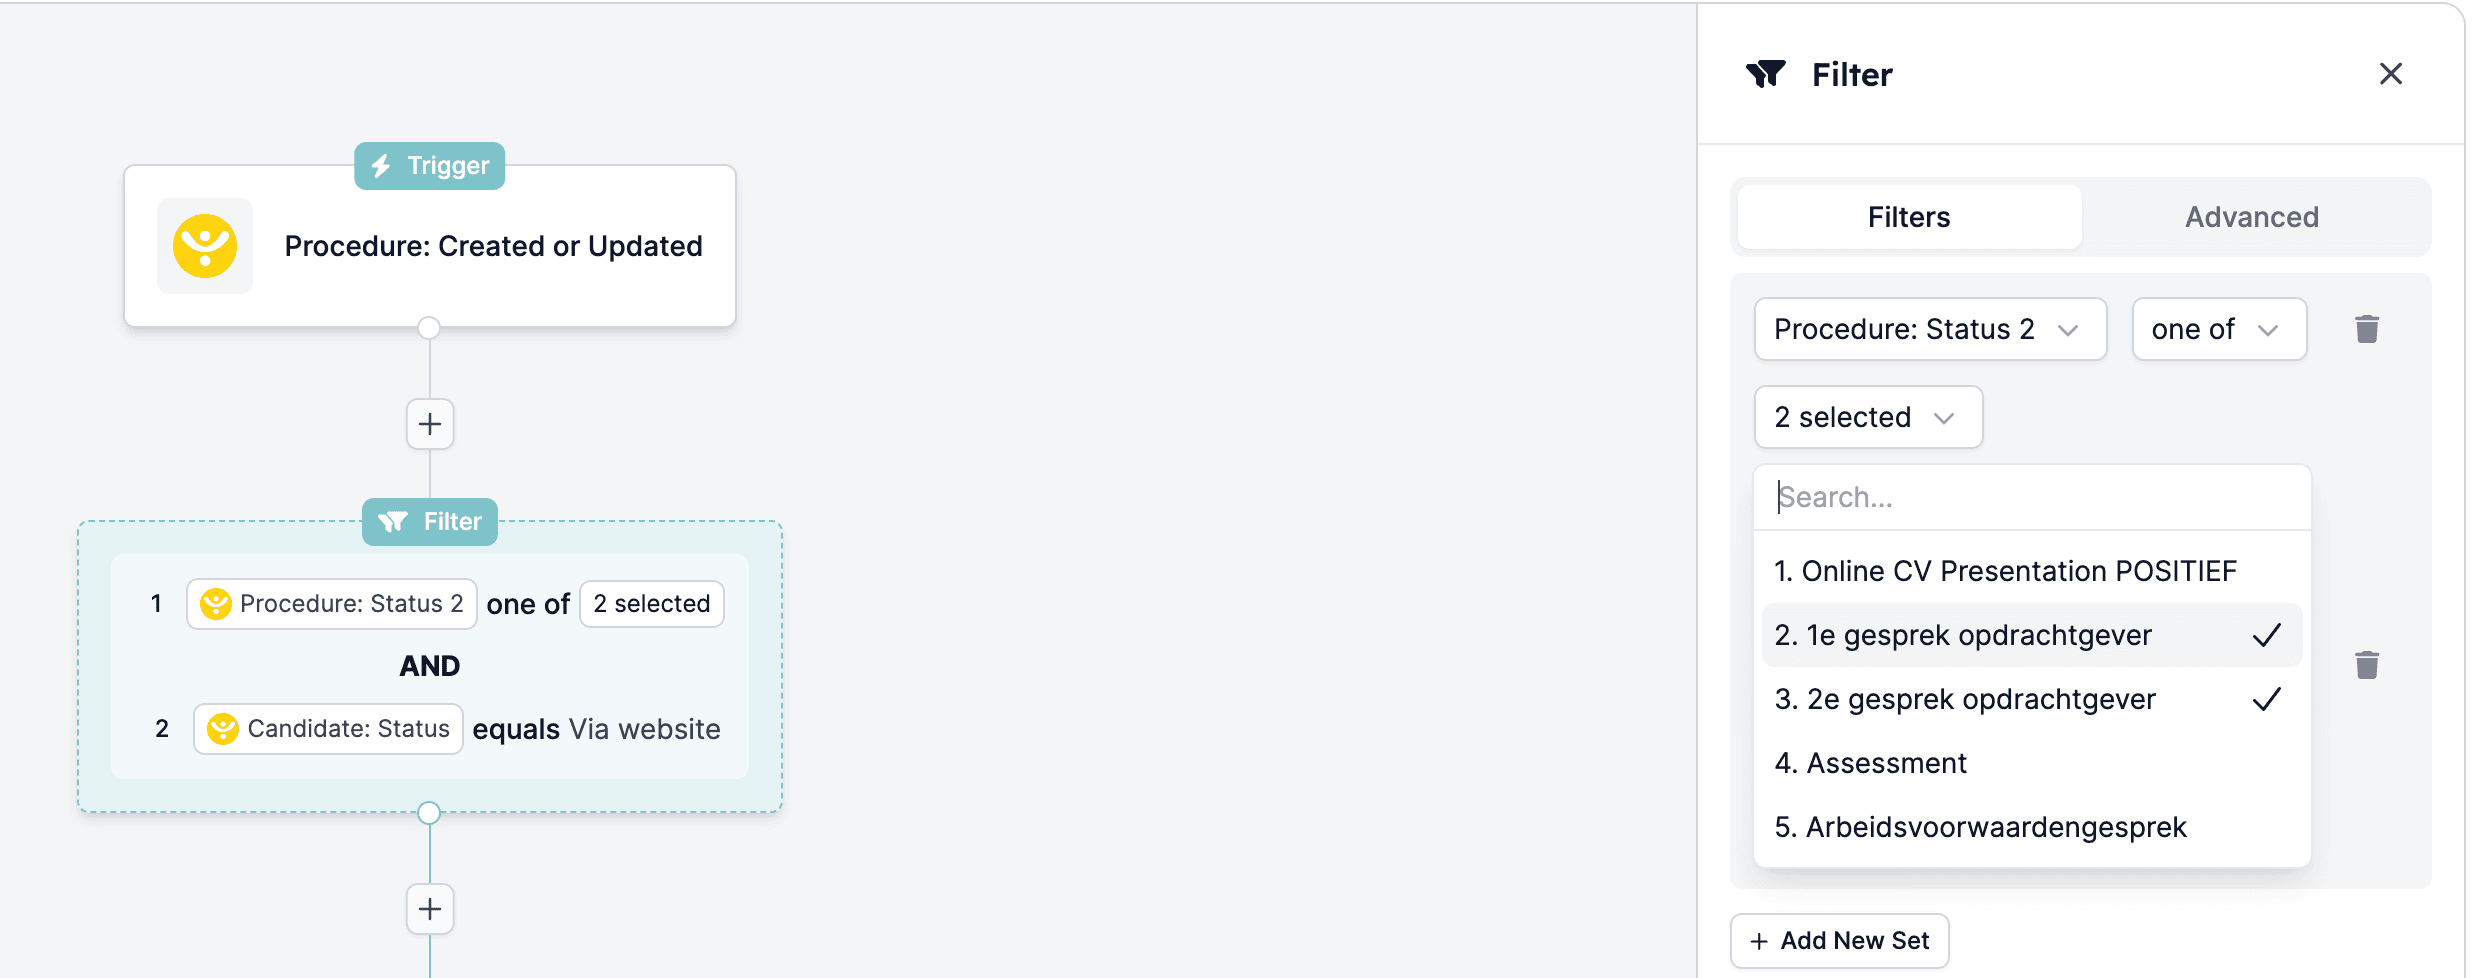
Once you've set up the trigger, it's essential to add filters to ensure that the automation is triggered under specific conditions. Follow these steps:
*Example Filter: If procedure status 2 equals one of these stages*
## Step 2: Adding a Filter
Once you've set up the trigger, it's essential to add filters to ensure that the automation is triggered under specific conditions. Follow these steps:
*Example Filter: If procedure status 2 equals one of these stages*
 ## Step 3: Adding a Delay
In some cases, you may want to introduce a delay before executing the automation. Here's how to add a delay:
*Example Delay: 1 day (e.g., to inform a candidate about landing the job before sending a post-placement survey)*
## Step 3: Adding a Delay
In some cases, you may want to introduce a delay before executing the automation. Here's how to add a delay:
*Example Delay: 1 day (e.g., to inform a candidate about landing the job before sending a post-placement survey)*
 ## Step 4: Setting up the 'Send Survey' Task
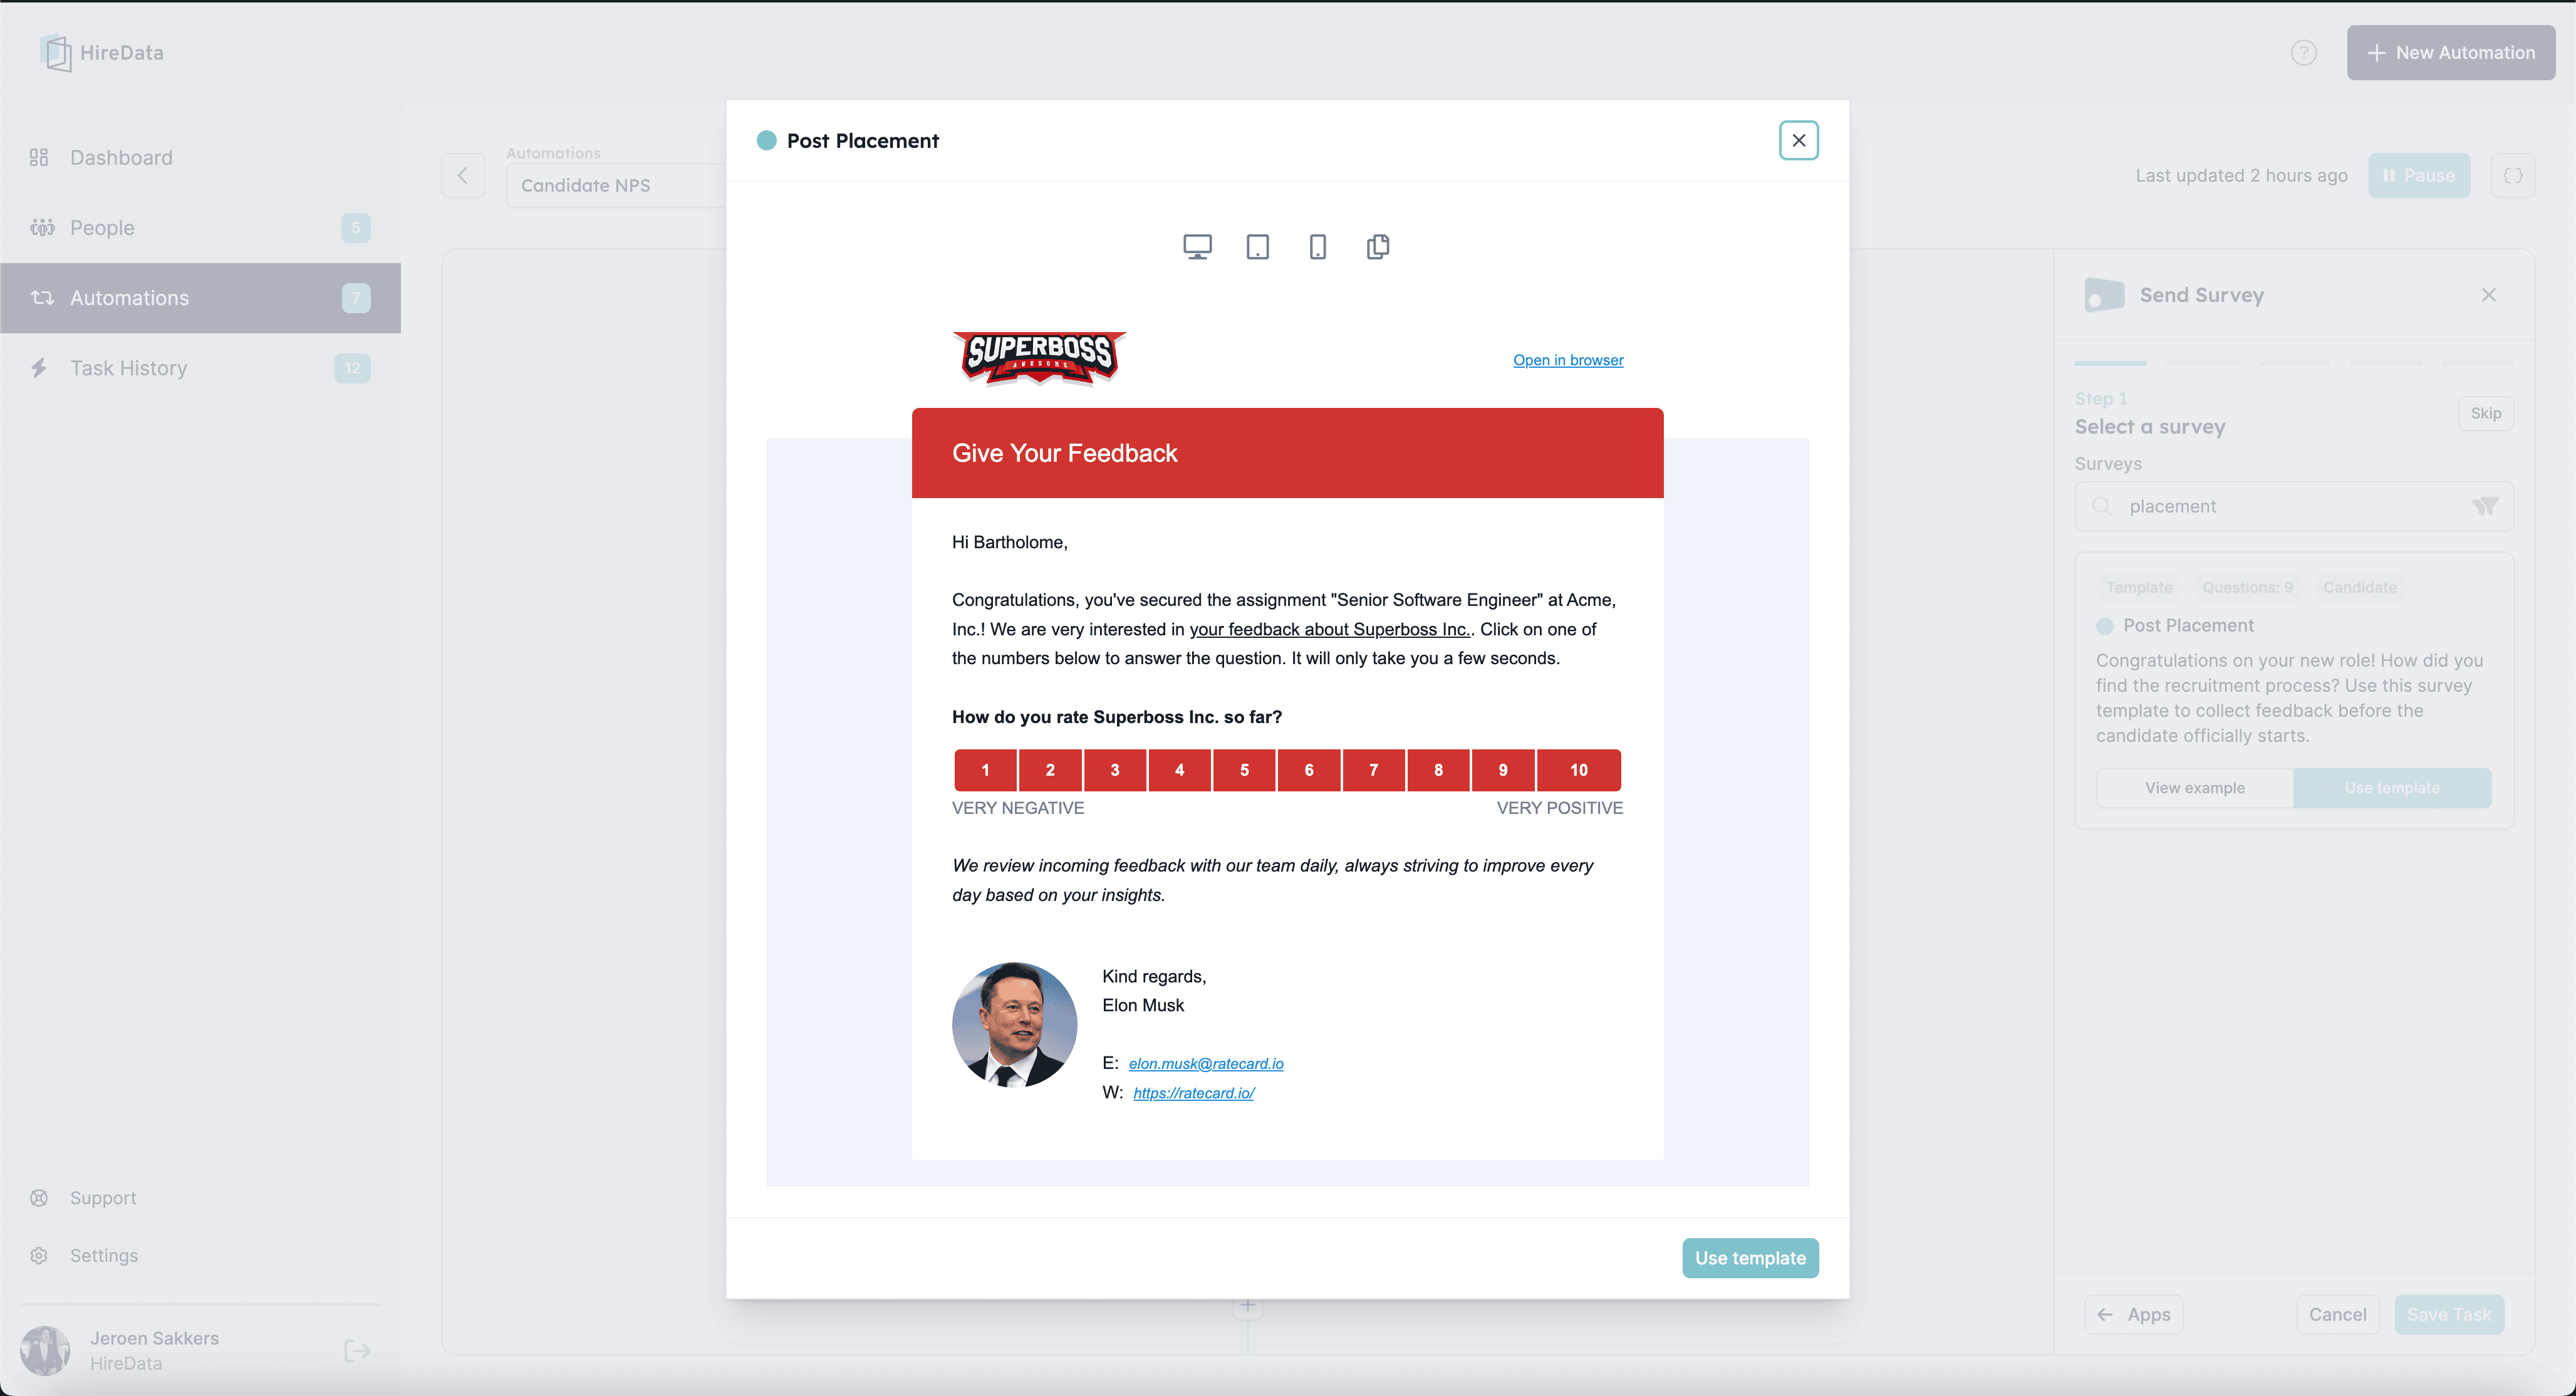
Now, let's configure the task to send the Candidate NPS survey. Follow these steps:
*4.1. Select your survey template:*
## Step 4: Setting up the 'Send Survey' Task
Now, let's configure the task to send the Candidate NPS survey. Follow these steps:
*4.1. Select your survey template:*
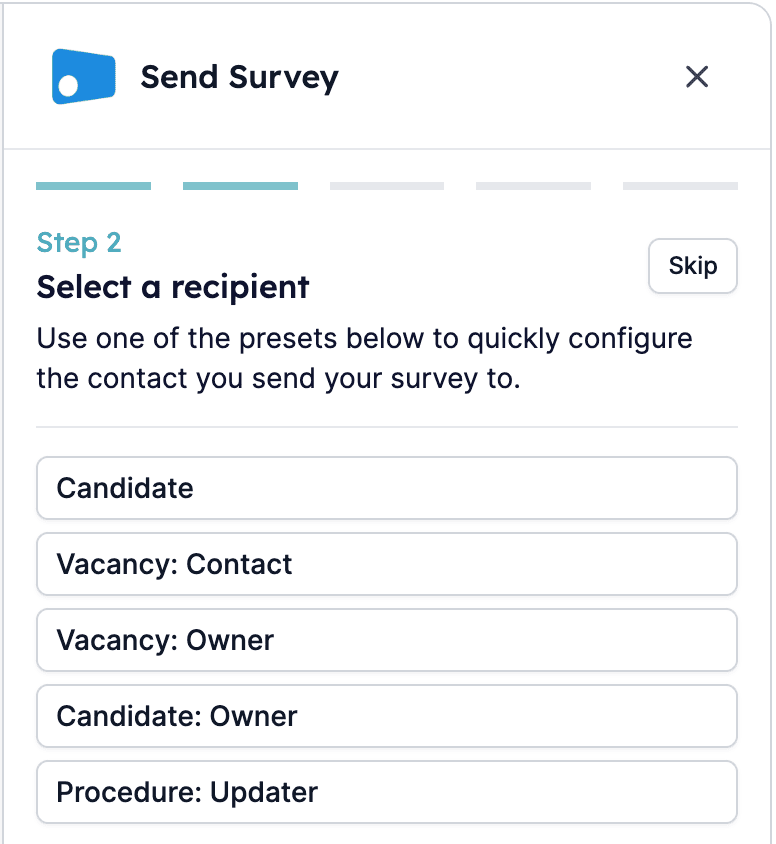
 *4.2. Choose the recipient of the survey:*
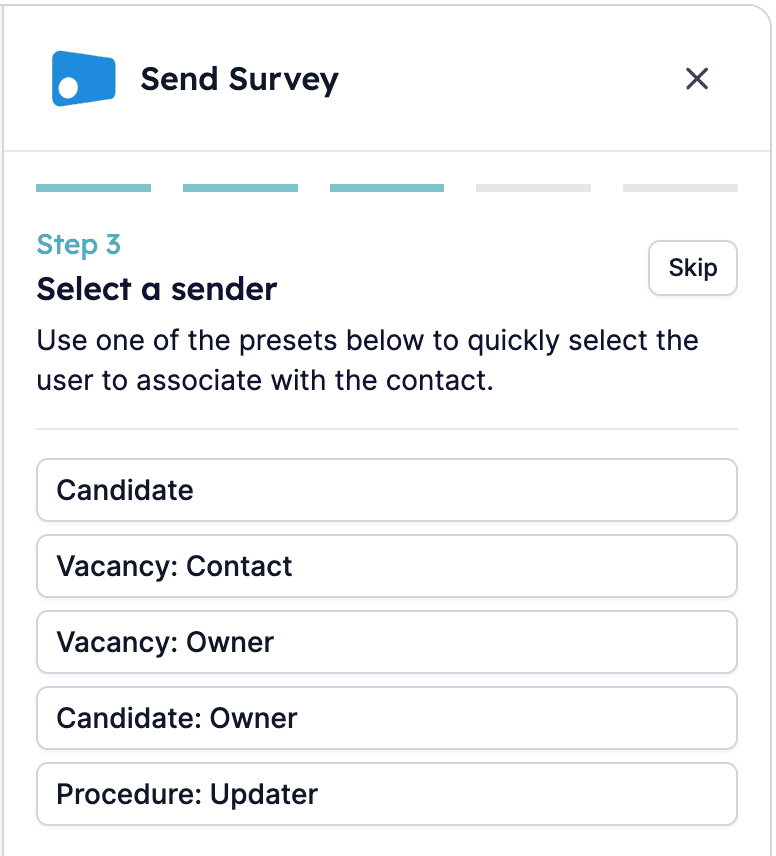
 *4.3. Specify the sender of the survey:*
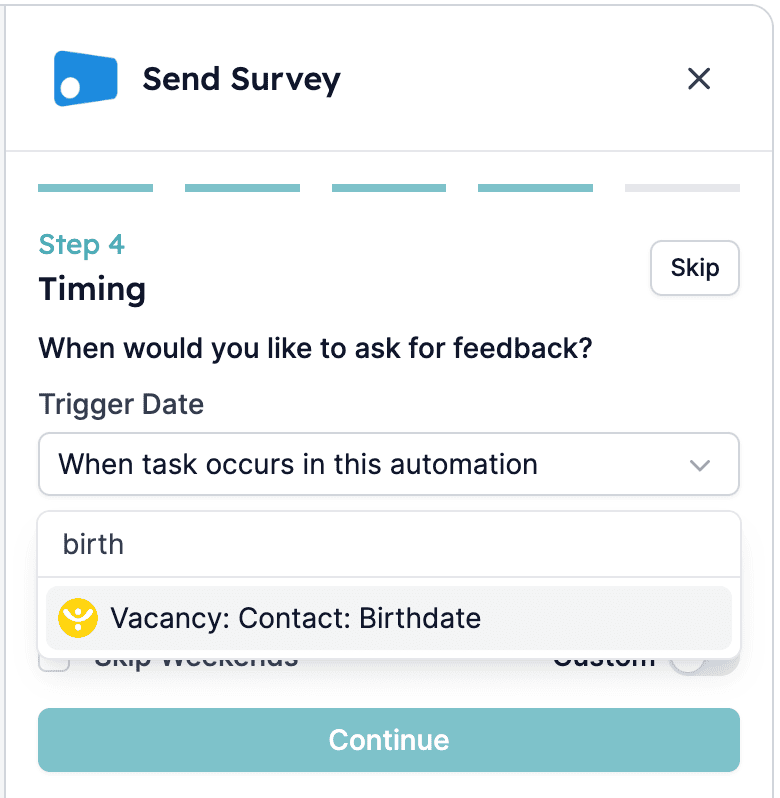
 *4.4. Configure the timing of the survey:*
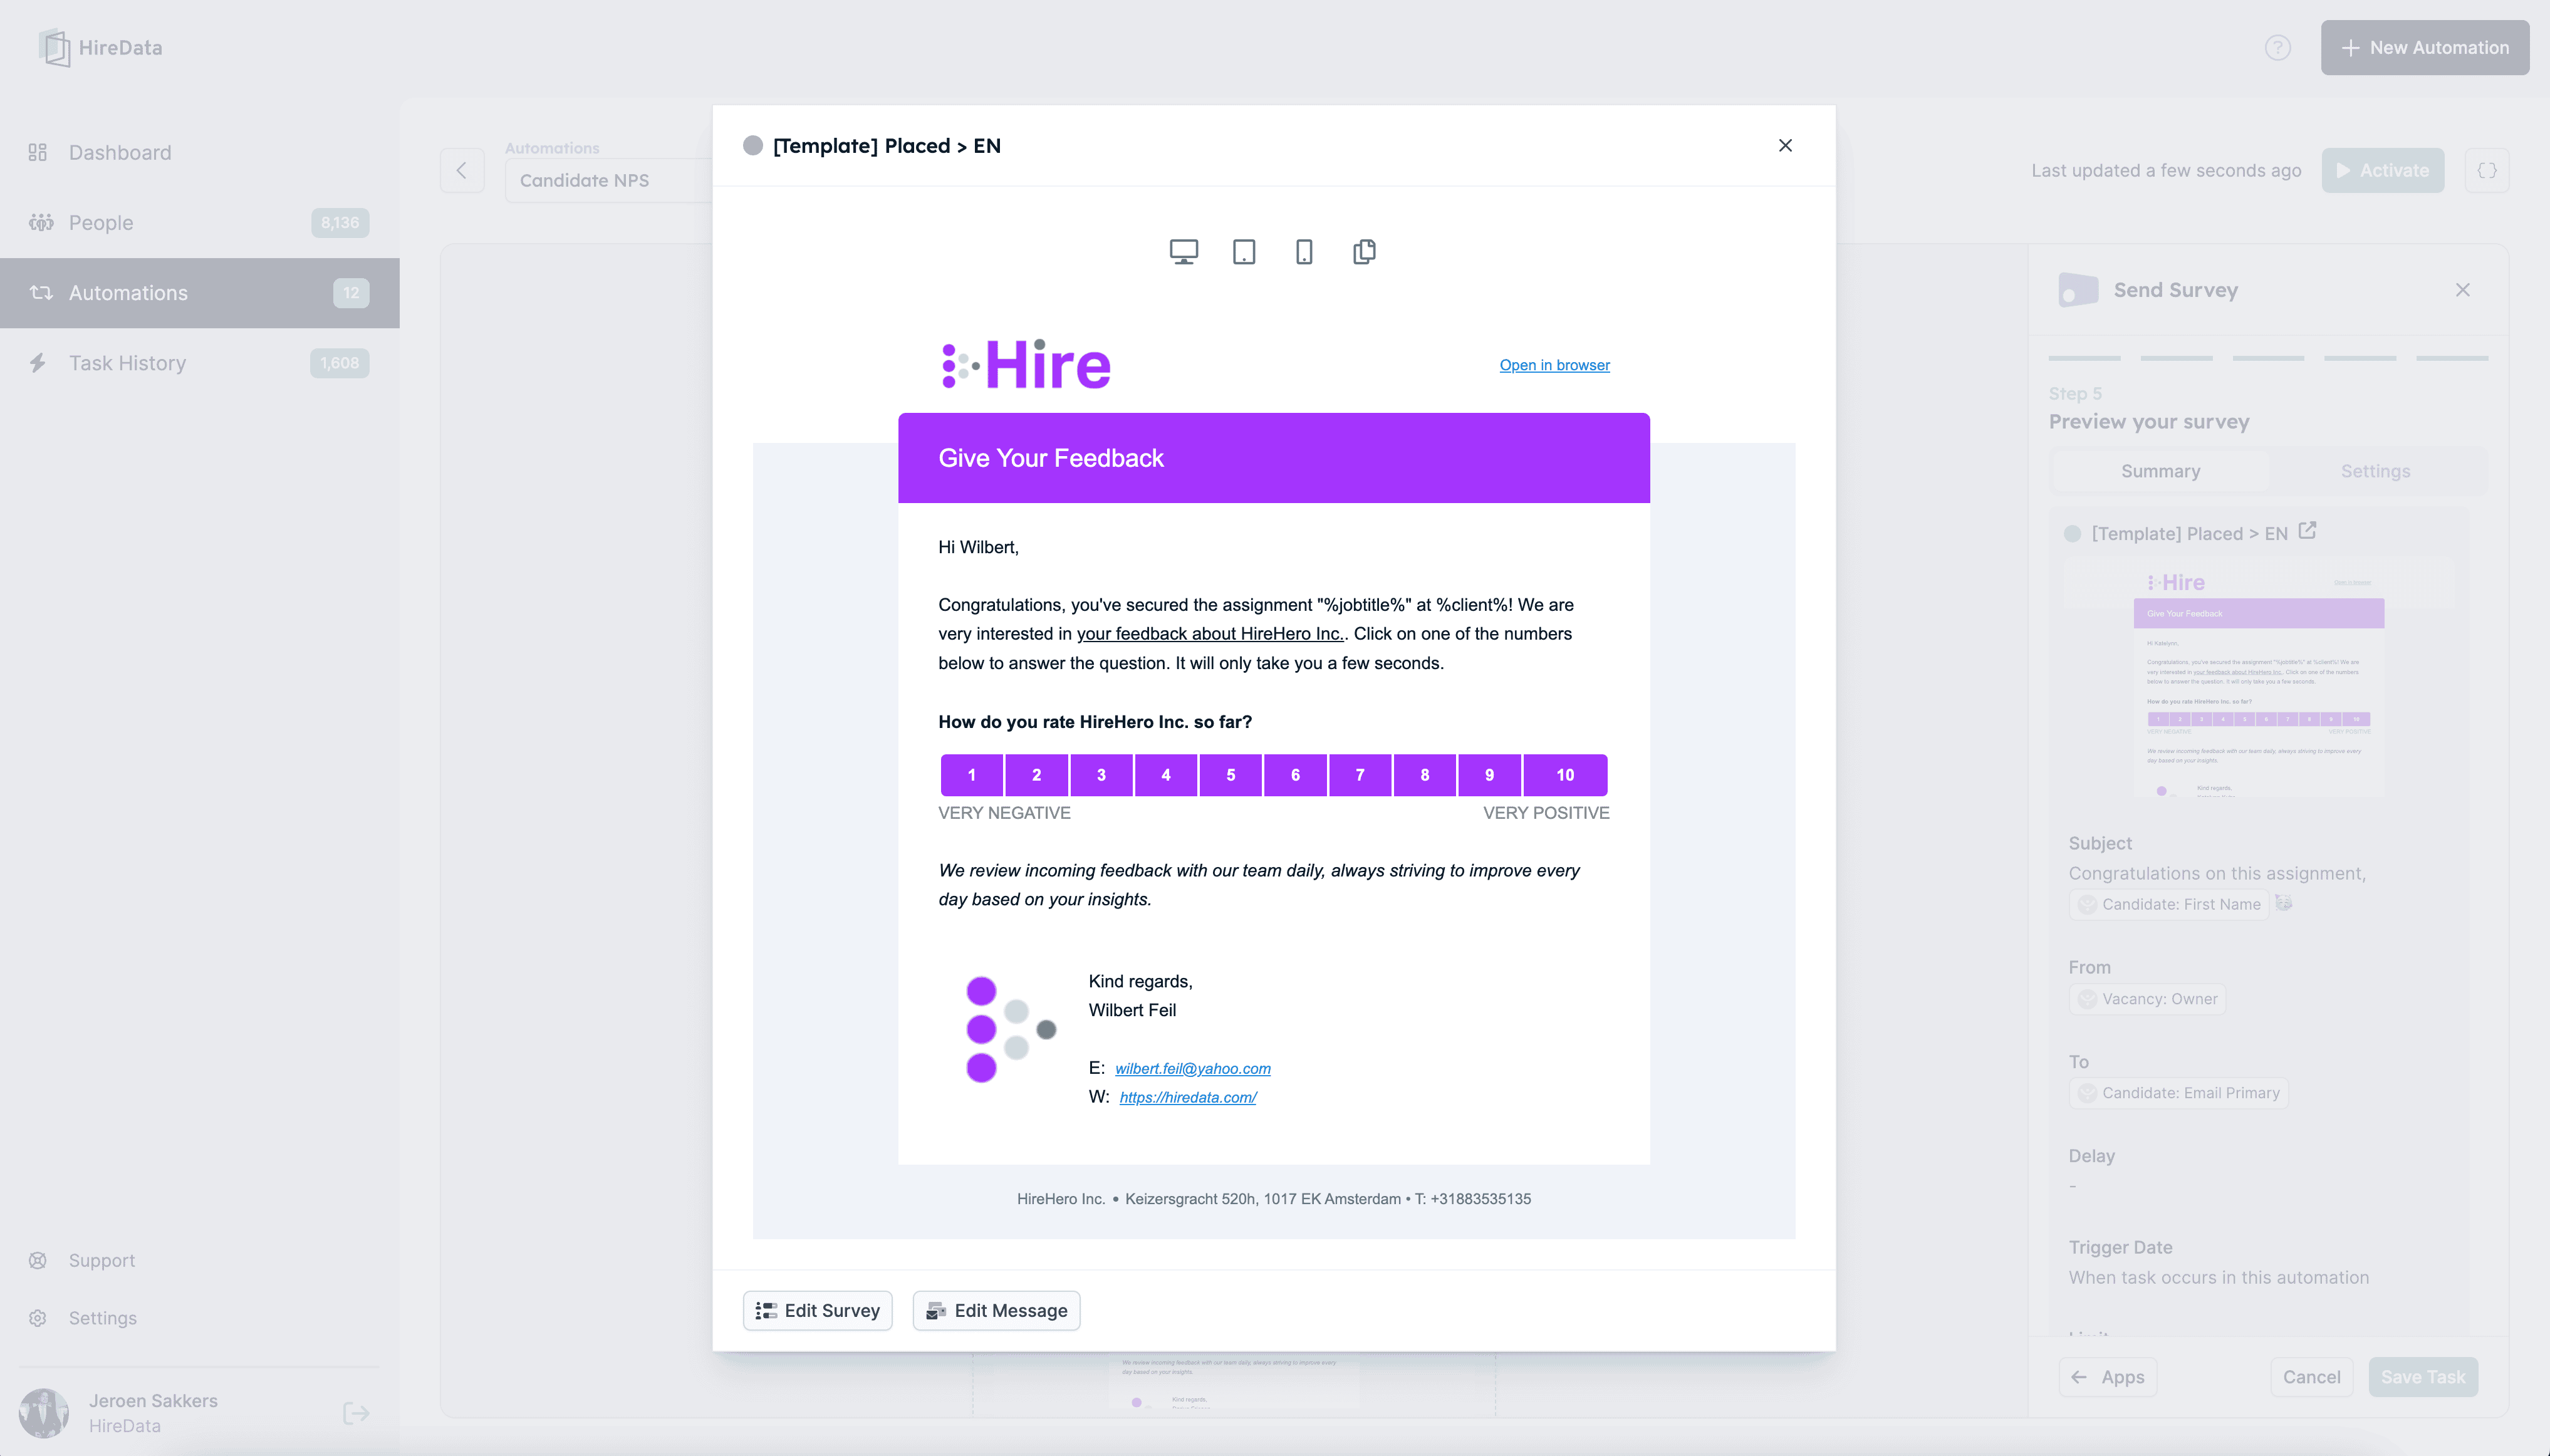
 *4.5. Ensure all settings are correct and save your task:*
 ## Step 5: Activating Your Automation
Once you've completed the setup, it's time to activate your automation. With this step, your OTYS automation is ready to go, streamlining your recruitment processes effortlessly.
*Click the \[Activate] button to turn your automation on*
## Step 5: Activating Your Automation
Once you've completed the setup, it's time to activate your automation. With this step, your OTYS automation is ready to go, streamlining your recruitment processes effortlessly.
*Click the \[Activate] button to turn your automation on*
 By setting up an OTYS automation within HireData, you can automate tasks such as sending Candidate NPS surveys, thereby improving candidate experiences and optimizing your recruitment workflows. With the step-by-step guide provided in this tutorial, you can efficiently set up and activate your automation, saving time and resources while enhancing your recruitment efforts.
## Related topics
- [Connect with OTYS](/apps/otys/connect-with-otys.md)
- [Create a Recruitee automation in HireData](/apps/recruitee/create-a-recruitee-automation-in-hiredata.md)
- [Create a Vincere automation in HireData](/apps/vincere/create-a-vincere-automation-in-hiredata.md)
- [Create a Carerix automation in HireData](/apps/carerix/create-a-carerix-automation-in-hiredata.md)
- [Create a WhatsApp automation in HireData](/apps/messaging/whatsapp/create-a-whatsapp-automation-in-hiredata.md)
By setting up an OTYS automation within HireData, you can automate tasks such as sending Candidate NPS surveys, thereby improving candidate experiences and optimizing your recruitment workflows. With the step-by-step guide provided in this tutorial, you can efficiently set up and activate your automation, saving time and resources while enhancing your recruitment efforts.
## Related topics
- [Connect with OTYS](/apps/otys/connect-with-otys.md)
- [Create a Recruitee automation in HireData](/apps/recruitee/create-a-recruitee-automation-in-hiredata.md)
- [Create a Vincere automation in HireData](/apps/vincere/create-a-vincere-automation-in-hiredata.md)
- [Create a Carerix automation in HireData](/apps/carerix/create-a-carerix-automation-in-hiredata.md)
- [Create a WhatsApp automation in HireData](/apps/messaging/whatsapp/create-a-whatsapp-automation-in-hiredata.md)