> ## Documentation Index
> Fetch the complete documentation index at: https://help.hiredata.com/llms.txt
> Use this file to discover all available pages before exploring further.
# Create a Recruitee automation in HireData
> Build a Recruitee automation in HireData: choose a trigger, map candidate fields, and streamline hiring workflows without writing a single line of code.
*Welcome to our tutorial on setting up a Recruitee automation within HireData. With this integration, you can automate tasks such as sending Candidate NPS surveys, thereby improving candidate experiences and streamlining your recruitment processes. Follow along as we demonstrate each step to set up an automation efficiently.*
## Step 1: Setting up the Automation
After you've set up the [connection with Recruitee](/apps/recruitee/connect-with-recruitee), you can create your first automation. Log in to HireData and navigate to the **Automations** page, where you can find and click on the \[New Automation] button.
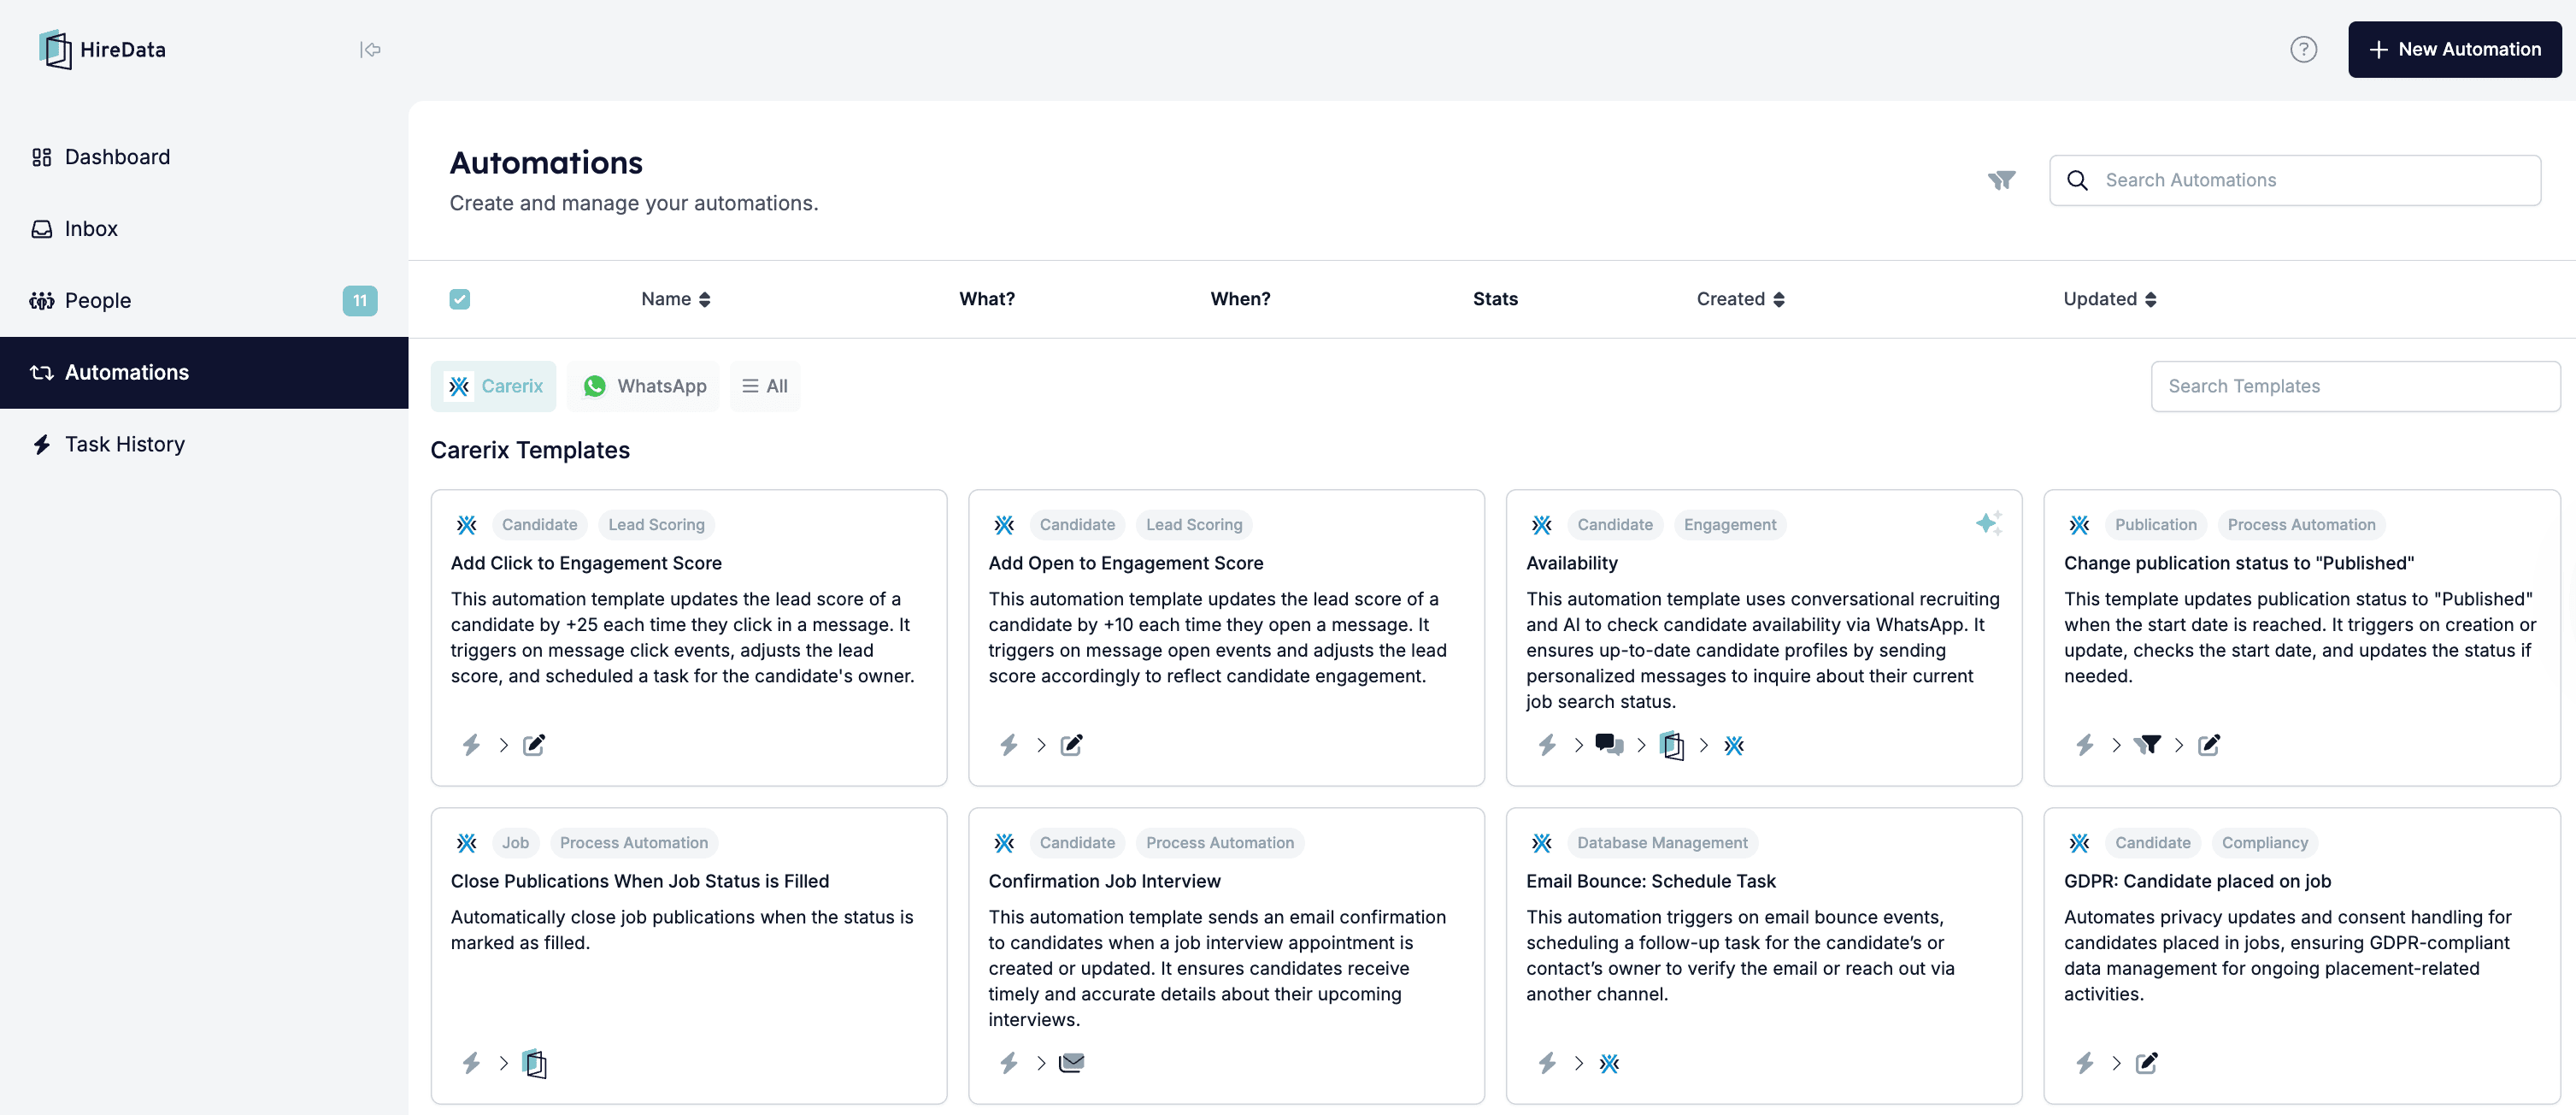 ### 1.1 Choose Blank Automation or any of the available templates
If you want complete control and the freedom to design every step of your workflow exactly as you need, then **Blank Automation** is the right choice. It allows you to build a fully customised process from the ground up.
On the other hand, if you prefer a quick, ready-made solution, select any of the templates, and the automation will be created for you.
## Step 2: Define the Trigger
The second step is to define the trigger. A trigger makes sure HireData “listens” to specific events occurring within Recruitee. To set this up, first select the app, then the object, and finally the trigger that should start the automation. You can also apply filters at this stage to narrow down when the automation runs, for example by targeting only applications that meet certain criteria.
*Example Trigger: Application: Created or Updated*
### 1.1 Choose Blank Automation or any of the available templates
If you want complete control and the freedom to design every step of your workflow exactly as you need, then **Blank Automation** is the right choice. It allows you to build a fully customised process from the ground up.
On the other hand, if you prefer a quick, ready-made solution, select any of the templates, and the automation will be created for you.
## Step 2: Define the Trigger
The second step is to define the trigger. A trigger makes sure HireData “listens” to specific events occurring within Recruitee. To set this up, first select the app, then the object, and finally the trigger that should start the automation. You can also apply filters at this stage to narrow down when the automation runs, for example by targeting only applications that meet certain criteria.
*Example Trigger: Application: Created or Updated*
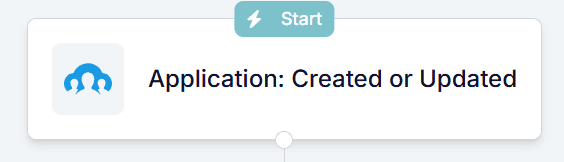 Select the timing for when the automation should run, e.g. only when an item is created, updated, or both.
## Step 3: Adding a Filter
Once you've set up the trigger, it's essential to add filters to ensure that the automation is triggered under specific conditions.
Filters can be added directly to the trigger, ensuring the automation only runs when specific conditions are met. They can also be created as a separate building block, which is especially useful when multiple filter sets are needed for more complex workflows. Follow these steps:
*Example Filter: If Outcome equals Declined*
Select the timing for when the automation should run, e.g. only when an item is created, updated, or both.
## Step 3: Adding a Filter
Once you've set up the trigger, it's essential to add filters to ensure that the automation is triggered under specific conditions.
Filters can be added directly to the trigger, ensuring the automation only runs when specific conditions are met. They can also be created as a separate building block, which is especially useful when multiple filter sets are needed for more complex workflows. Follow these steps:
*Example Filter: If Outcome equals Declined*
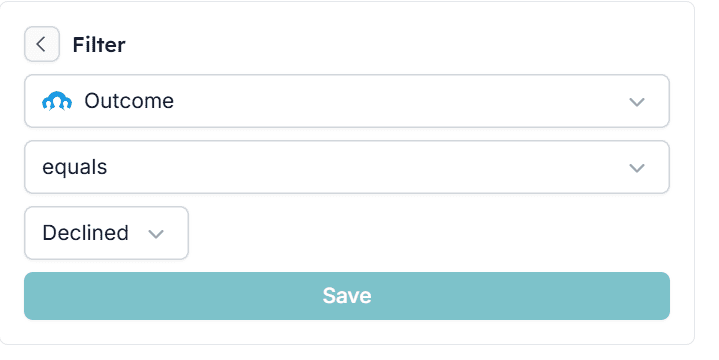 *Filters ensure that the automation only runs for candidates you want to reach (e.g., rejected candidates).*
## Step 4: Adding a Delay
In some cases, you may want to introduce a delay before executing the automation. A delay is when the automation waits a certain amount of time before performing the next action. Here's how to add it:
*Example Delay: 1 day (e.g., to inform a candidate about landing the job before sending a post-placement survey)*
*Filters ensure that the automation only runs for candidates you want to reach (e.g., rejected candidates).*
## Step 4: Adding a Delay
In some cases, you may want to introduce a delay before executing the automation. A delay is when the automation waits a certain amount of time before performing the next action. Here's how to add it:
*Example Delay: 1 day (e.g., to inform a candidate about landing the job before sending a post-placement survey)*
 ## Step 5: Setting up the 'Send Email ' Task
Now, let's configure the task to send the Candidate NPS survey. Follow these steps:
### 5.1 Add a block from the \[+] and then click on \[Message]
## Step 5: Setting up the 'Send Email ' Task
Now, let's configure the task to send the Candidate NPS survey. Follow these steps:
### 5.1 Add a block from the \[+] and then click on \[Message]
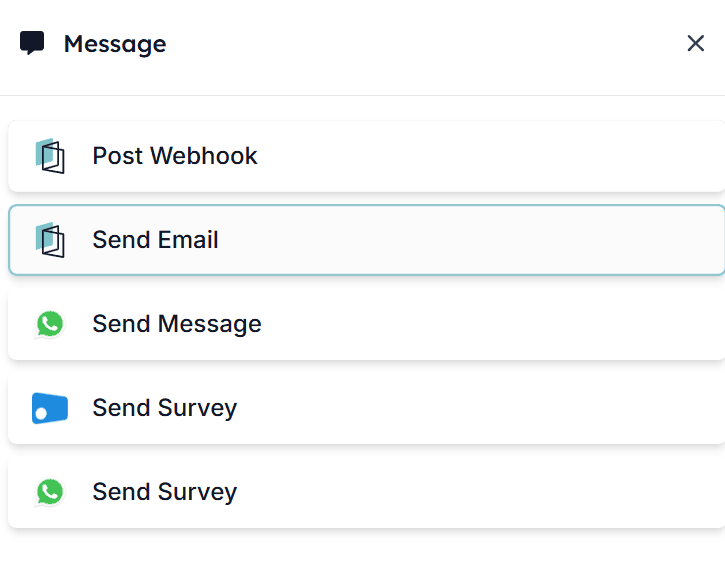
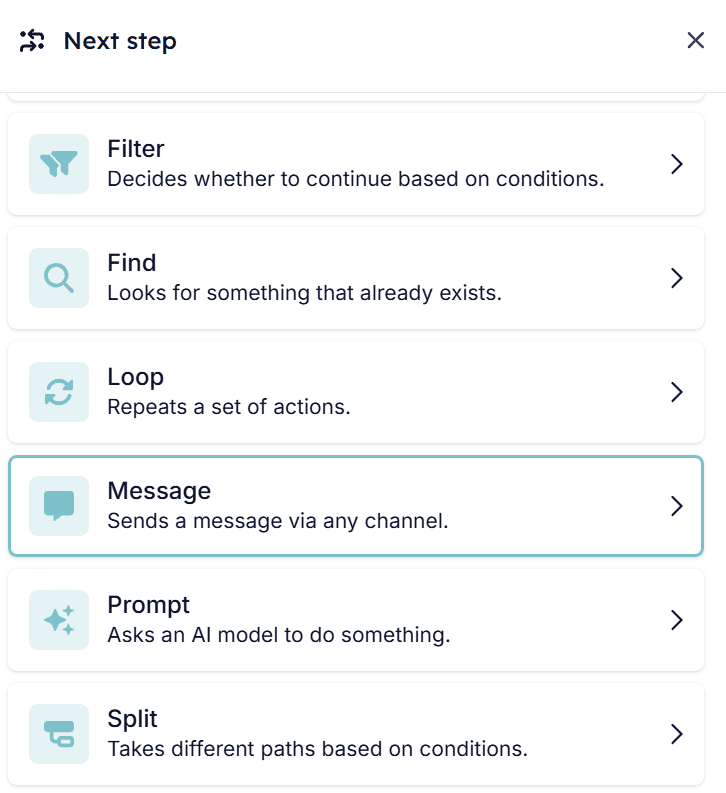 ### 5.2 In this step, you can decide what type of message you would like to send
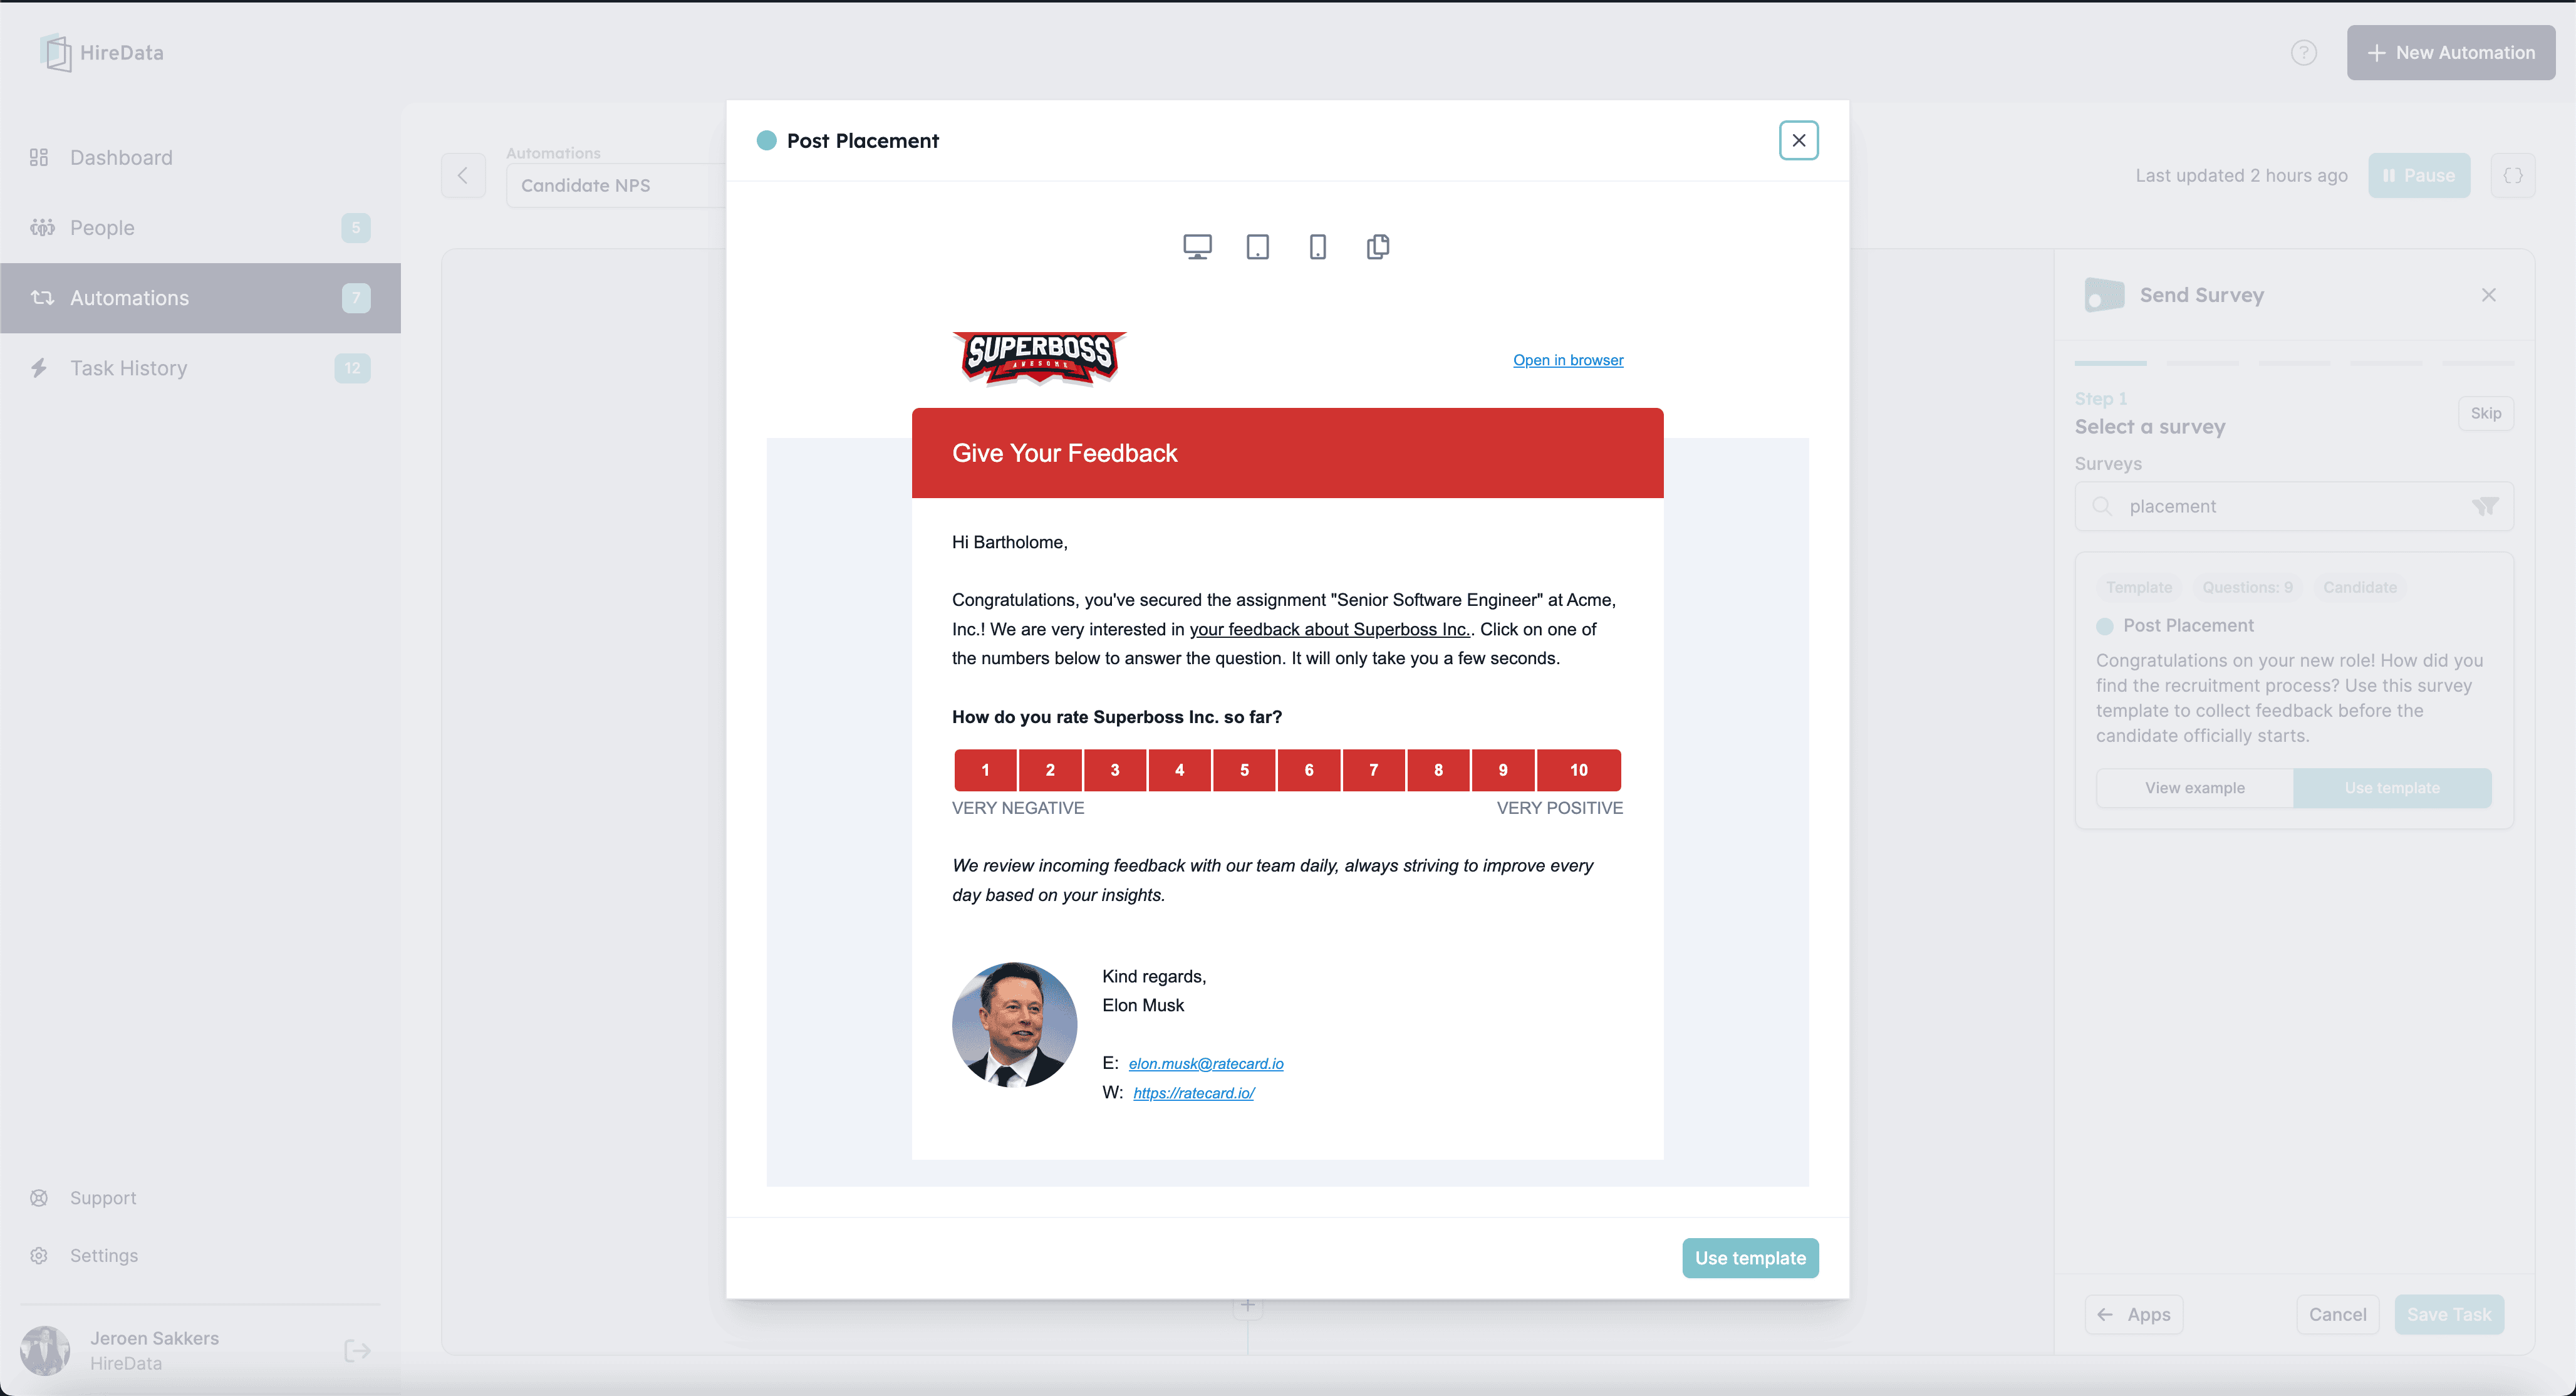
 ### 5.3 Now, select the template you would like to use
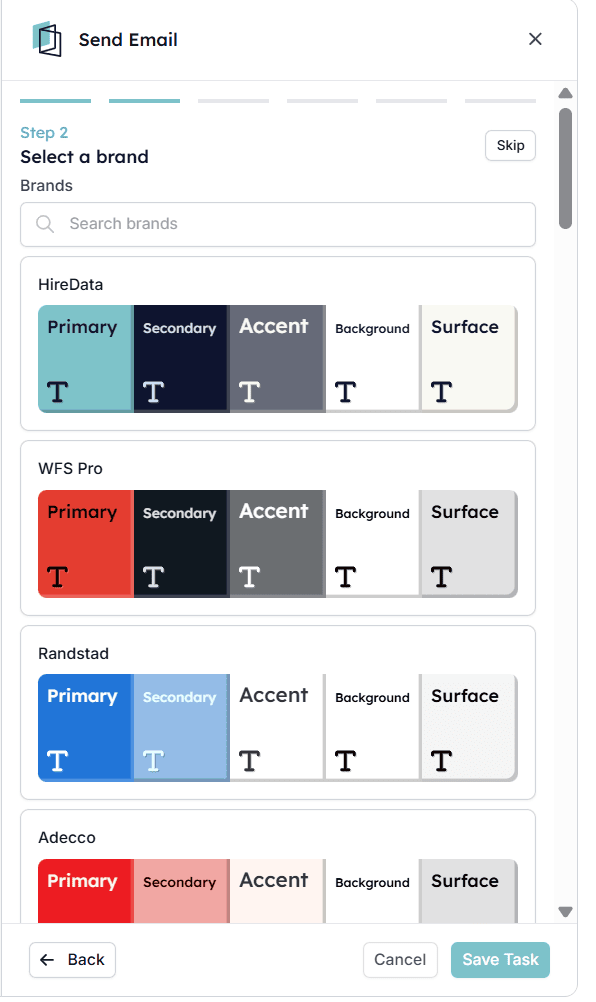
 ### 5.4 Select the Branding of your email
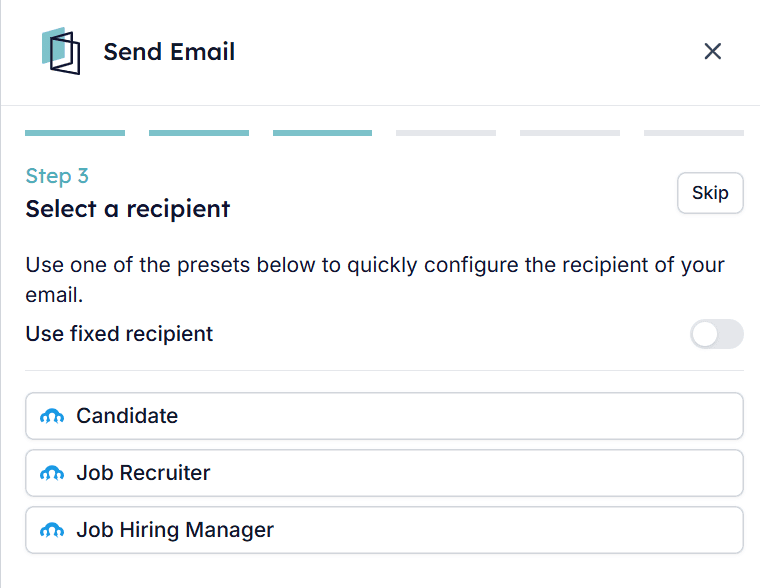
 ### 5.5 Choose the recipient of the message
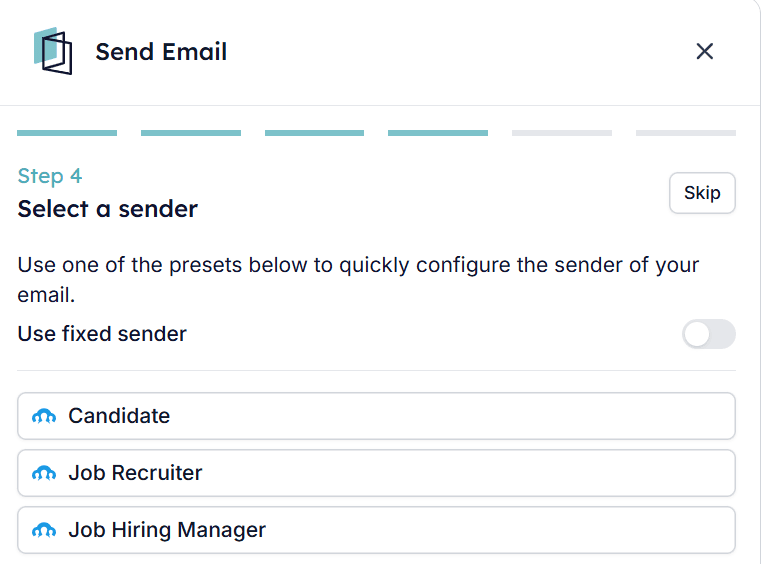
 ### 5.6 Specify the sender of the survey
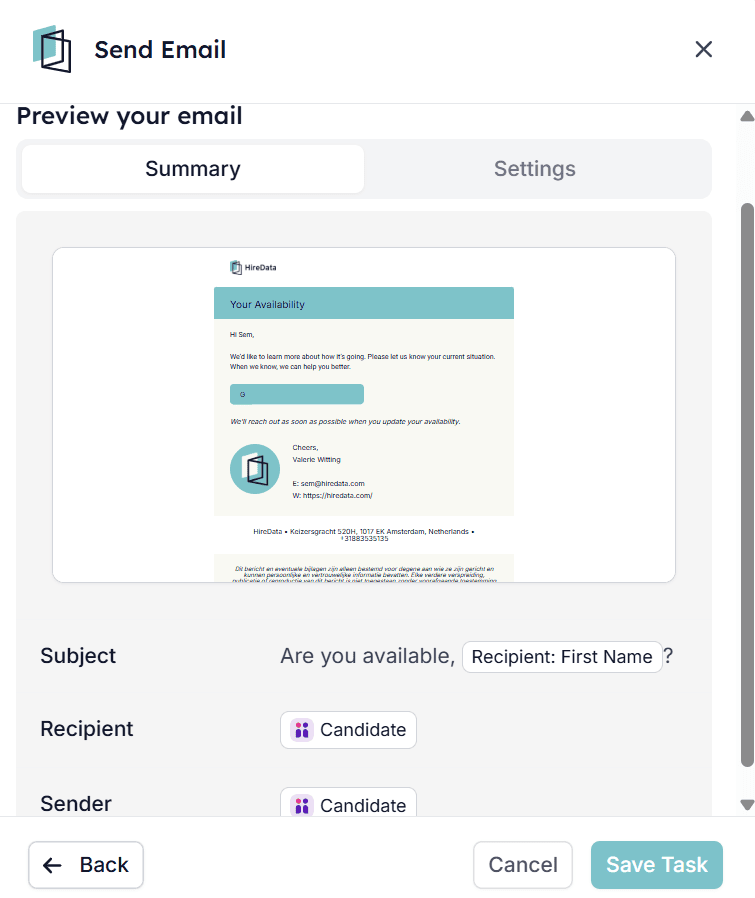
 ### 5.7 Ensure all settings are correct and save your task
 ### 5.8 Review the Automation
After you have set up your first Automation, we advise reviewing to ensure everything is set up correctly and that it runs smoothly.
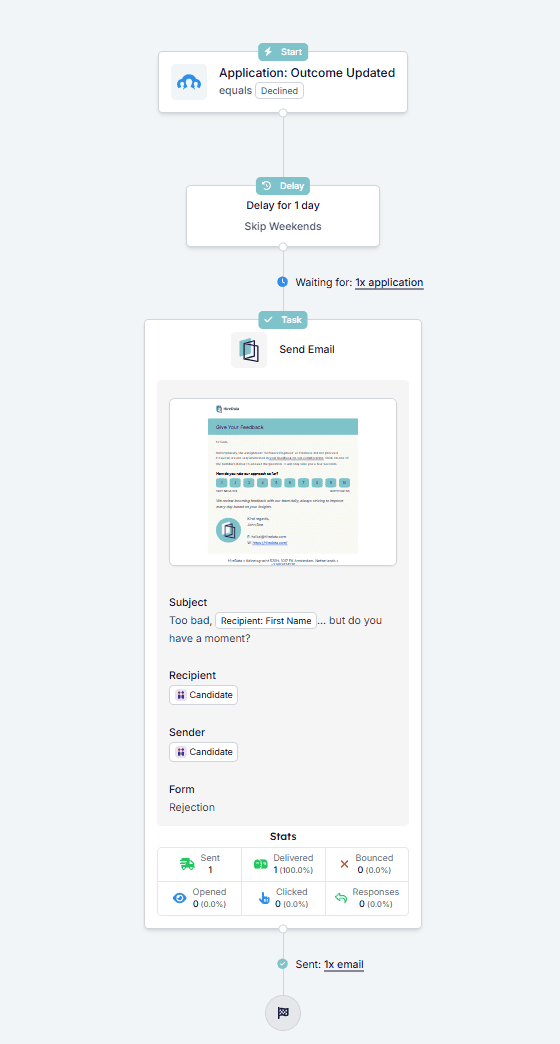
**Here is how the example automation in this guide will work:**
When an application is updated to **Declined**, HireData will receive an event from Recruitee. Then the automation will wait one day while skipping weekends to avoid delays (optional). After this short pause, the candidates who meet the criteria will receive a personalised email addressing them by name and including a feedback form.
This approach makes the rejection process more thoughtful and professional, while also giving you the chance to collect valuable feedback from candidates to improve the hiring experience.
### 5.8 Review the Automation
After you have set up your first Automation, we advise reviewing to ensure everything is set up correctly and that it runs smoothly.
**Here is how the example automation in this guide will work:**
When an application is updated to **Declined**, HireData will receive an event from Recruitee. Then the automation will wait one day while skipping weekends to avoid delays (optional). After this short pause, the candidates who meet the criteria will receive a personalised email addressing them by name and including a feedback form.
This approach makes the rejection process more thoughtful and professional, while also giving you the chance to collect valuable feedback from candidates to improve the hiring experience.
 ## Step 6: Activating Your Automation
Once you've completed the setup, it's time to activate your automation. With this step, your Recruitee automation is ready to go, streamlining your recruitment processes effortlessly.
*Click the \[Activate] button to turn your automation on*
## Step 6: Activating Your Automation
Once you've completed the setup, it's time to activate your automation. With this step, your Recruitee automation is ready to go, streamlining your recruitment processes effortlessly.
*Click the \[Activate] button to turn your automation on*
 By setting up an Recruitee automation within HireData, you can automate tasks such as sending Candidate NPS surveys, thereby improving candidate experiences and optimizing your recruitment workflows. With the step-by-step guide provided in this tutorial, you can efficiently set up and activate your automation, saving time and resources while enhancing your recruitment efforts.
***
# Video Guide
## Related topics
- [Create an OTYS automation in HireData](/apps/otys/create-an-otys-automation-in-hiredata.md)
- [Create a Vincere automation in HireData](/apps/vincere/create-a-vincere-automation-in-hiredata.md)
- [Create a Carerix automation in HireData](/apps/carerix/create-a-carerix-automation-in-hiredata.md)
- [Create a WhatsApp automation in HireData](/apps/messaging/whatsapp/create-a-whatsapp-automation-in-hiredata.md)
- [Connect with Vincere](/apps/vincere/connect-with-vincere.md)
By setting up an Recruitee automation within HireData, you can automate tasks such as sending Candidate NPS surveys, thereby improving candidate experiences and optimizing your recruitment workflows. With the step-by-step guide provided in this tutorial, you can efficiently set up and activate your automation, saving time and resources while enhancing your recruitment efforts.
***
# Video Guide
## Related topics
- [Create an OTYS automation in HireData](/apps/otys/create-an-otys-automation-in-hiredata.md)
- [Create a Vincere automation in HireData](/apps/vincere/create-a-vincere-automation-in-hiredata.md)
- [Create a Carerix automation in HireData](/apps/carerix/create-a-carerix-automation-in-hiredata.md)
- [Create a WhatsApp automation in HireData](/apps/messaging/whatsapp/create-a-whatsapp-automation-in-hiredata.md)
- [Connect with Vincere](/apps/vincere/connect-with-vincere.md)