> ## Documentation Index
> Fetch the complete documentation index at: https://help.hiredata.com/llms.txt
> Use this file to discover all available pages before exploring further.
# How to Test an Automation
> Test your HireData automations with sample data before going live, catch errors early, and validate every step so your recruitment workflows run smoothly.
*Before activating an automation in HireData, it is essential to test it to ensure it runs as expected. There are two ways to test automation: **Preview a Single Item** and **Test with a User**. In this guide, we will demonstrate how to test with a user, so keep reading if you want to learn how you can do it.*
## Selecting how to test an automation
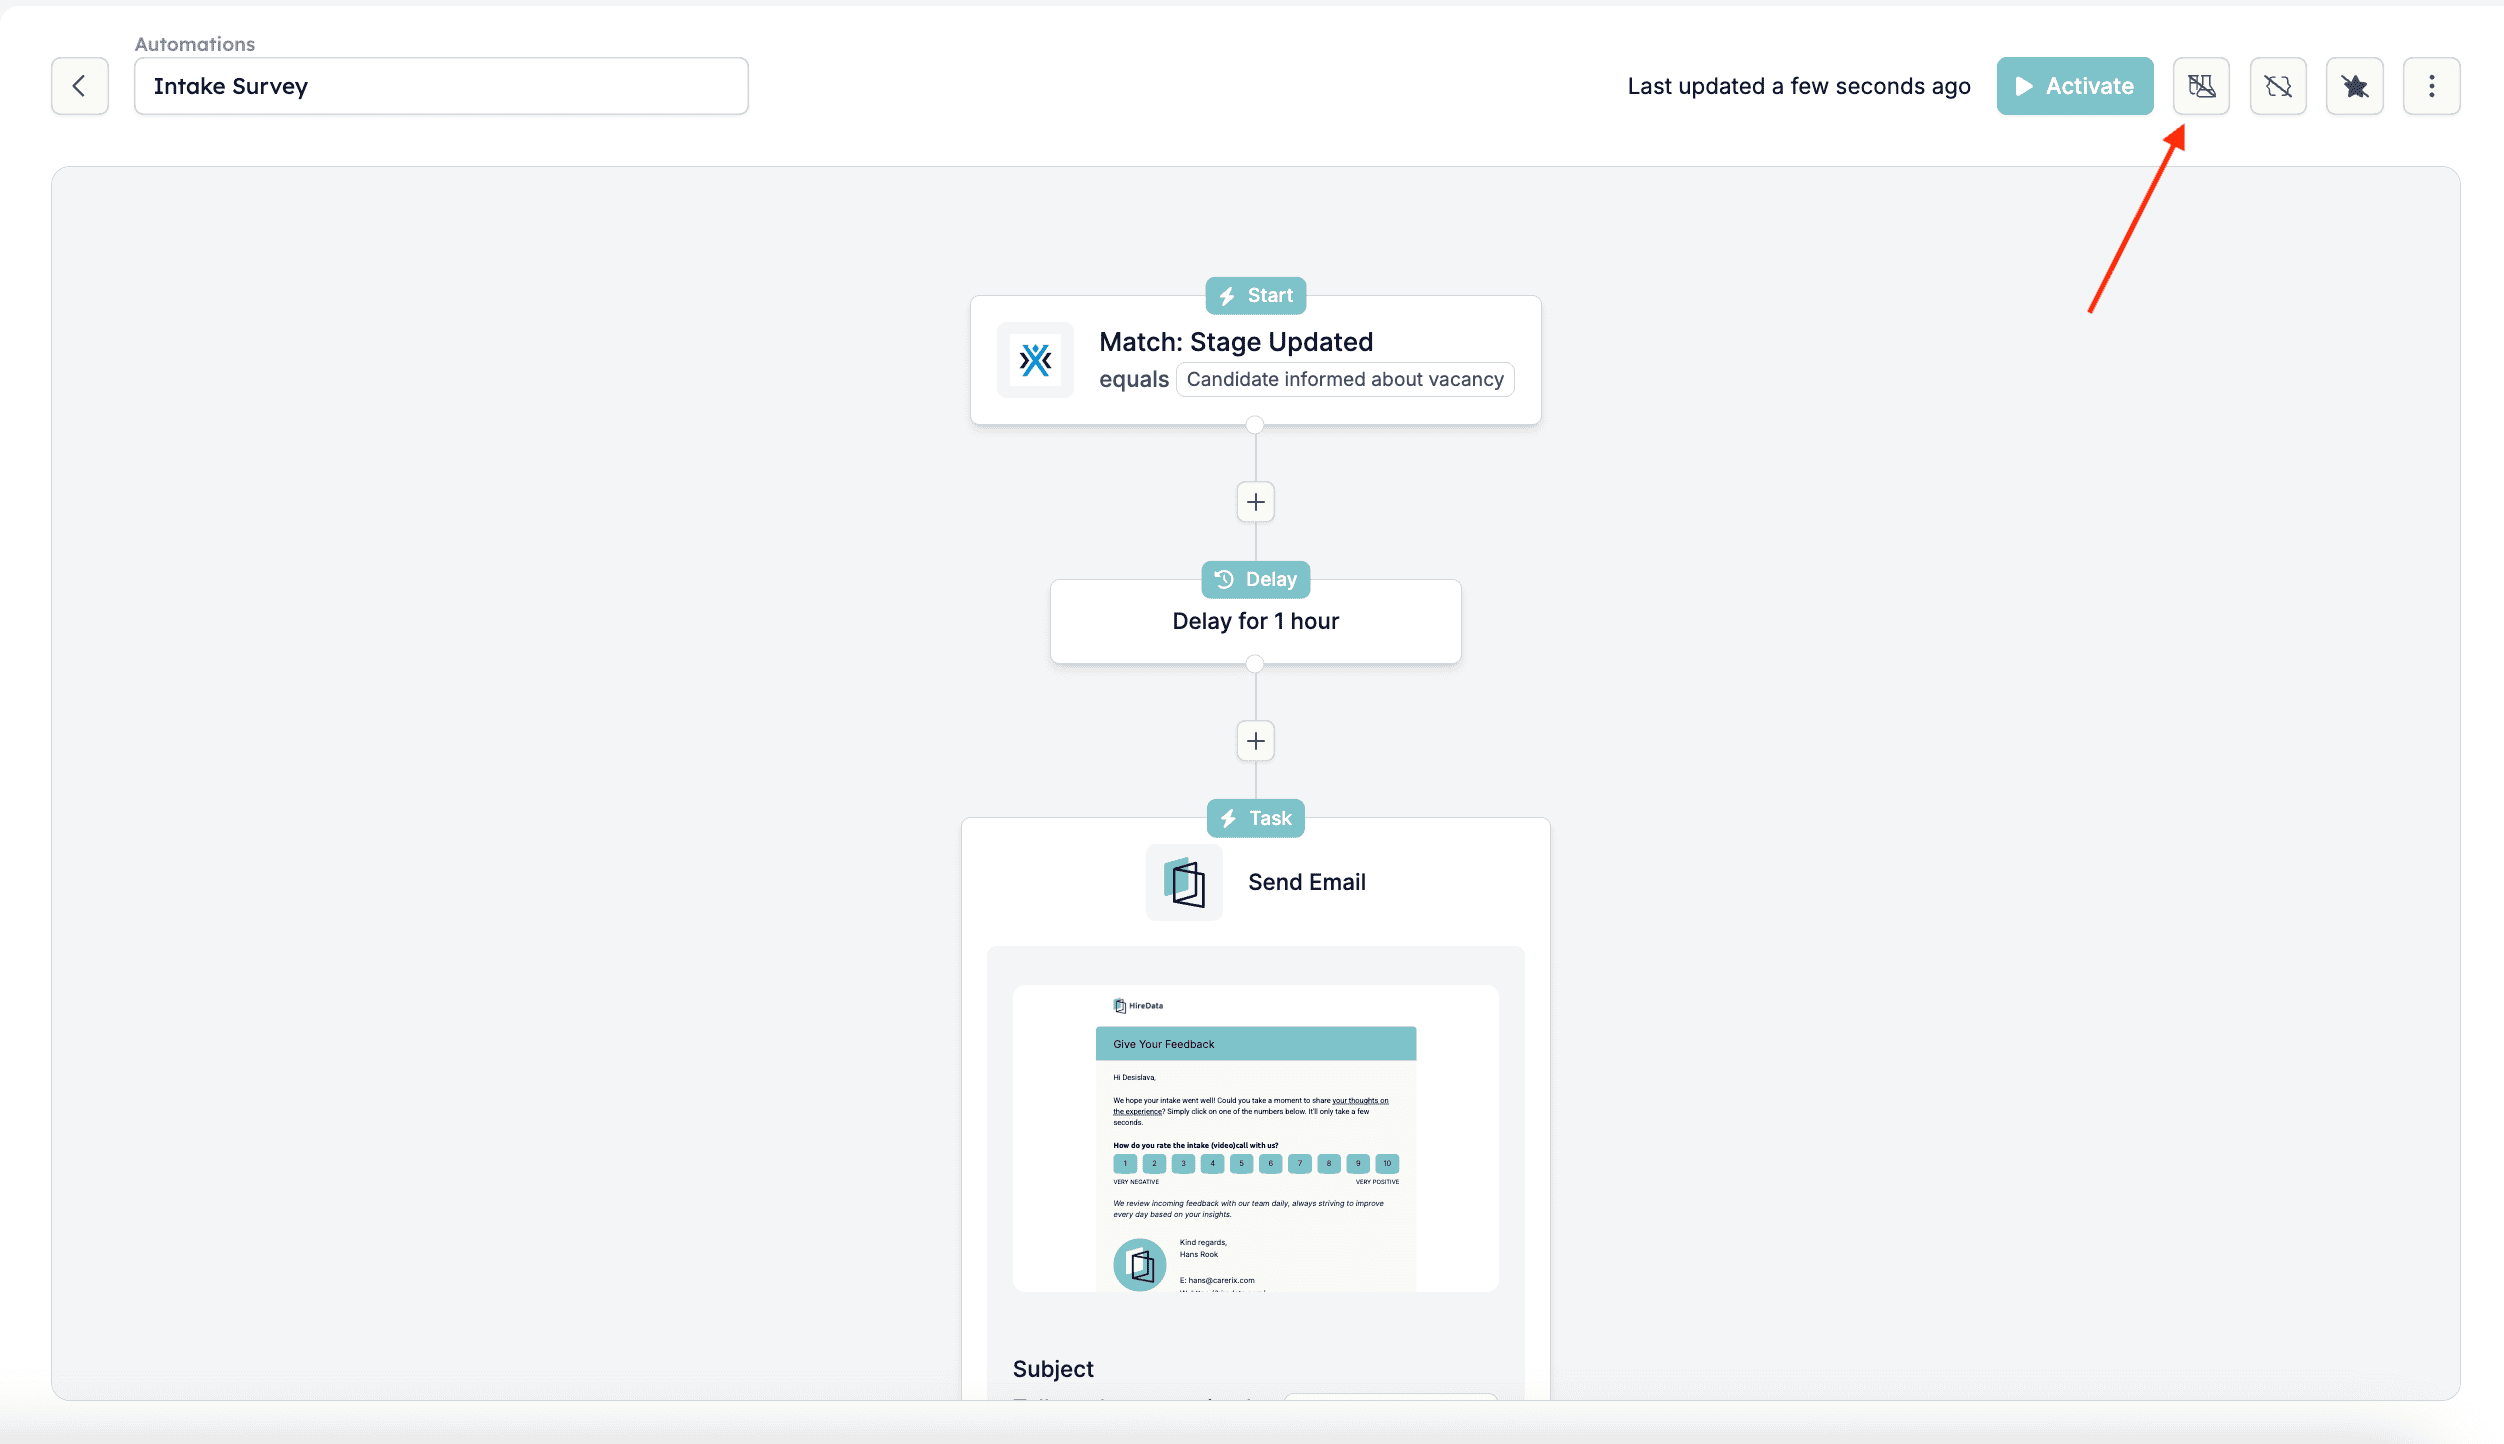
Navigate to the automation you want to test and click on the test icon in the top-right corner of the screen. This will open the automation testing panel.
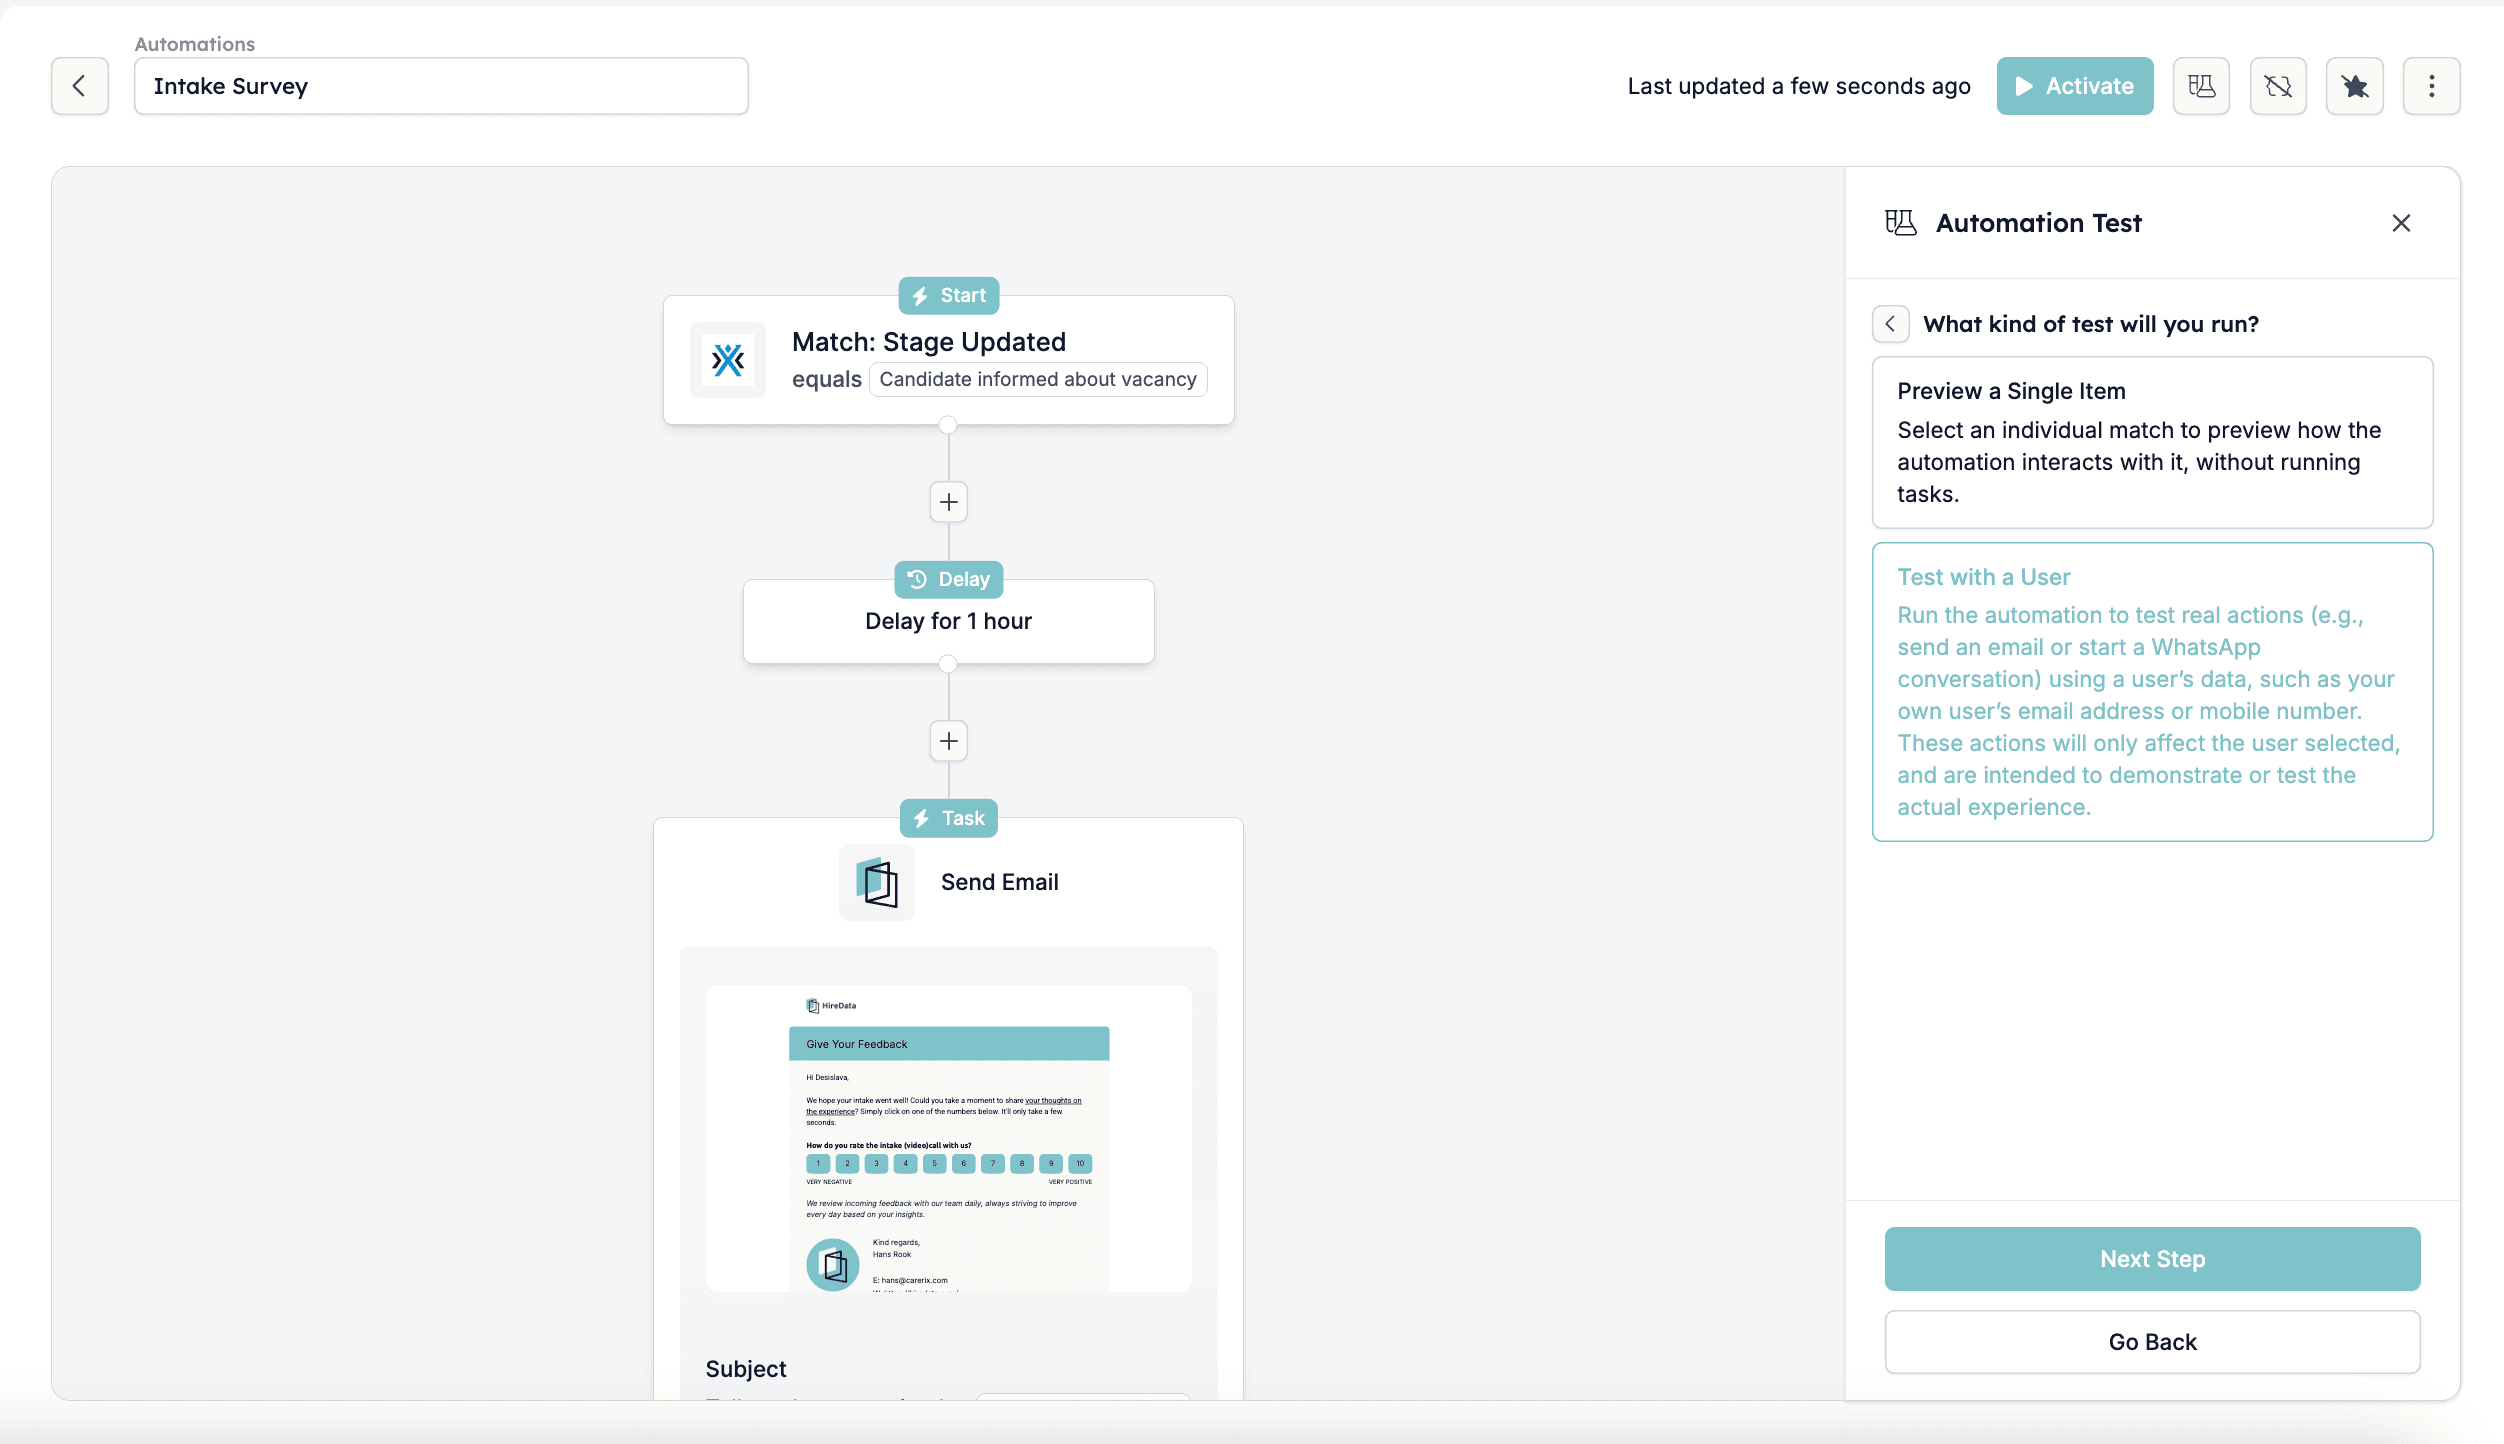
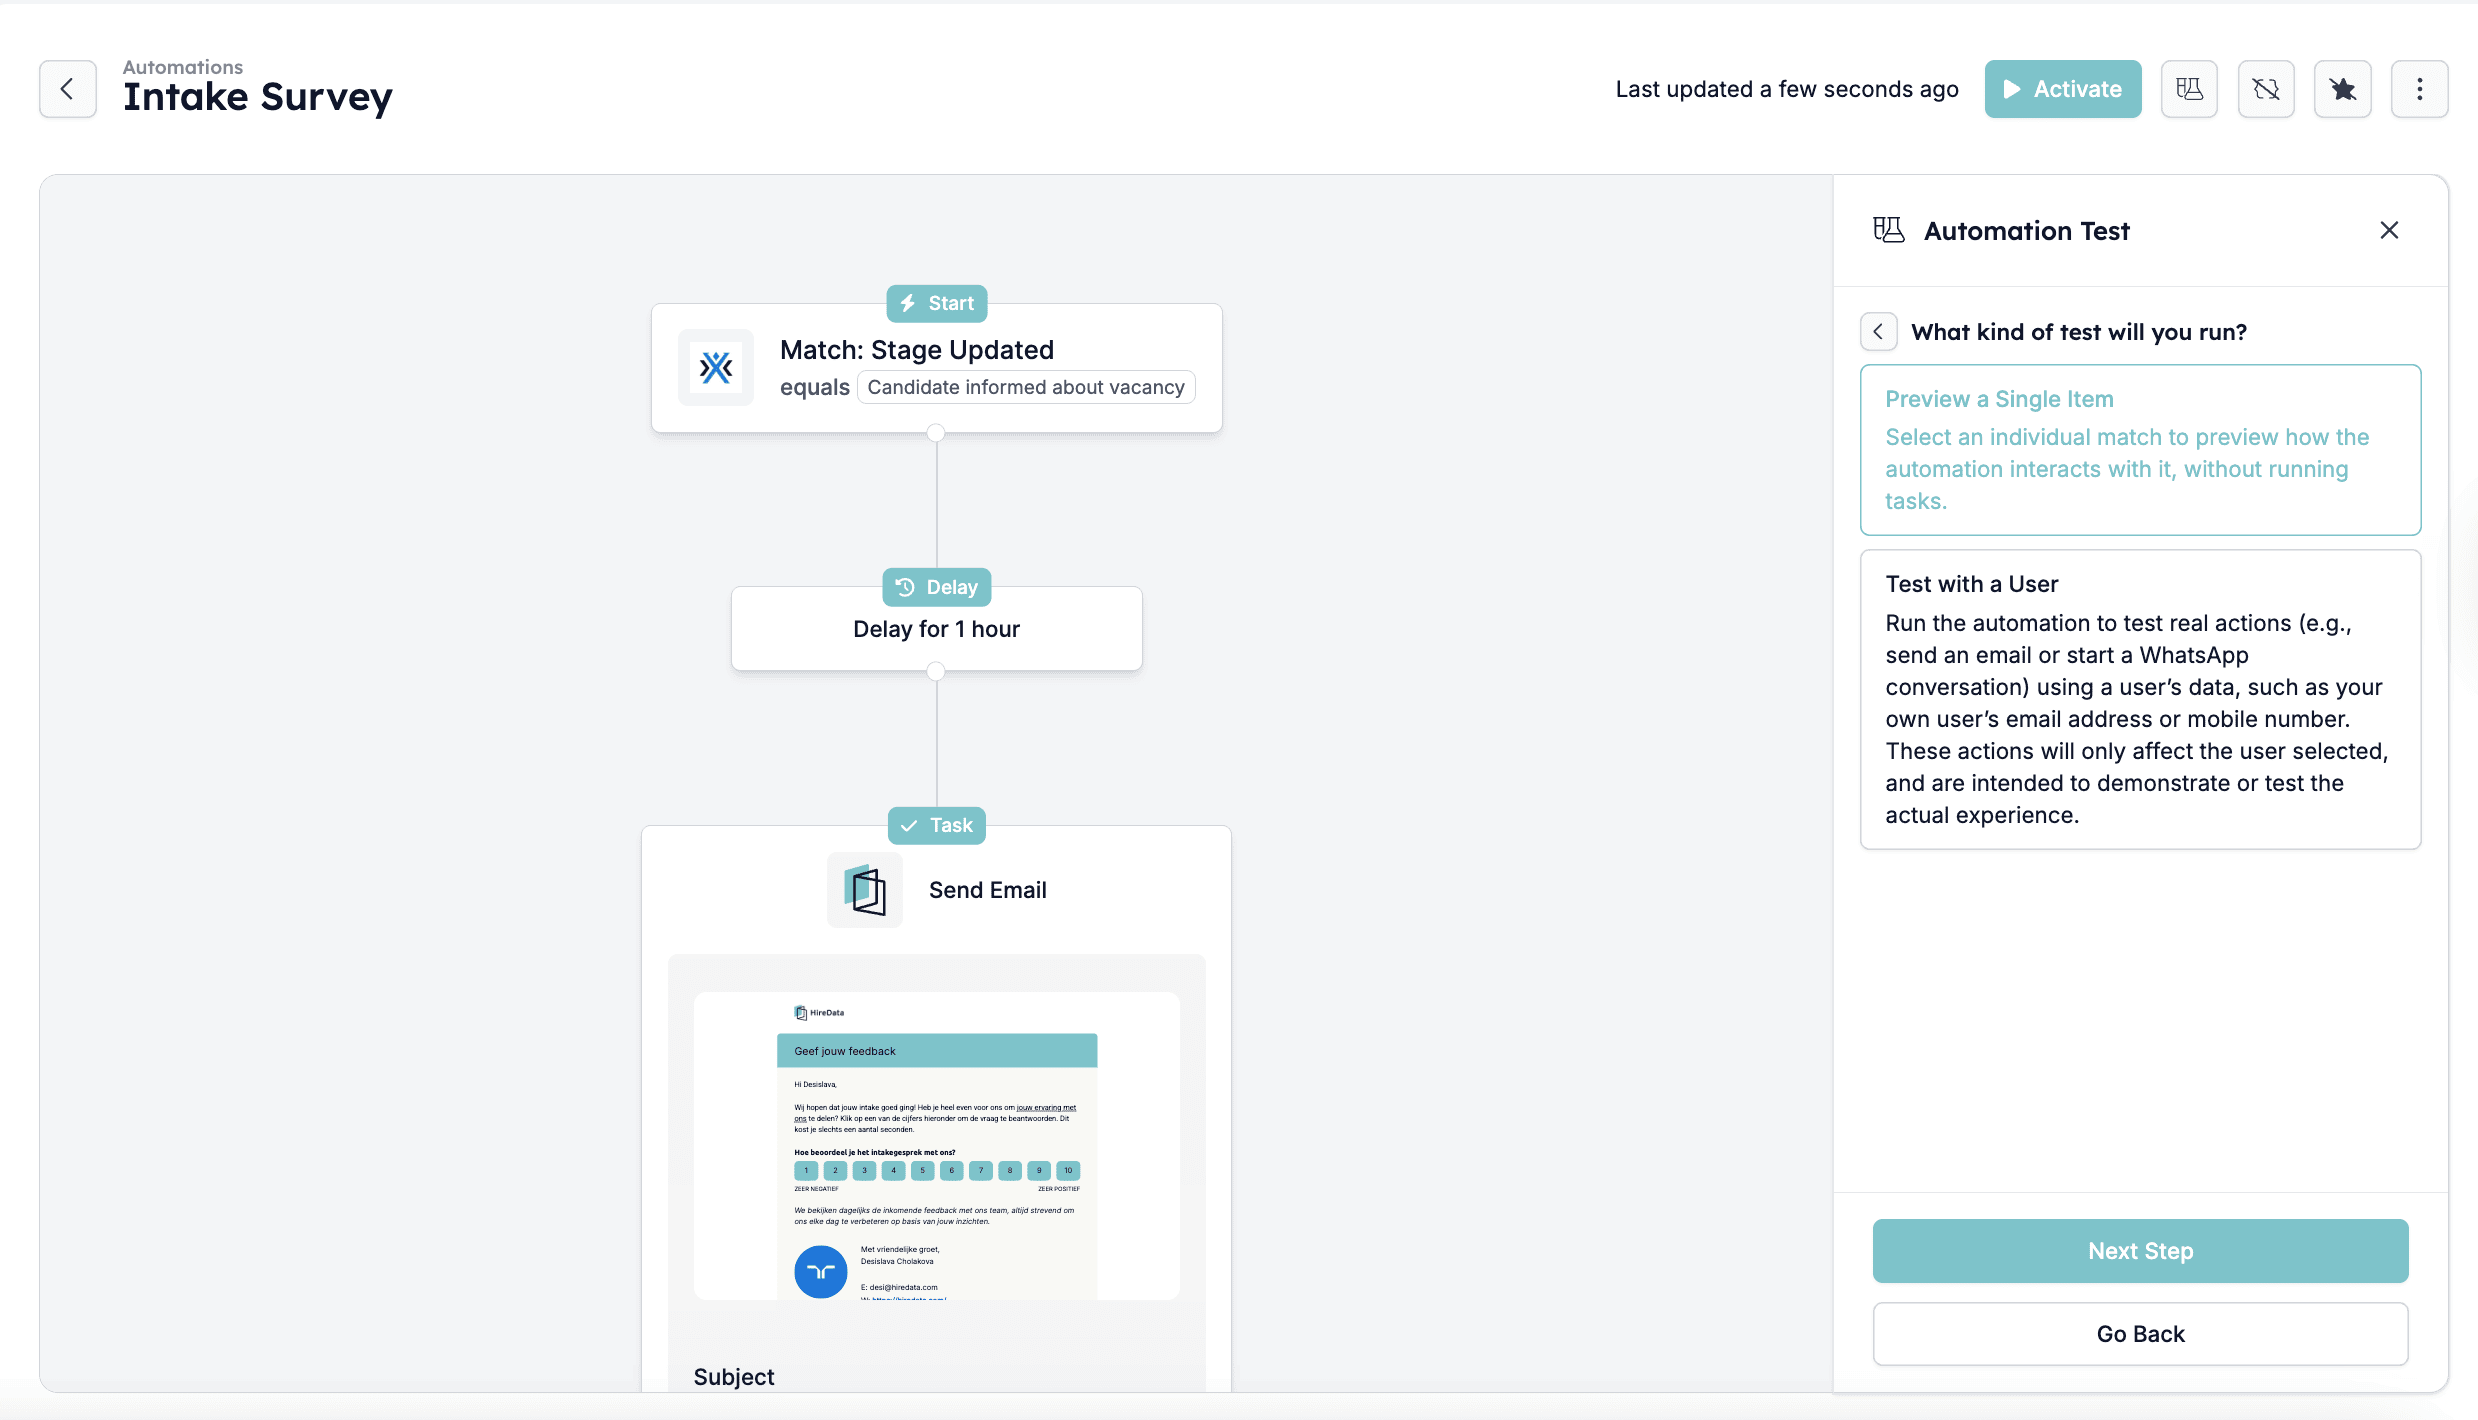
 You will be given two options:
* **Test with a User**: This runs the automation using real user data, such as an email address or phone number, to simulate the actual experience of, for example, sending an email or starting a WhatsApp conversation.
* **Preview a Single Item**: This allows you to see how the automation would process an individual item without actually running tasks.
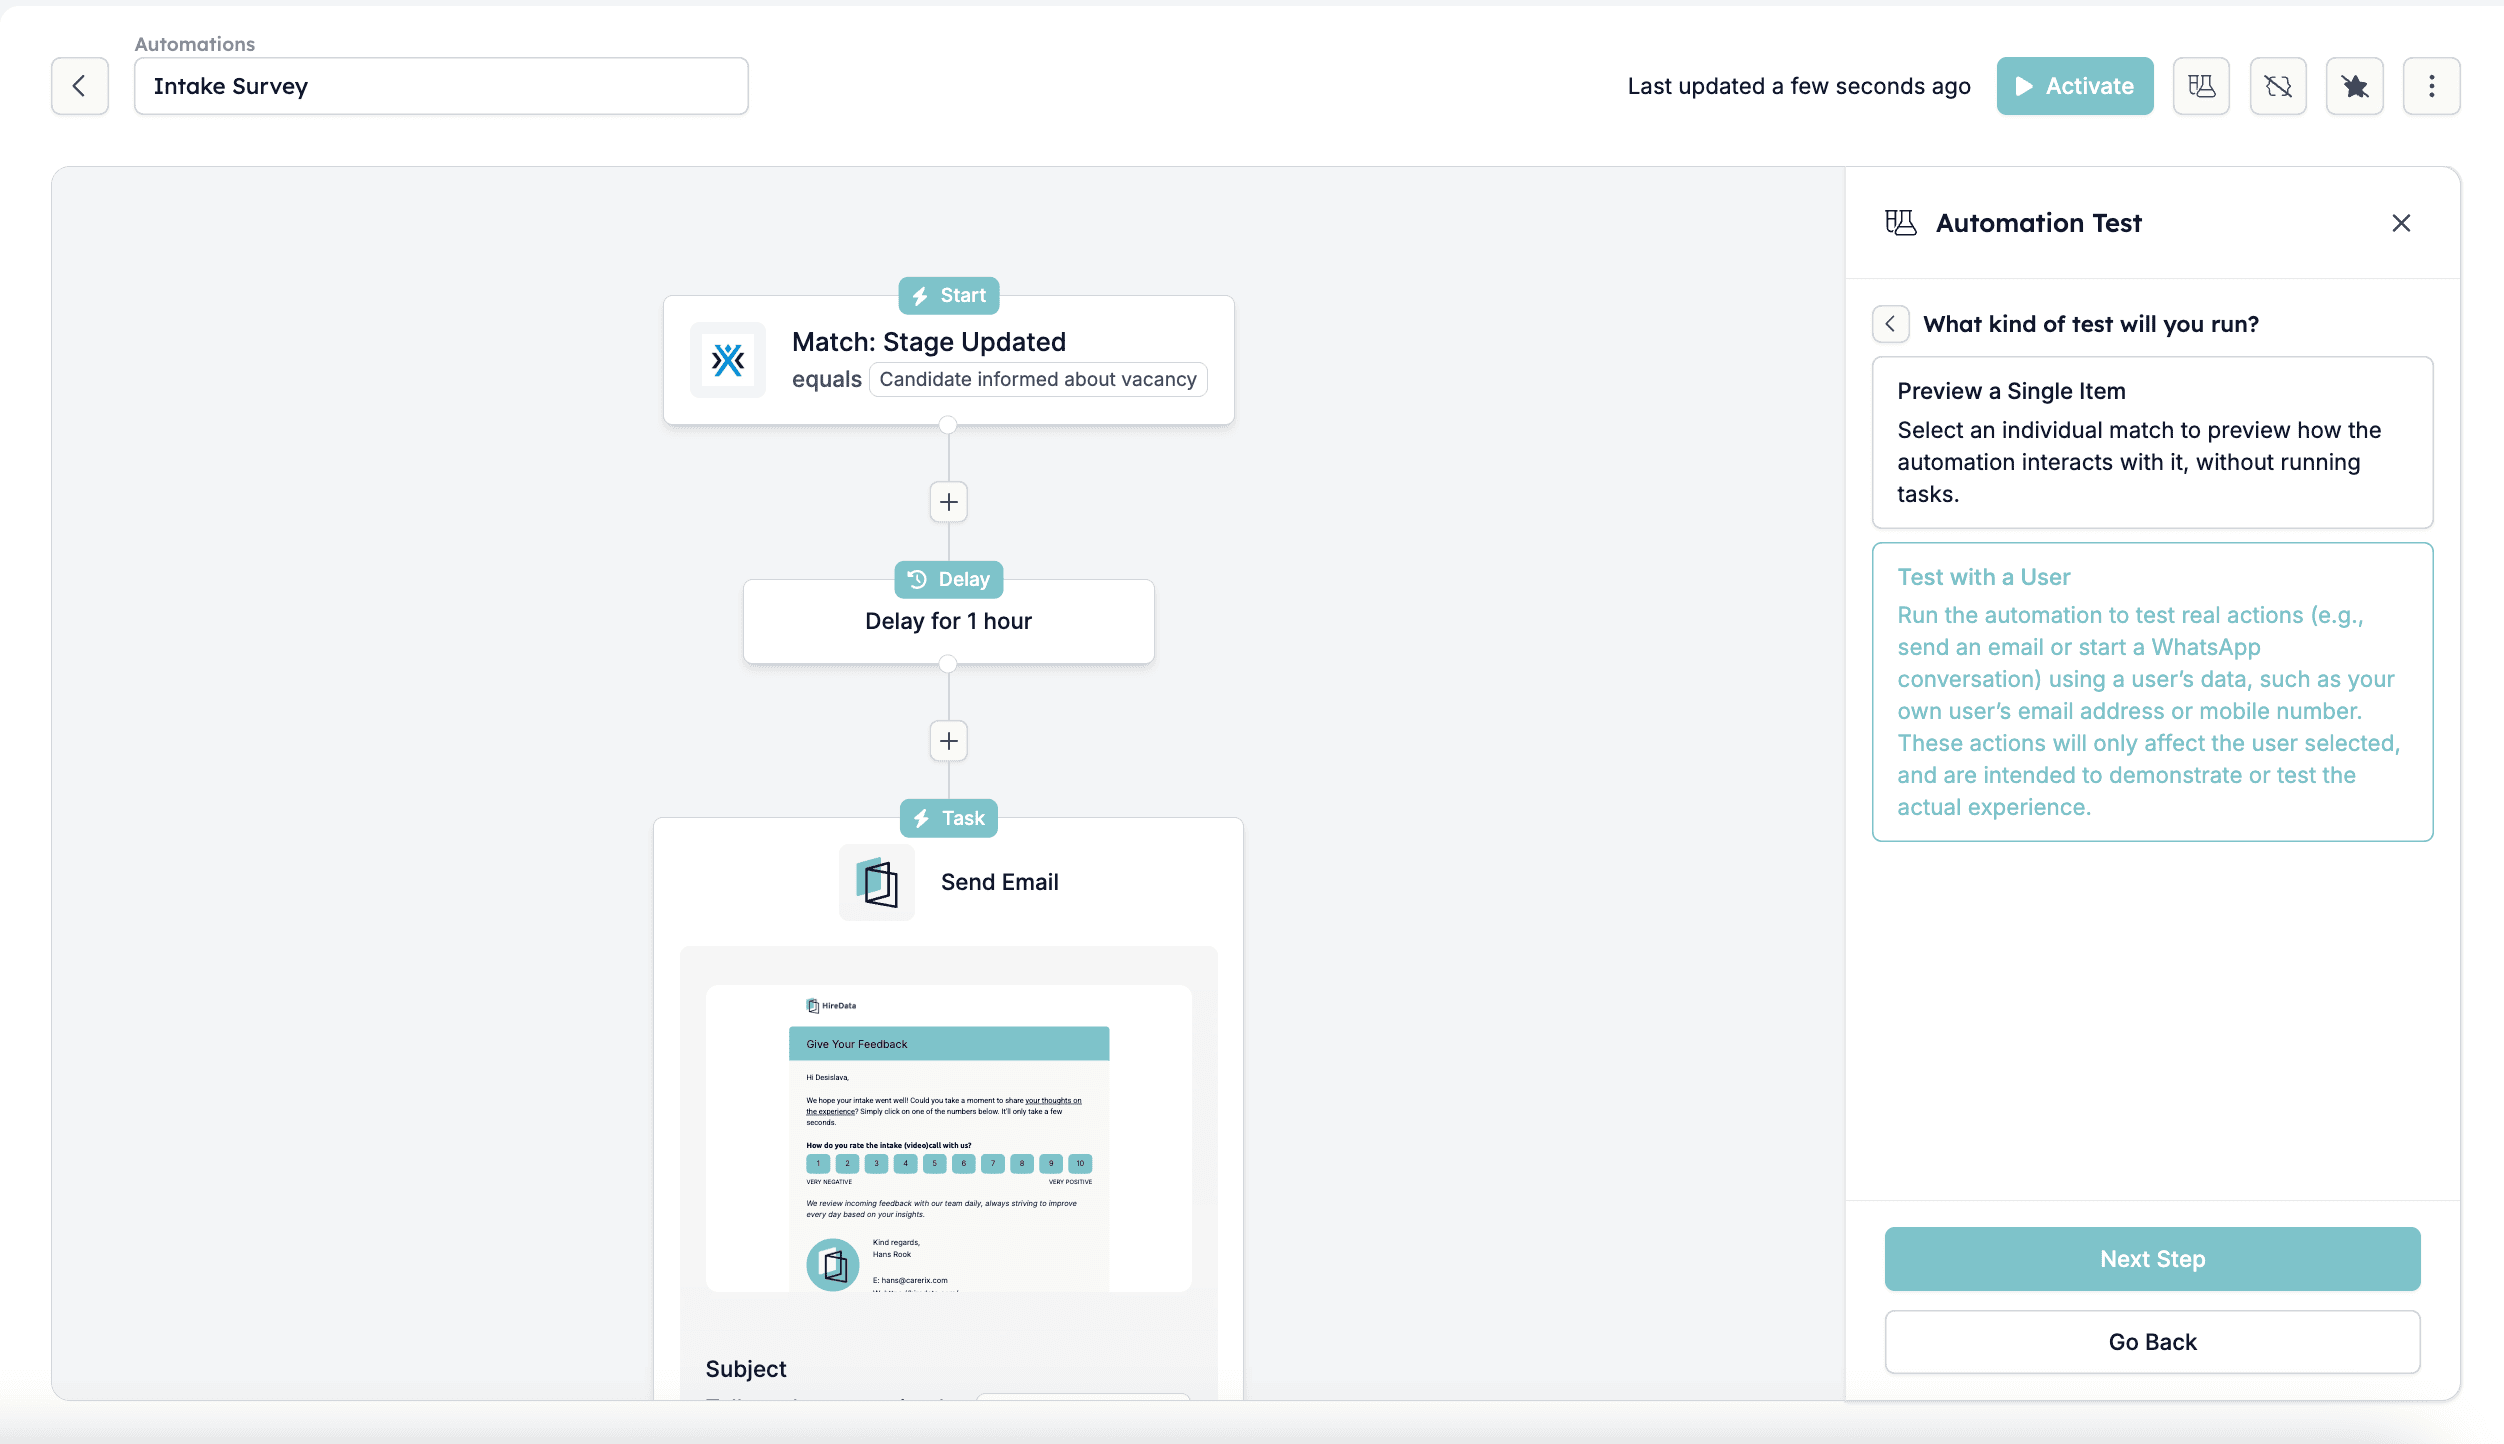
You will be given two options:
* **Test with a User**: This runs the automation using real user data, such as an email address or phone number, to simulate the actual experience of, for example, sending an email or starting a WhatsApp conversation.
* **Preview a Single Item**: This allows you to see how the automation would process an individual item without actually running tasks.
 ## Testing with a user
This is the better choice if you want to see the whole experience of running an automation.
## Testing with a user
This is the better choice if you want to see the whole experience of running an automation.
 ### Step 1: Choose the user whose data will be used for testing
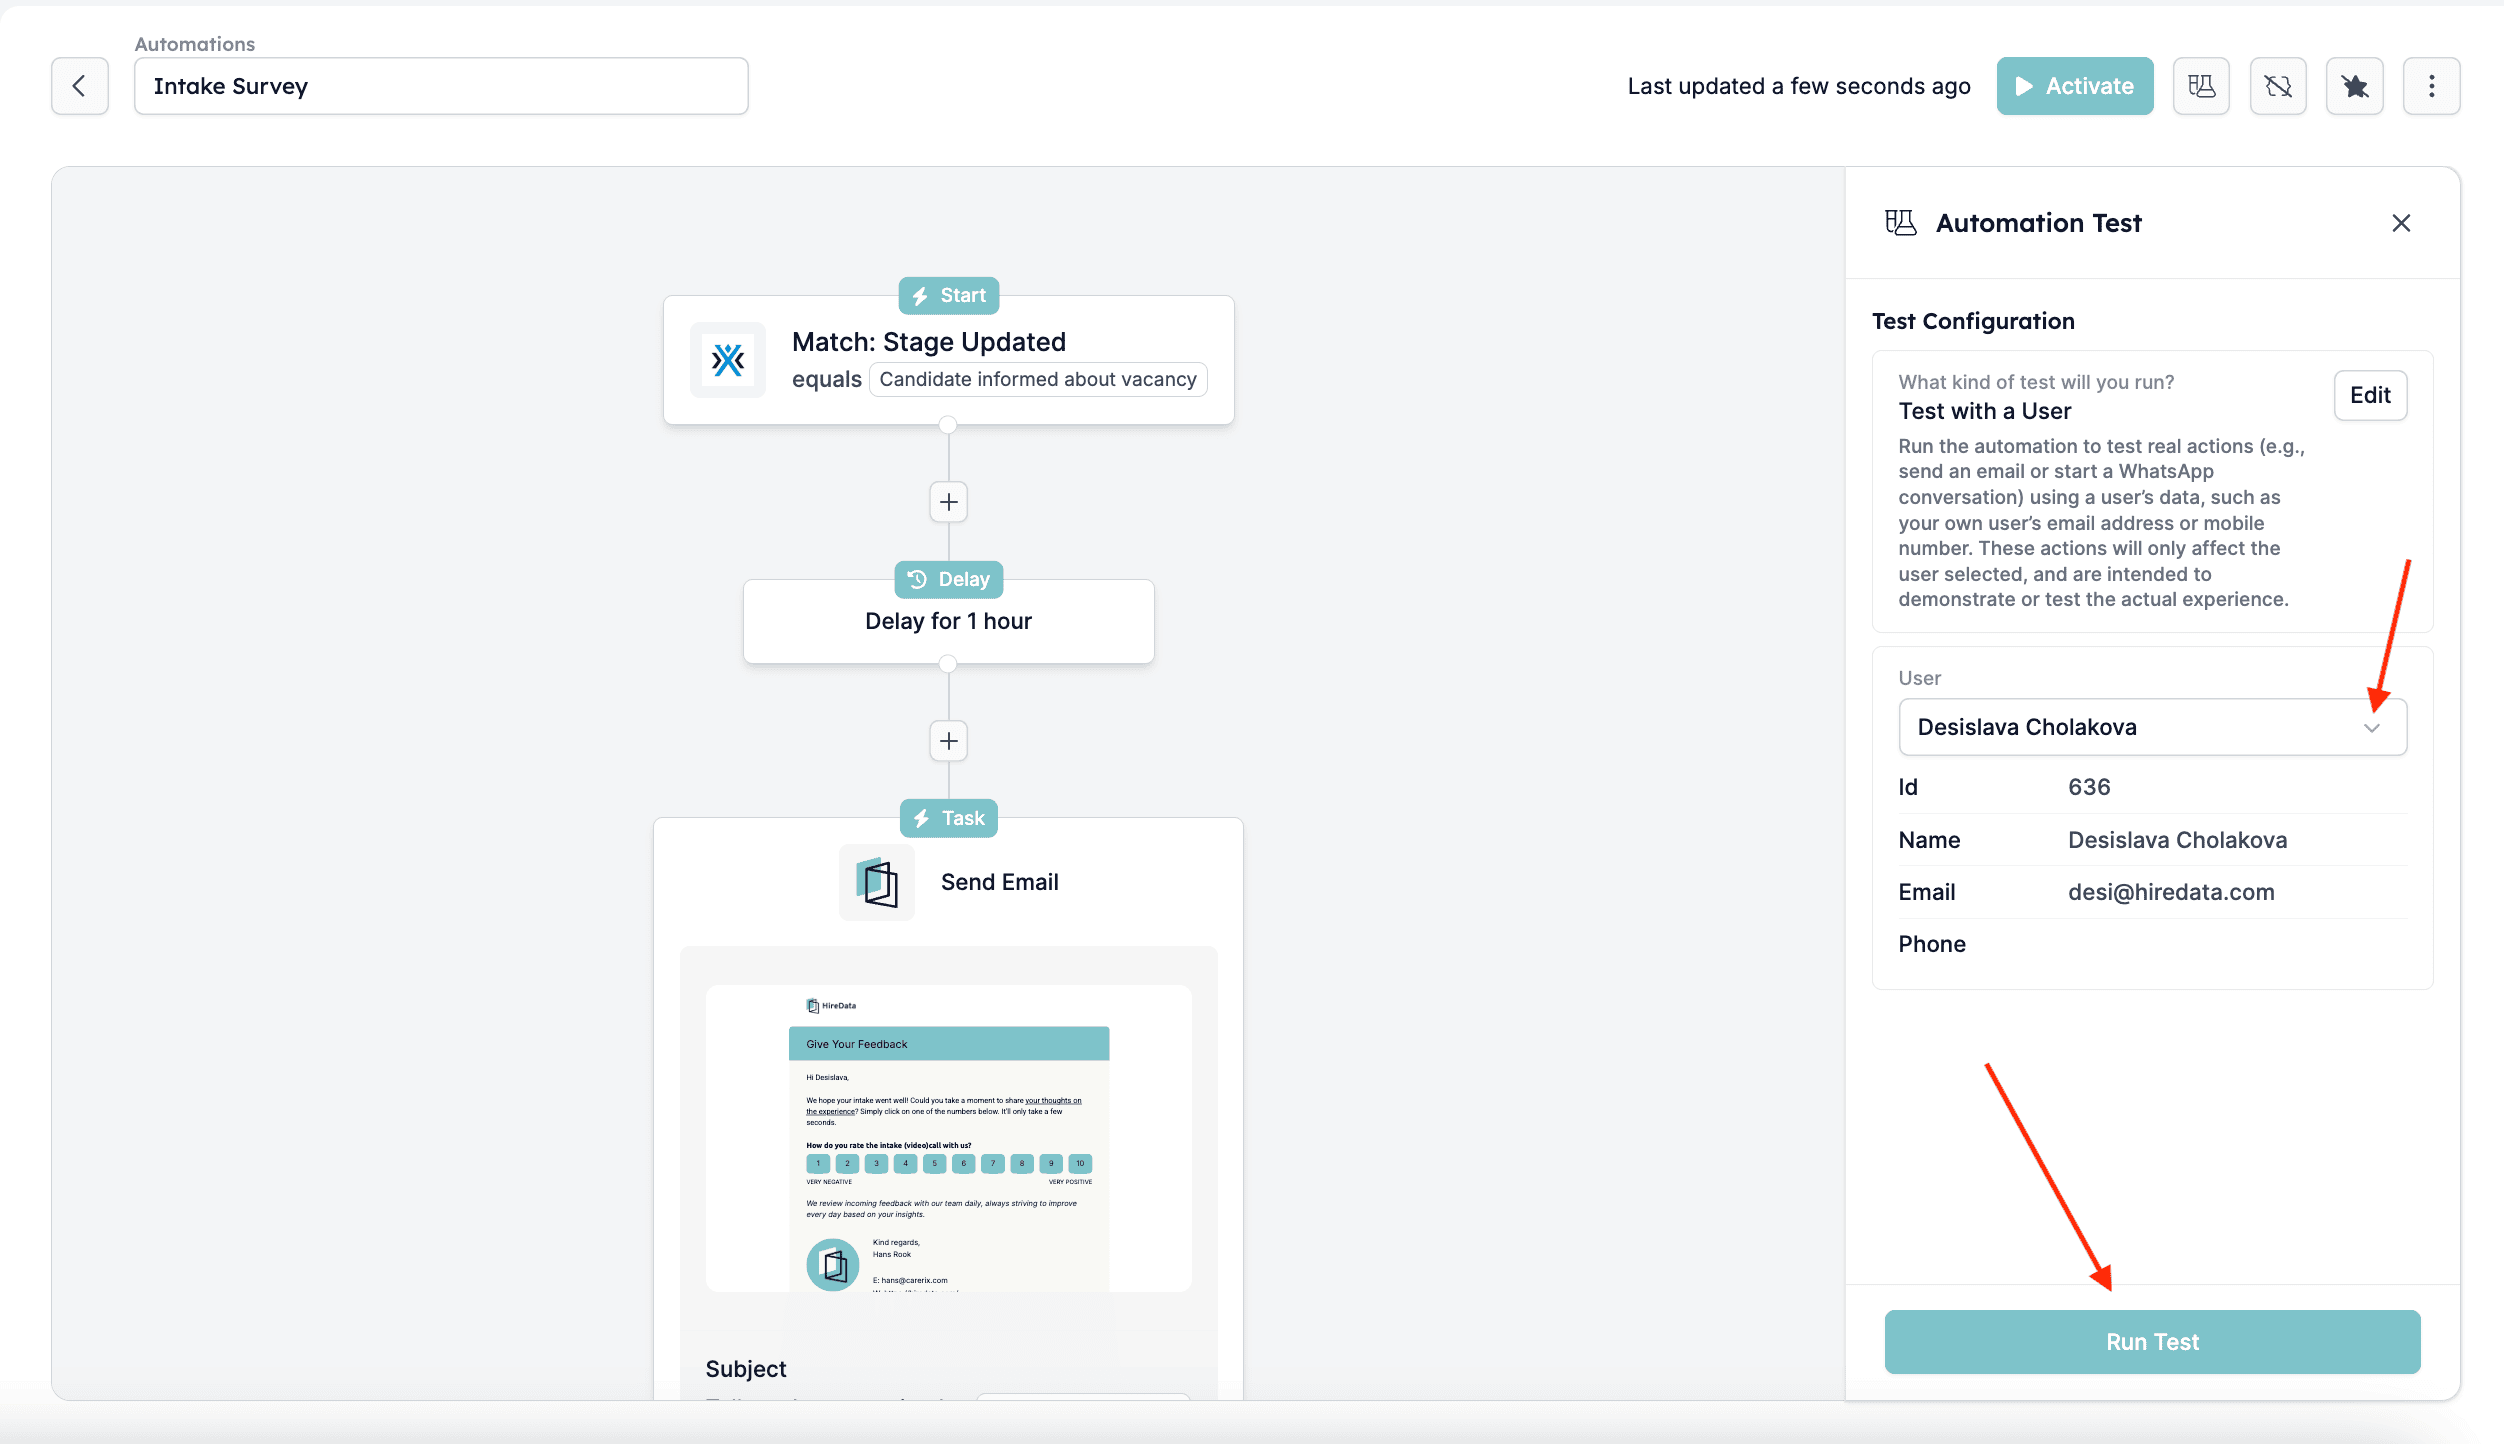
This user will receive emails or messages as if the automation was live. Once selected from the drop-down menu, click \[Run Test] to initiate the process.
### Step 1: Choose the user whose data will be used for testing
This user will receive emails or messages as if the automation was live. Once selected from the drop-down menu, click \[Run Test] to initiate the process.
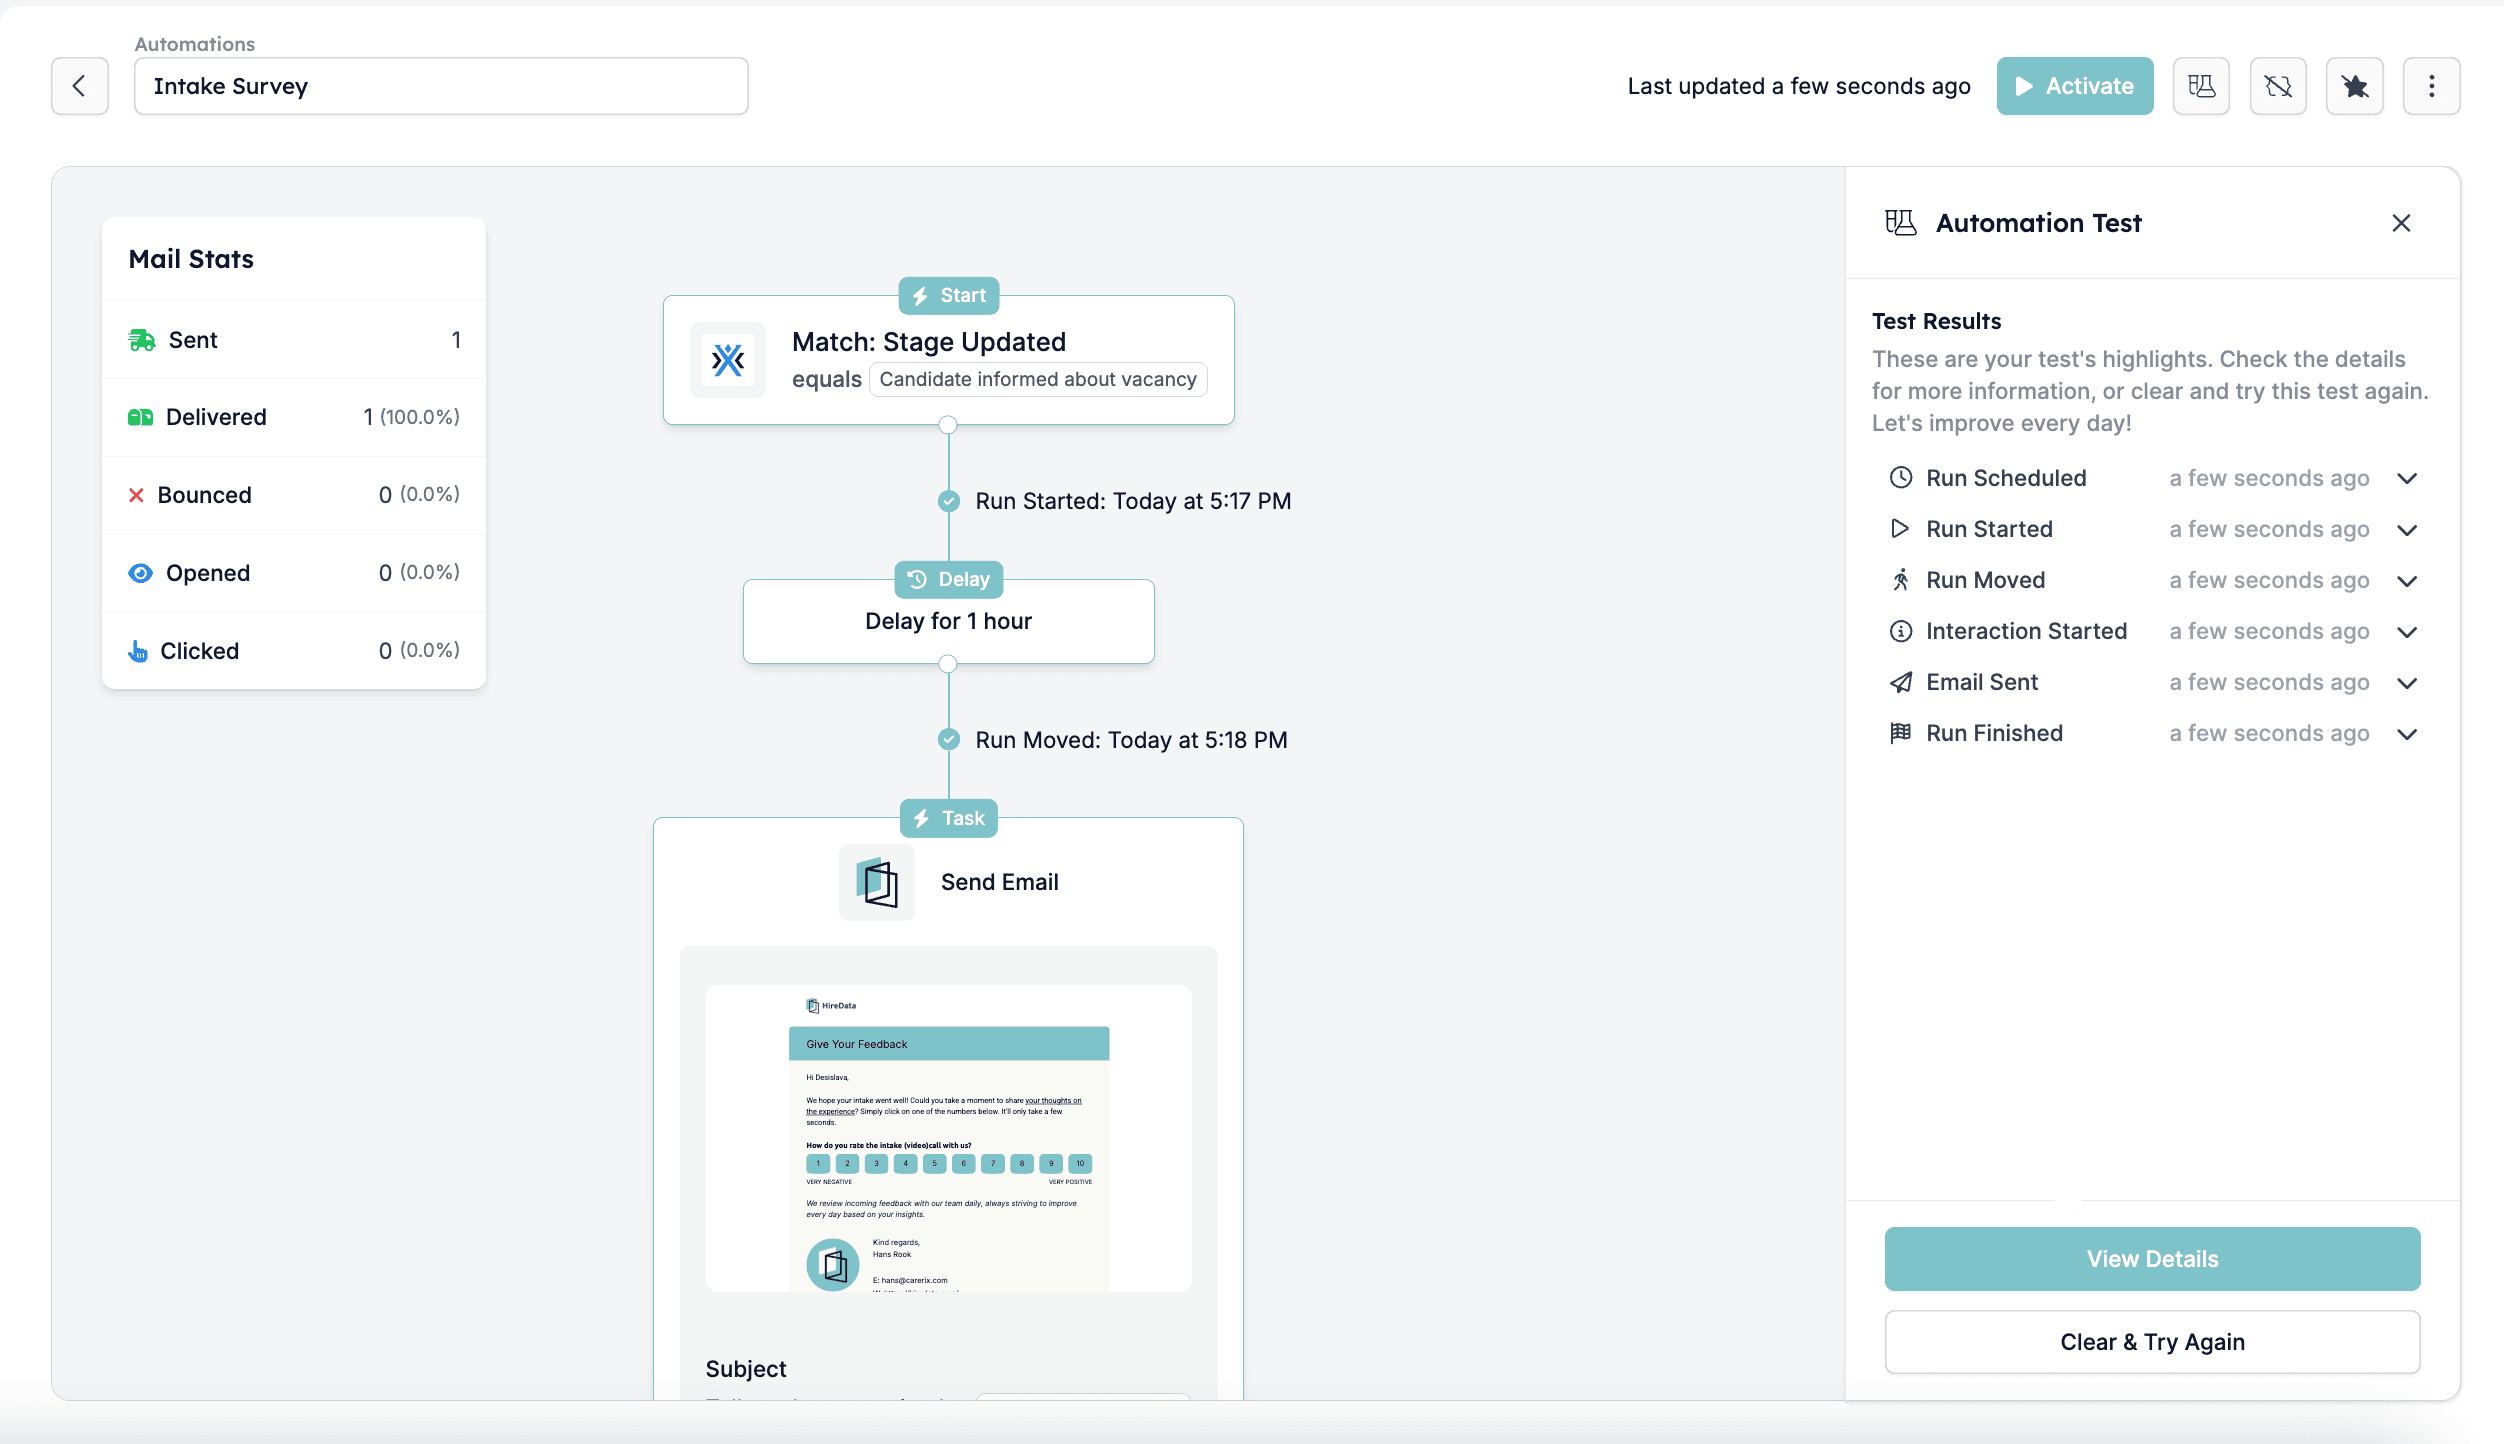
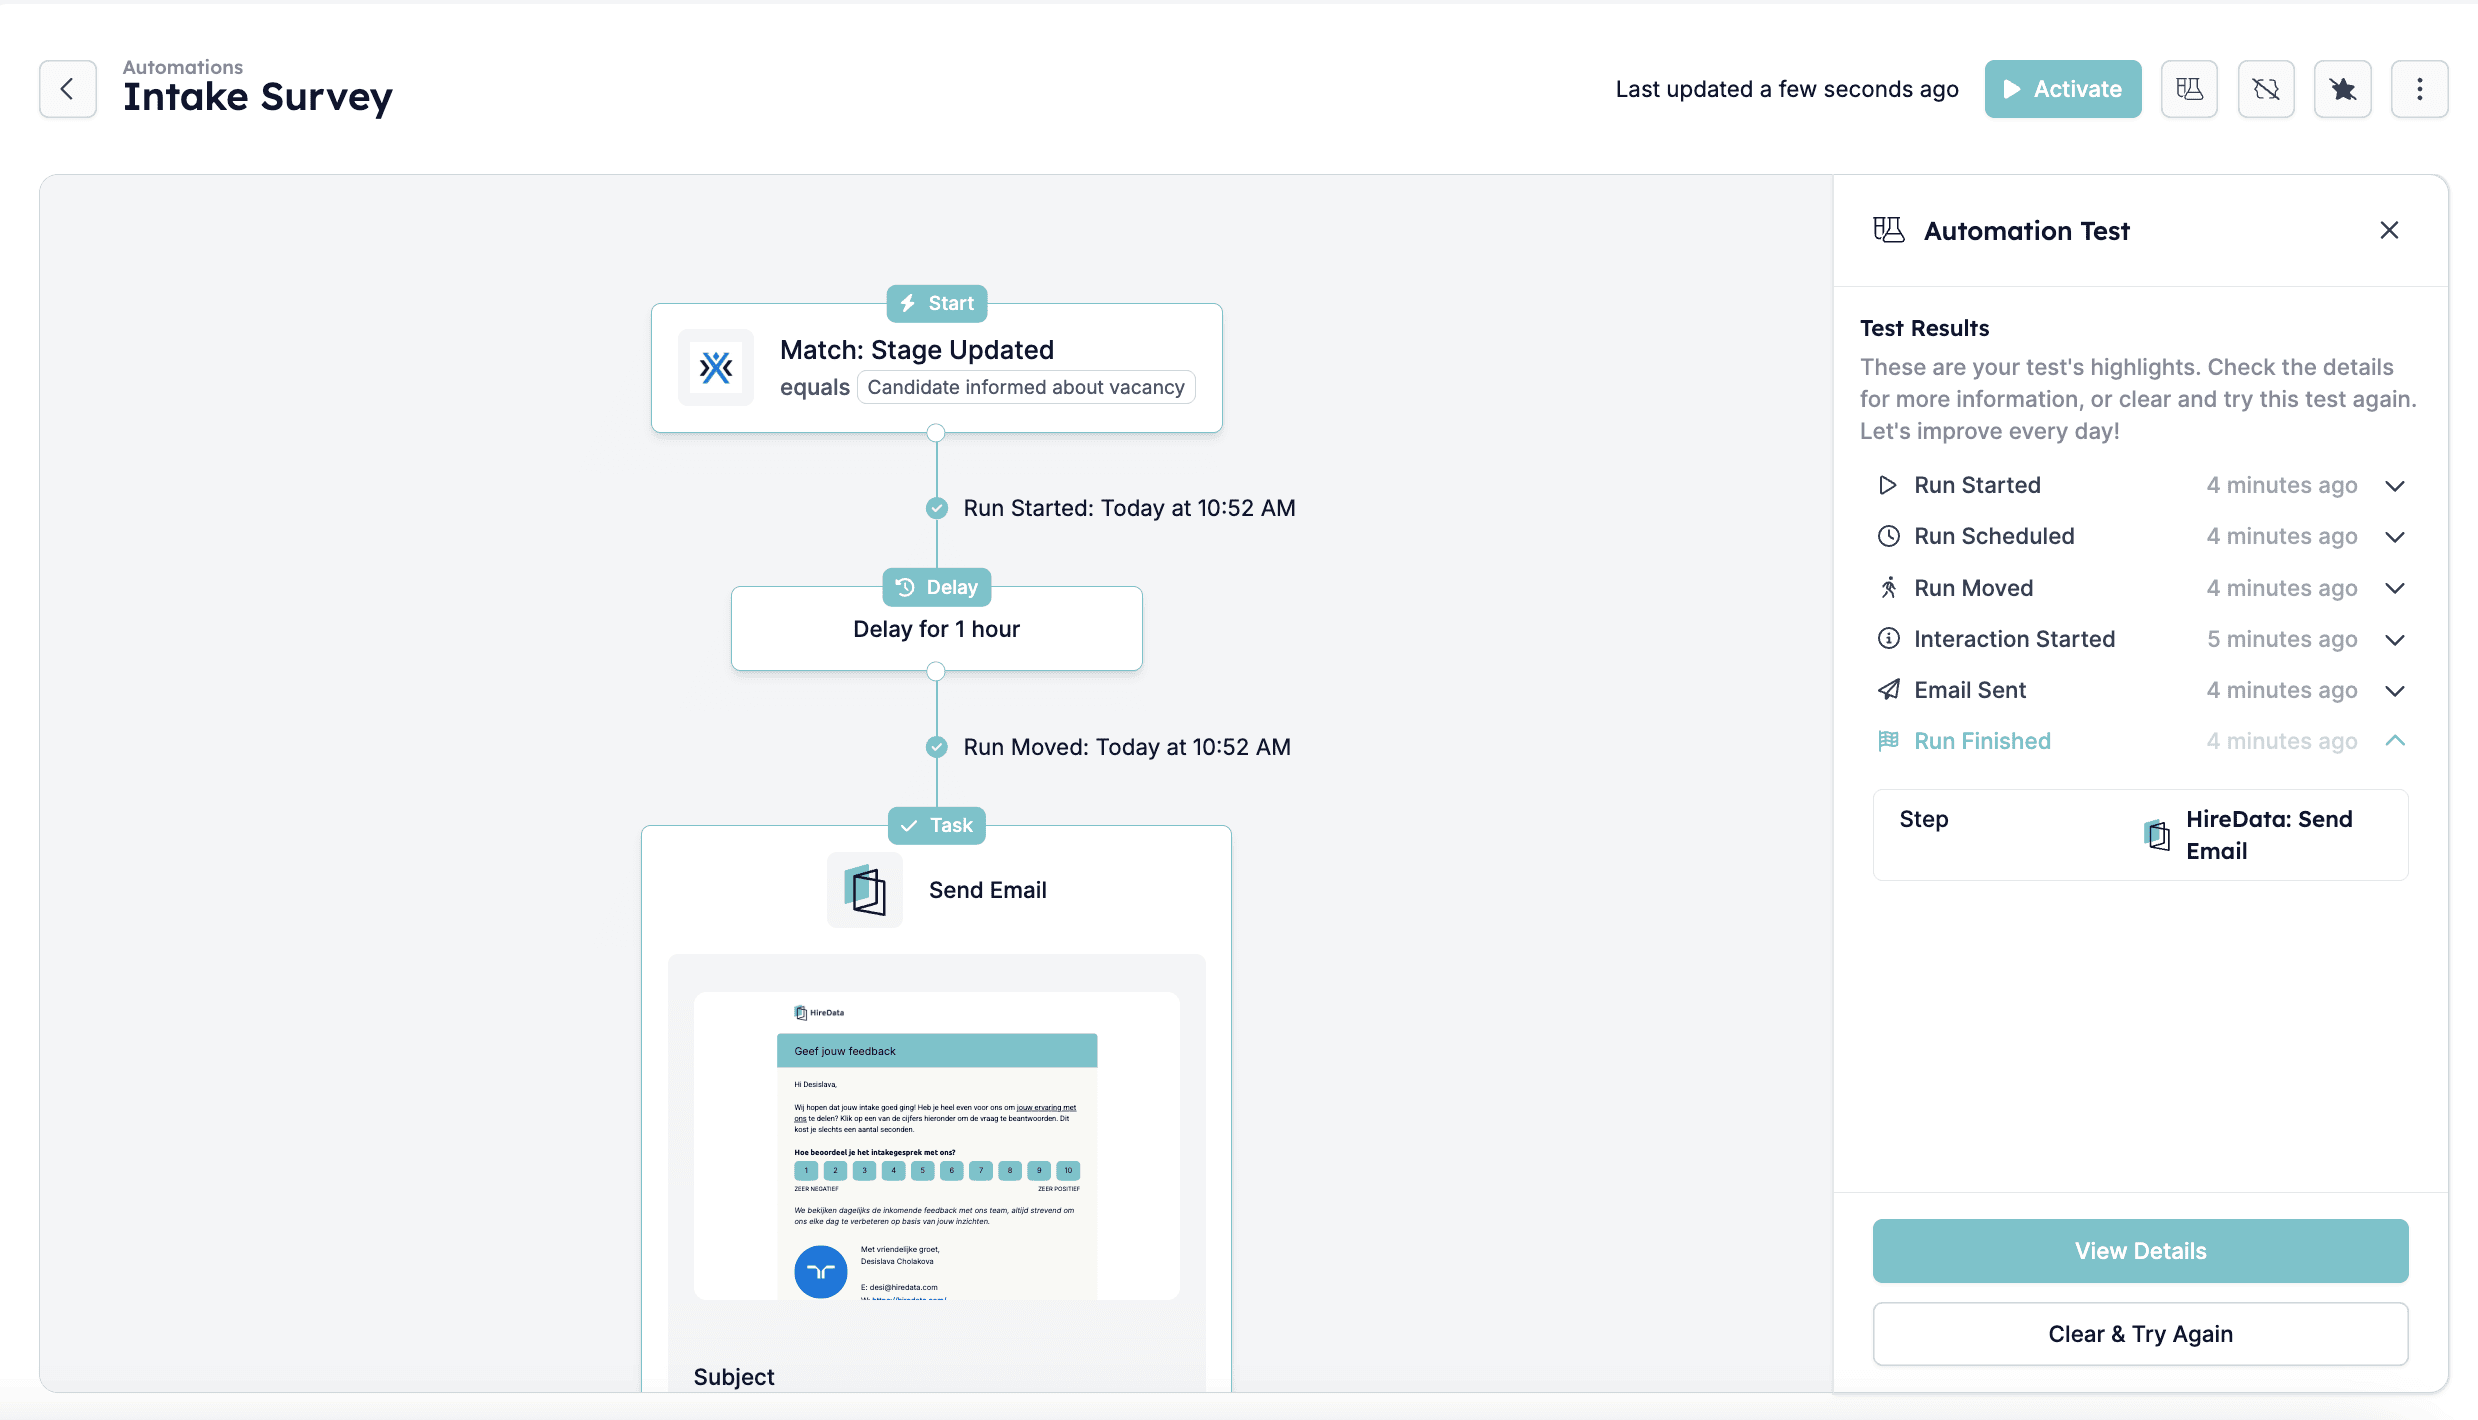
 ### Step 2: Monitor the Timeline
The system will display a timeline of each step of the automation as it runs. You will see alerts such as:
* Run Scheduled
* Run Started
* Interaction Started
* Email Sent (or other task execution)
* Run Finished
Wait for the test to complete and ensure all steps progress smoothly.
### Step 2: Monitor the Timeline
The system will display a timeline of each step of the automation as it runs. You will see alerts such as:
* Run Scheduled
* Run Started
* Interaction Started
* Email Sent (or other task execution)
* Run Finished
Wait for the test to complete and ensure all steps progress smoothly.
 ### Step 3: Check the User’s Inbox
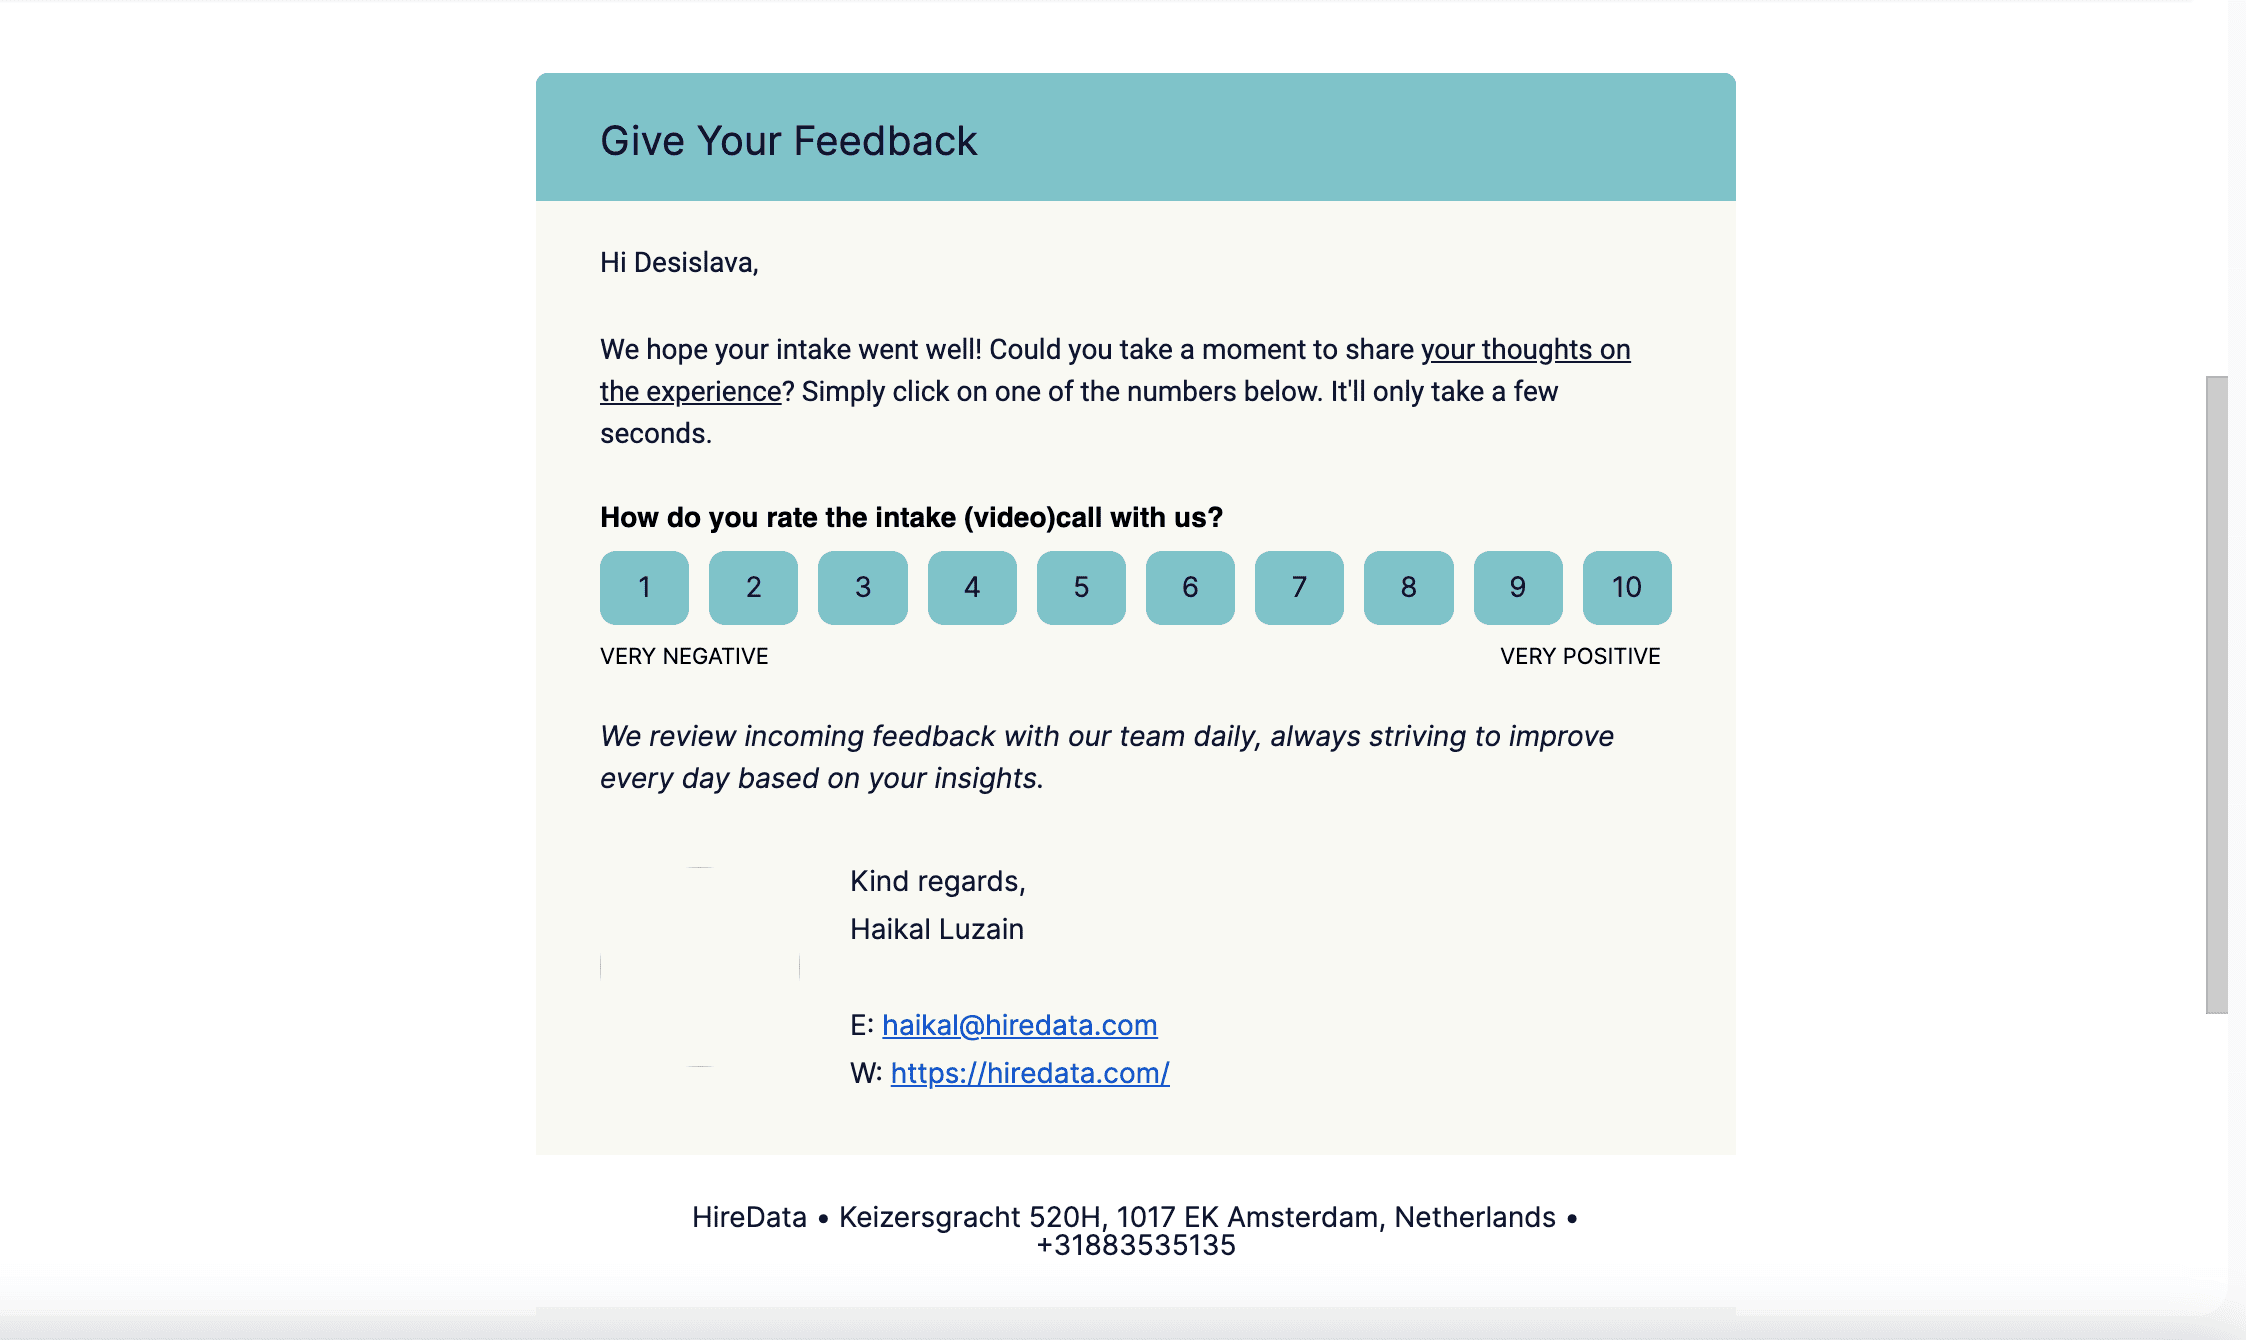
If the automation includes sending an email, go to the selected user's inbox (for example, yours) and verify that the email was delivered correctly.
* Check the formatting and content to ensure it appears as expected;
* Go through the form to ensure all questions are set up correctly.
### Step 3: Check the User’s Inbox
If the automation includes sending an email, go to the selected user's inbox (for example, yours) and verify that the email was delivered correctly.
* Check the formatting and content to ensure it appears as expected;
* Go through the form to ensure all questions are set up correctly.
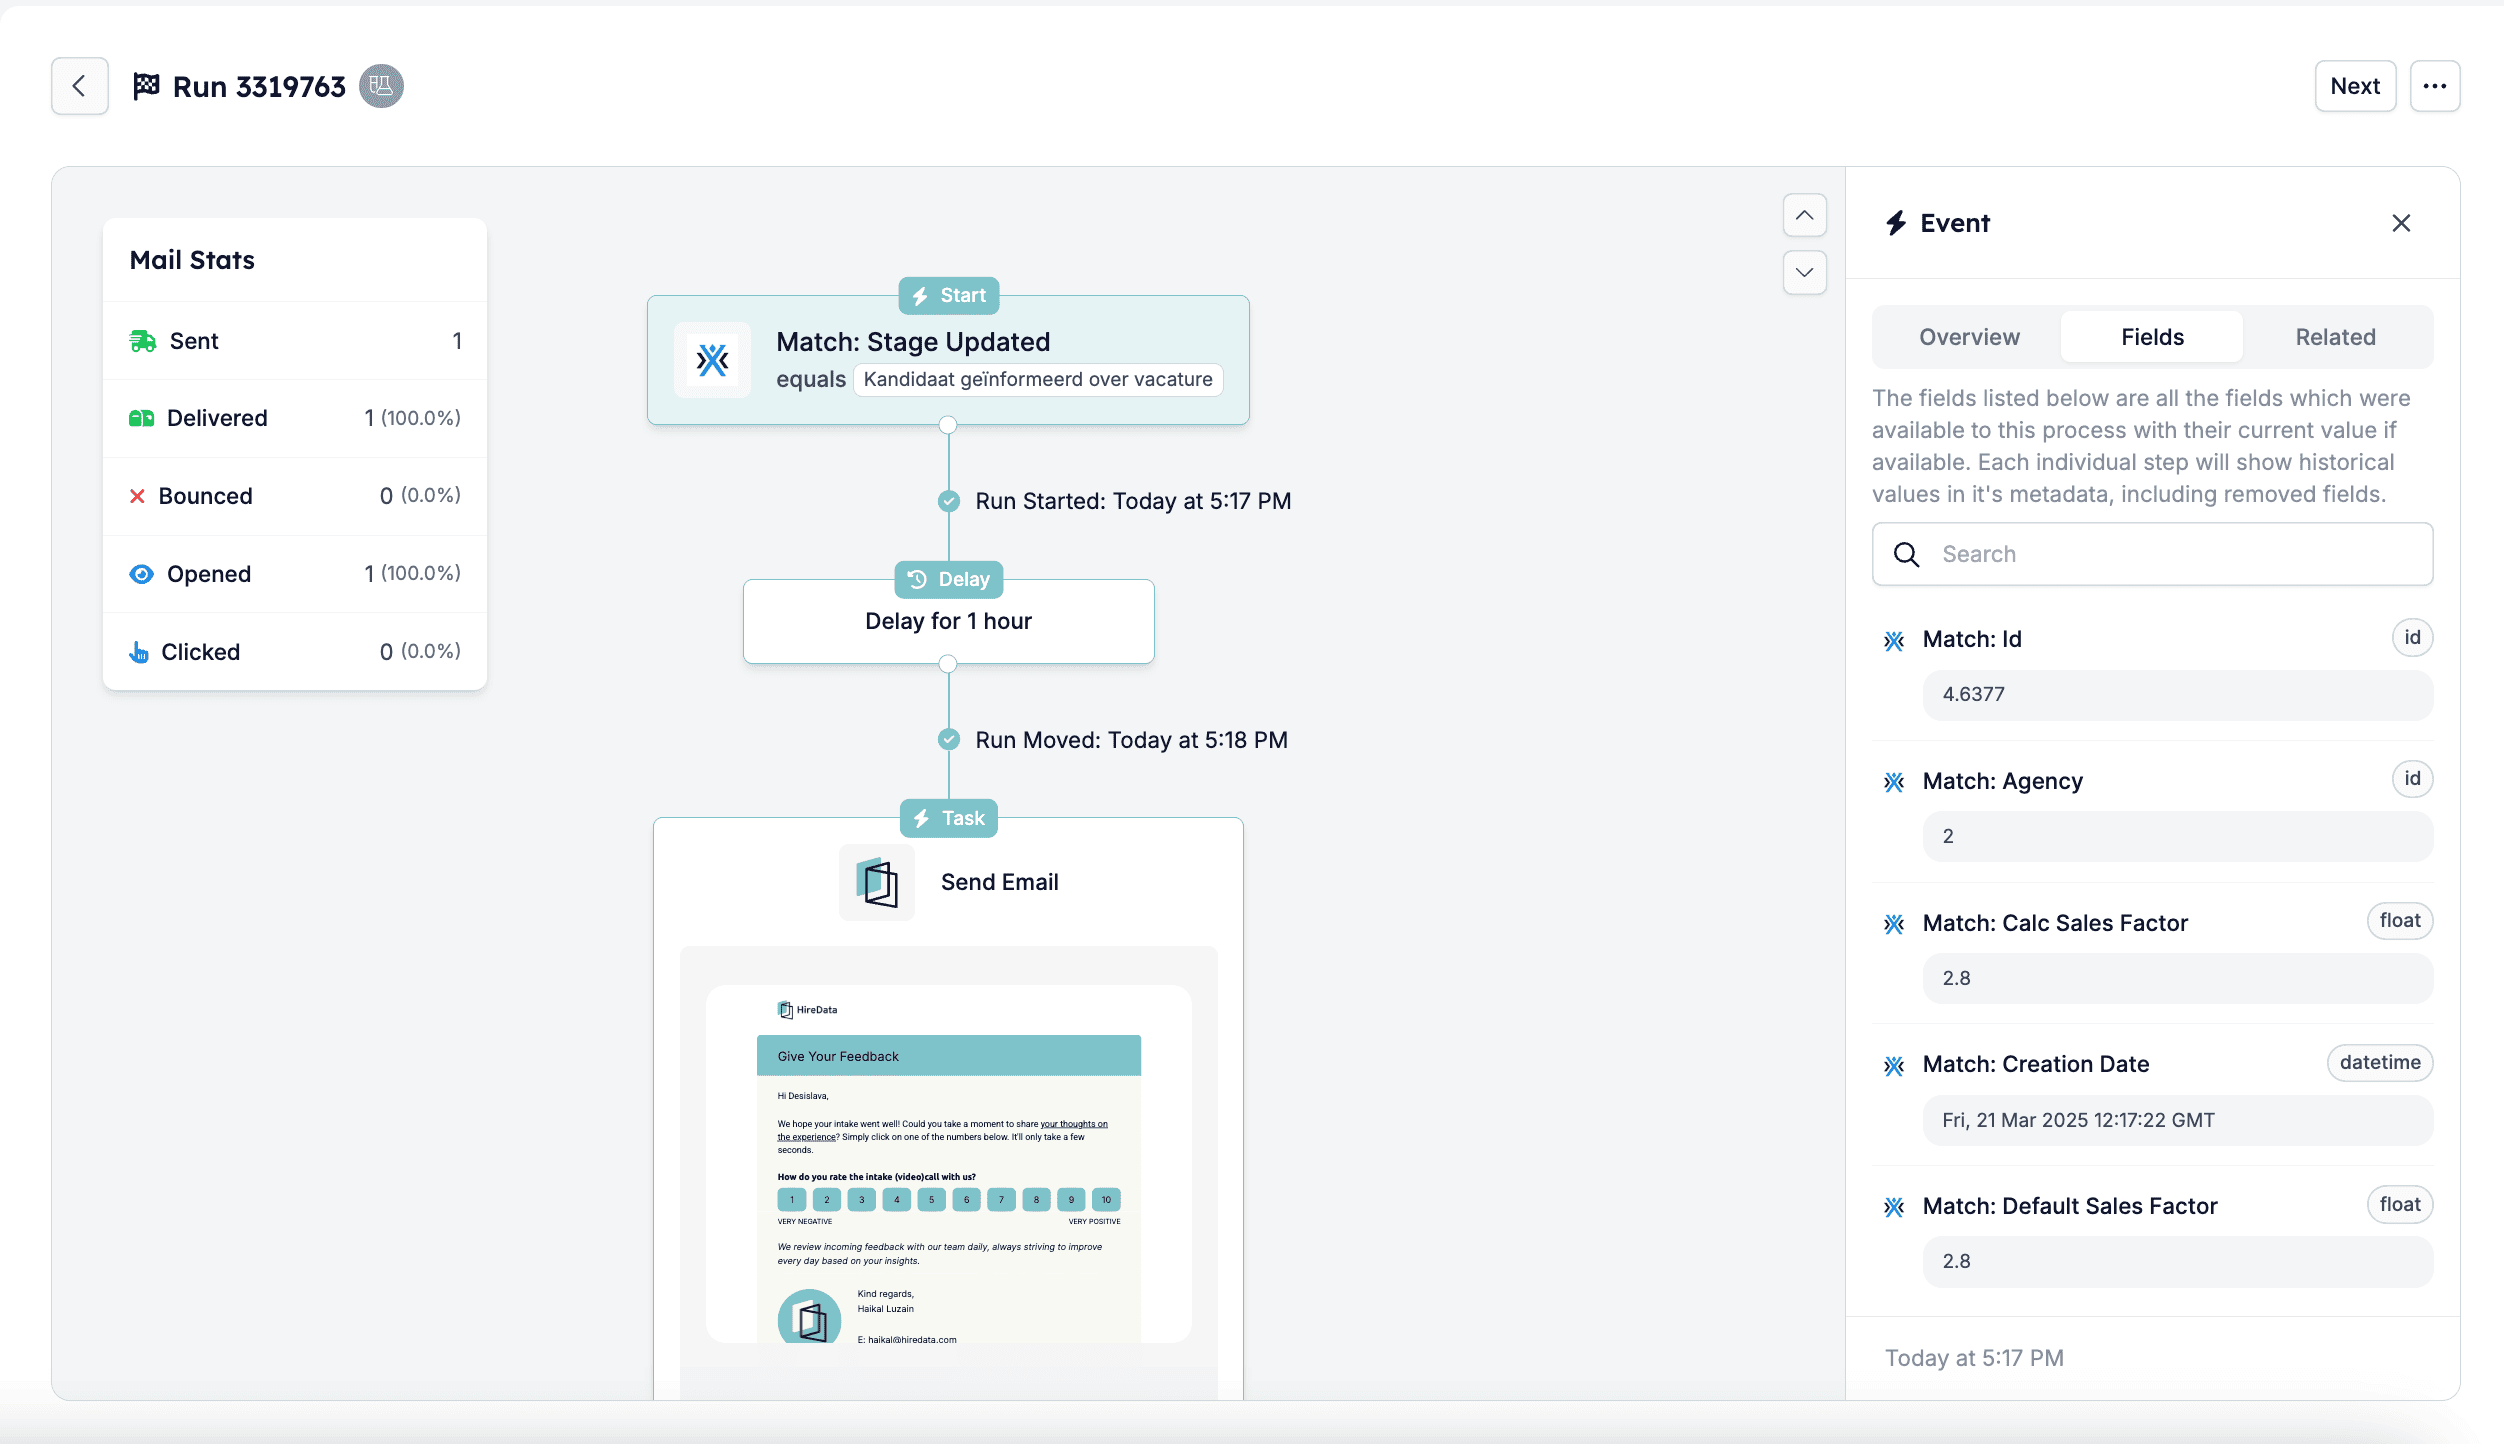
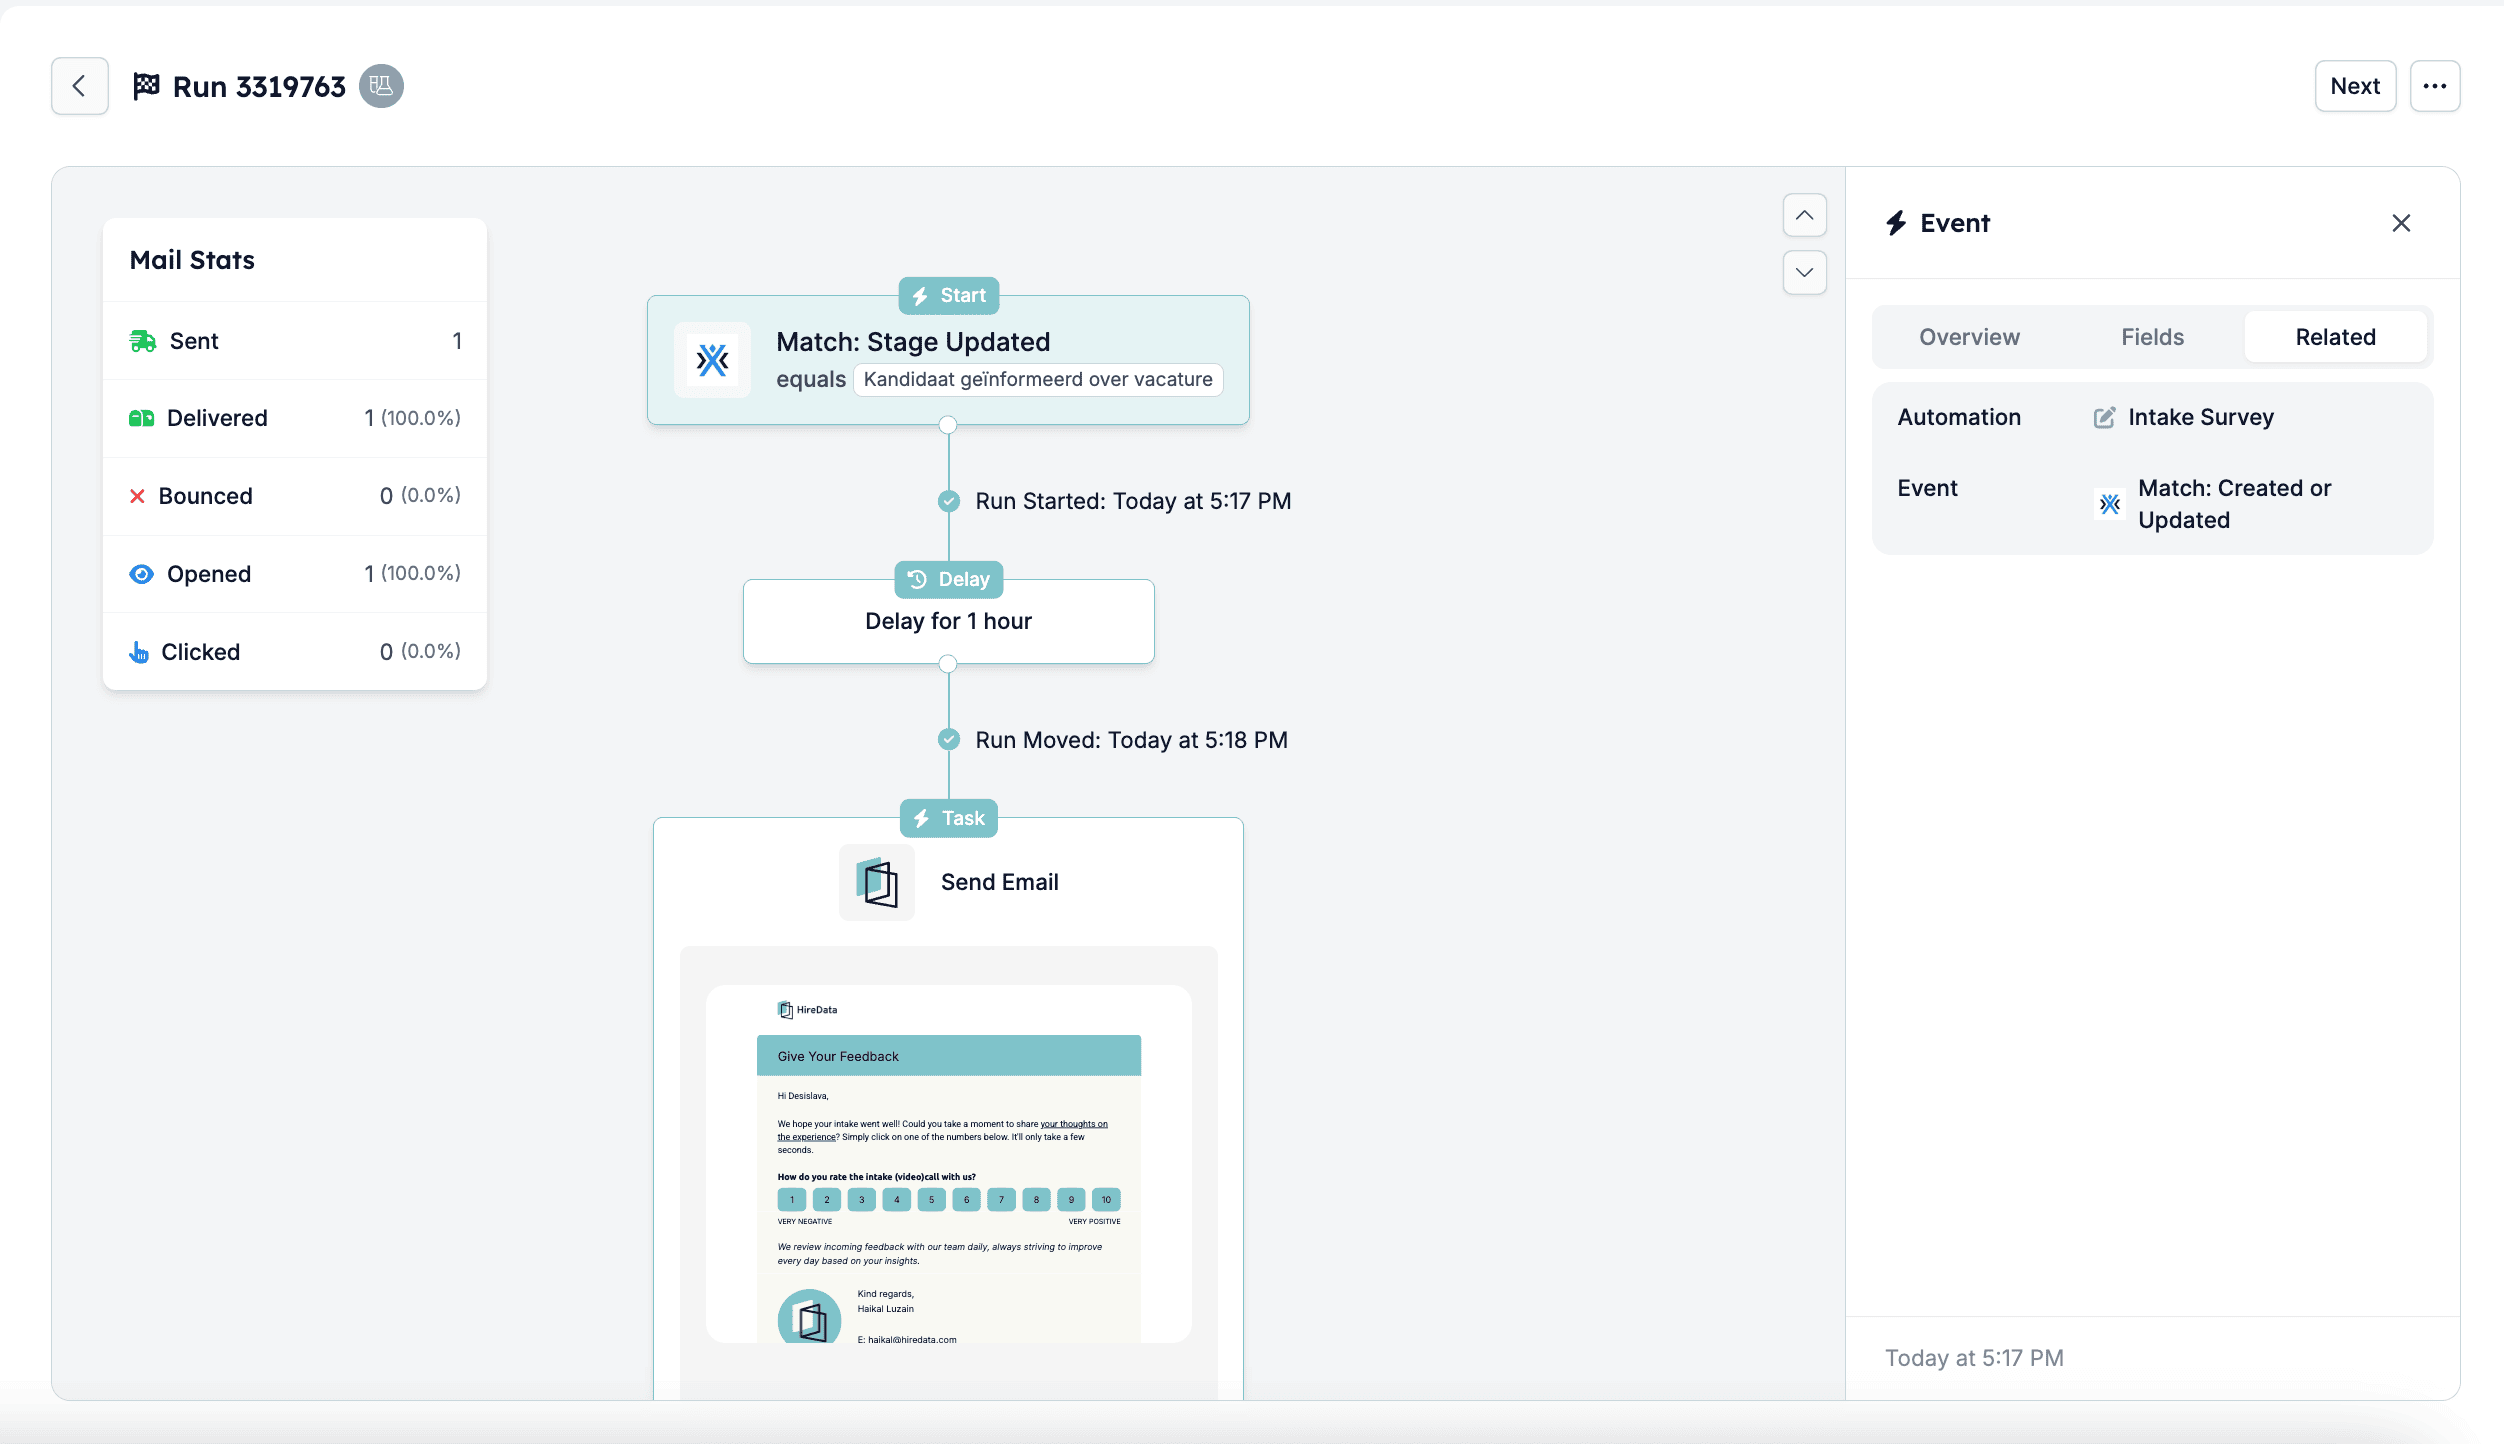
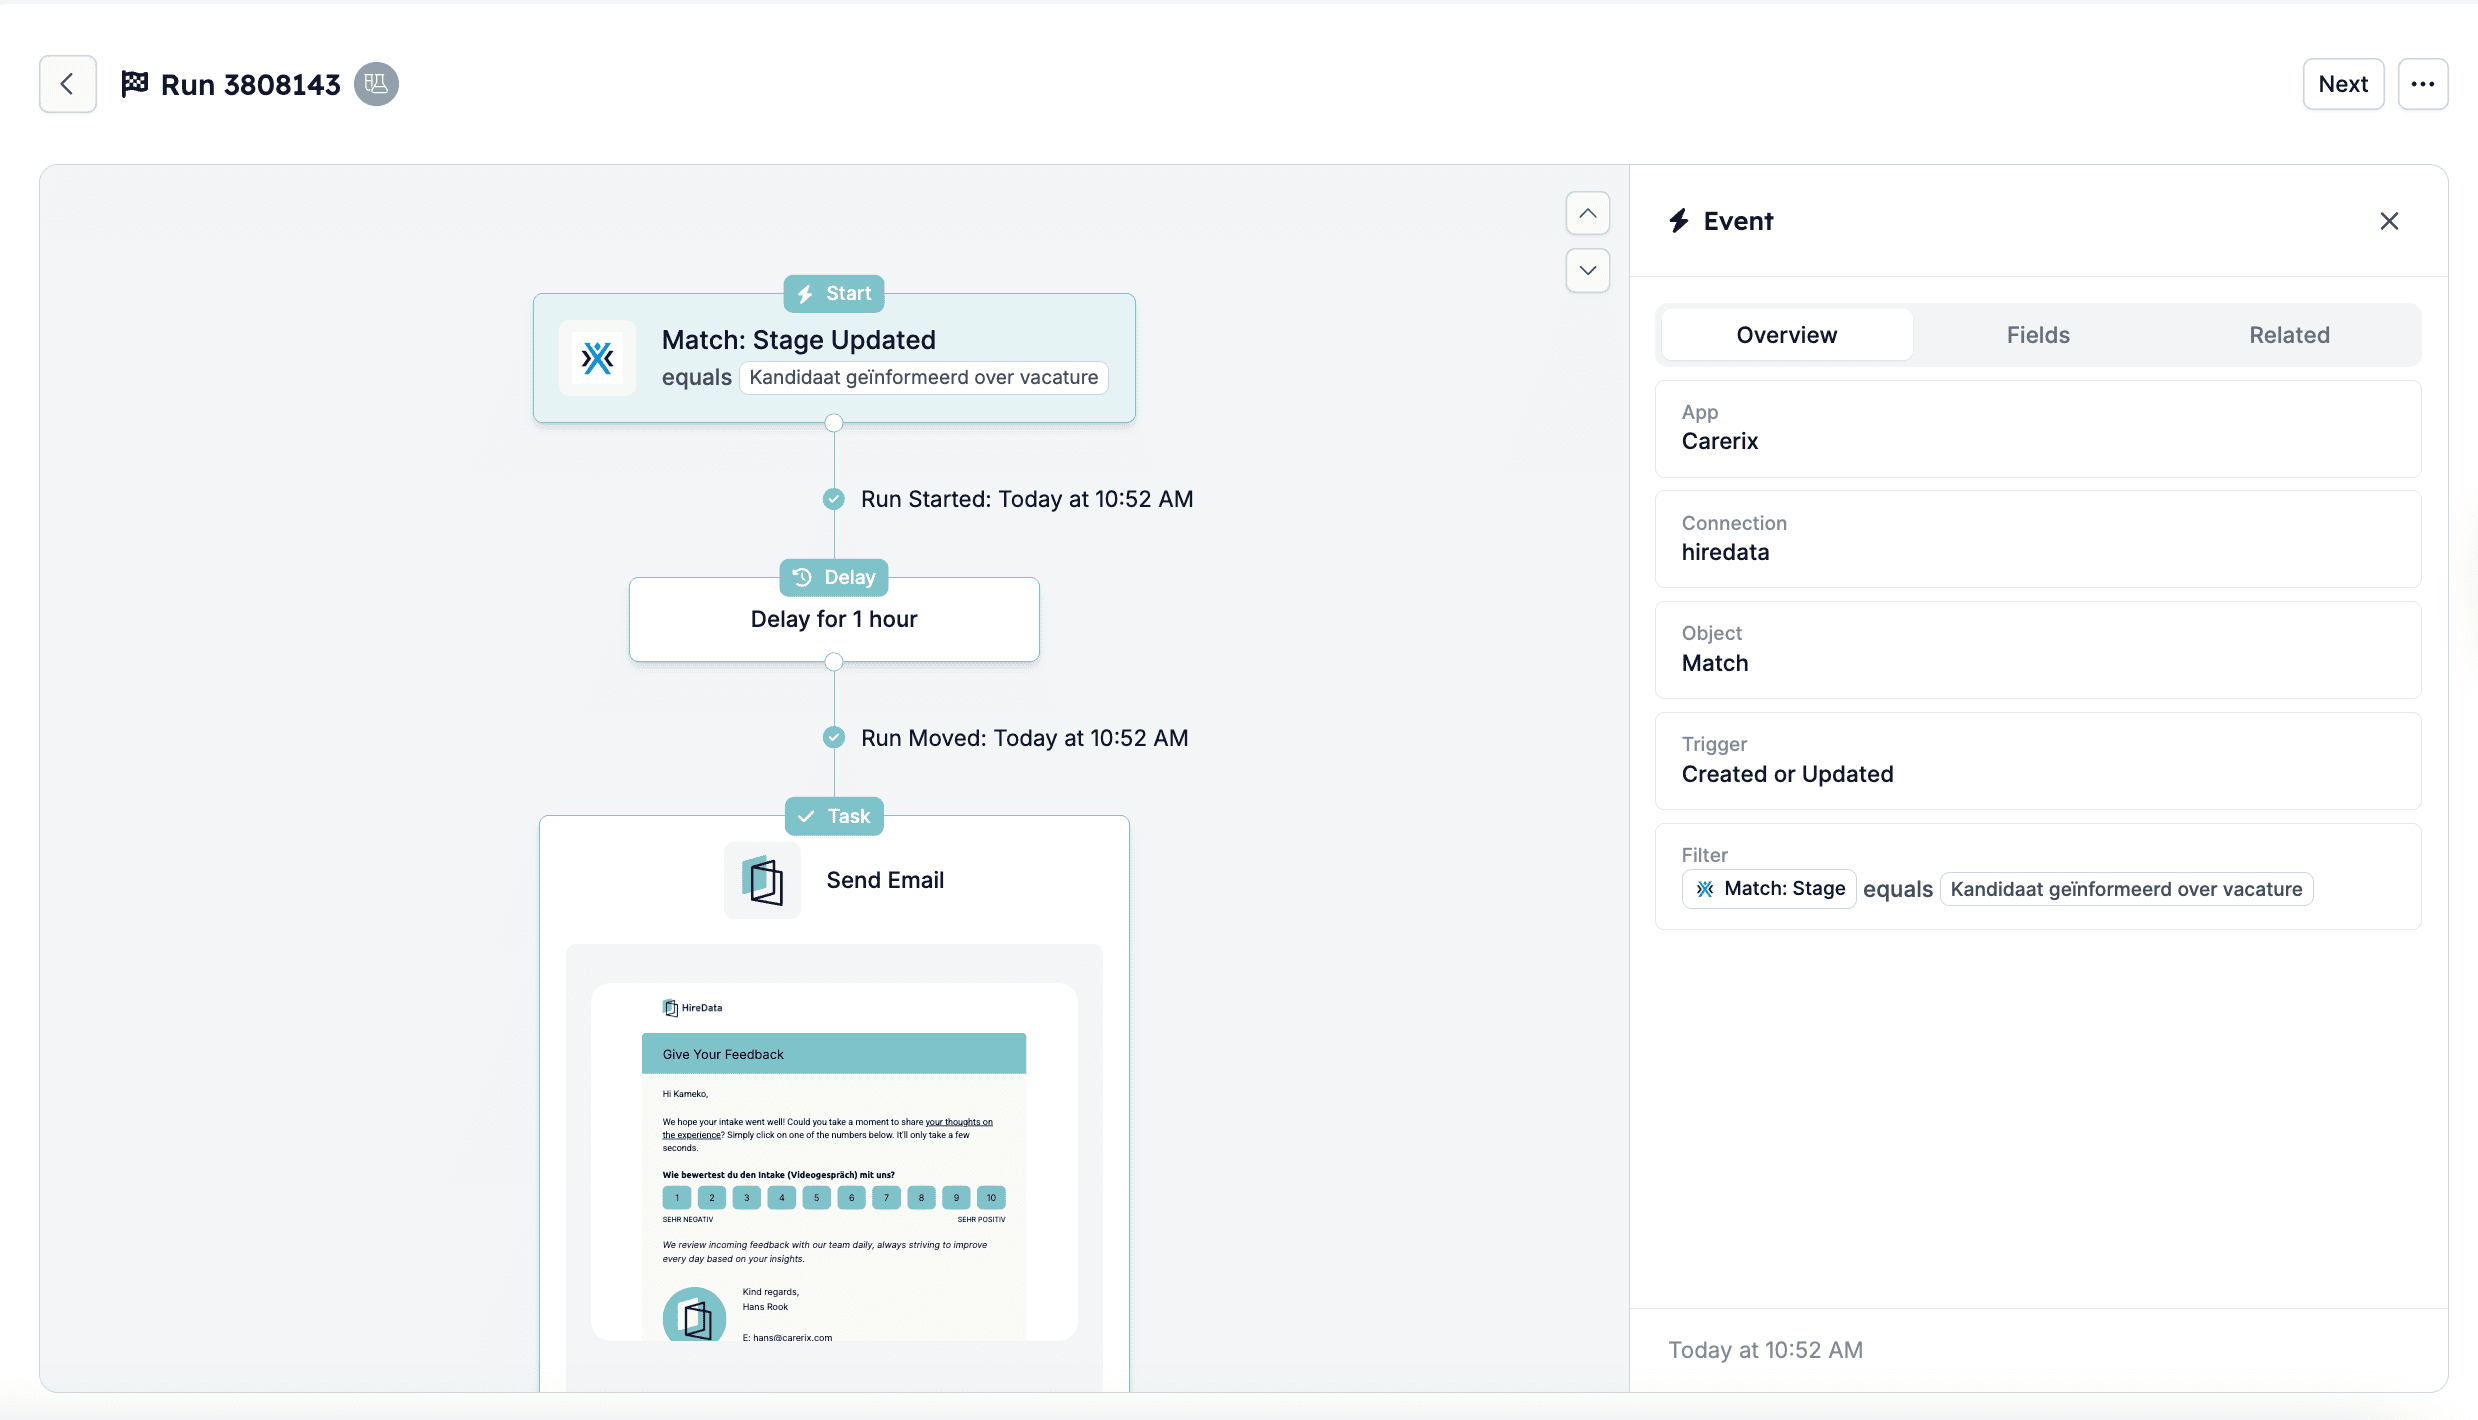
 ### Step 4: Review the Run and Event Details
After the test run, you can click on **View Details** to check specific event logs, including:
* Email delivery status (sent, delivered, opened, clicked, or bounced)
* Any delays in execution
* Data values used in the test
### Step 4: Review the Run and Event Details
After the test run, you can click on **View Details** to check specific event logs, including:
* Email delivery status (sent, delivered, opened, clicked, or bounced)
* Any delays in execution
* Data values used in the test
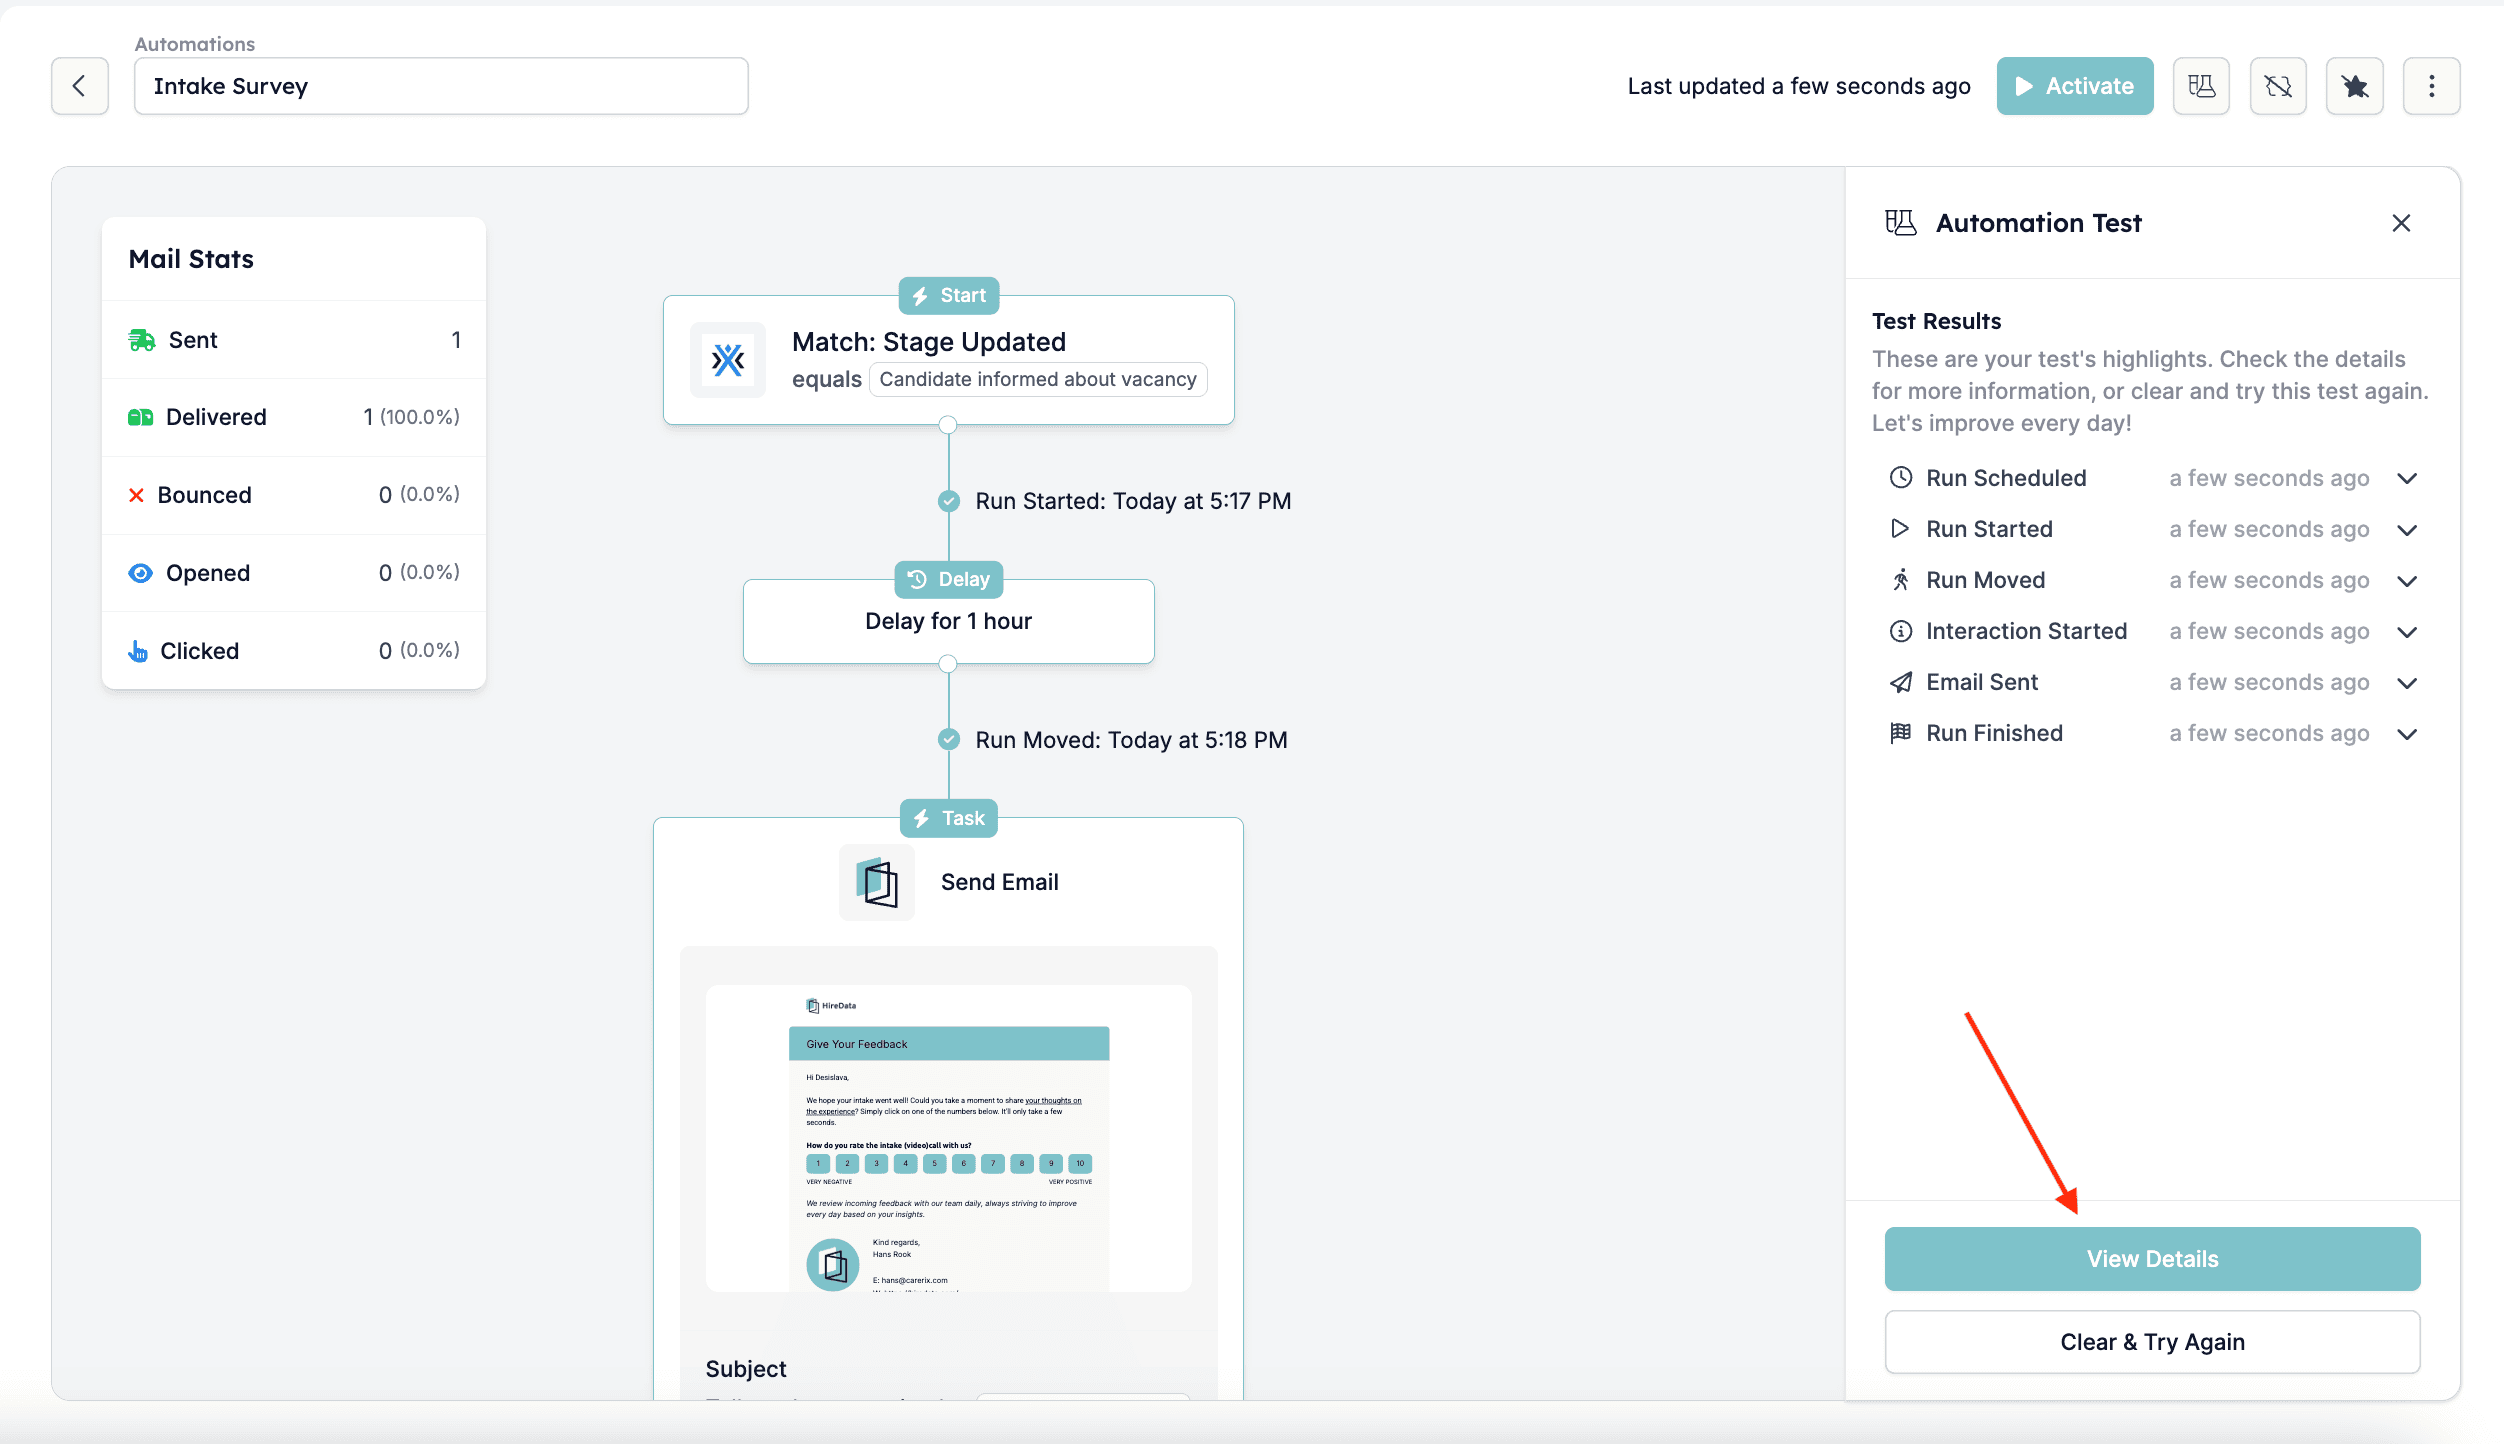 *Automation overview details:*
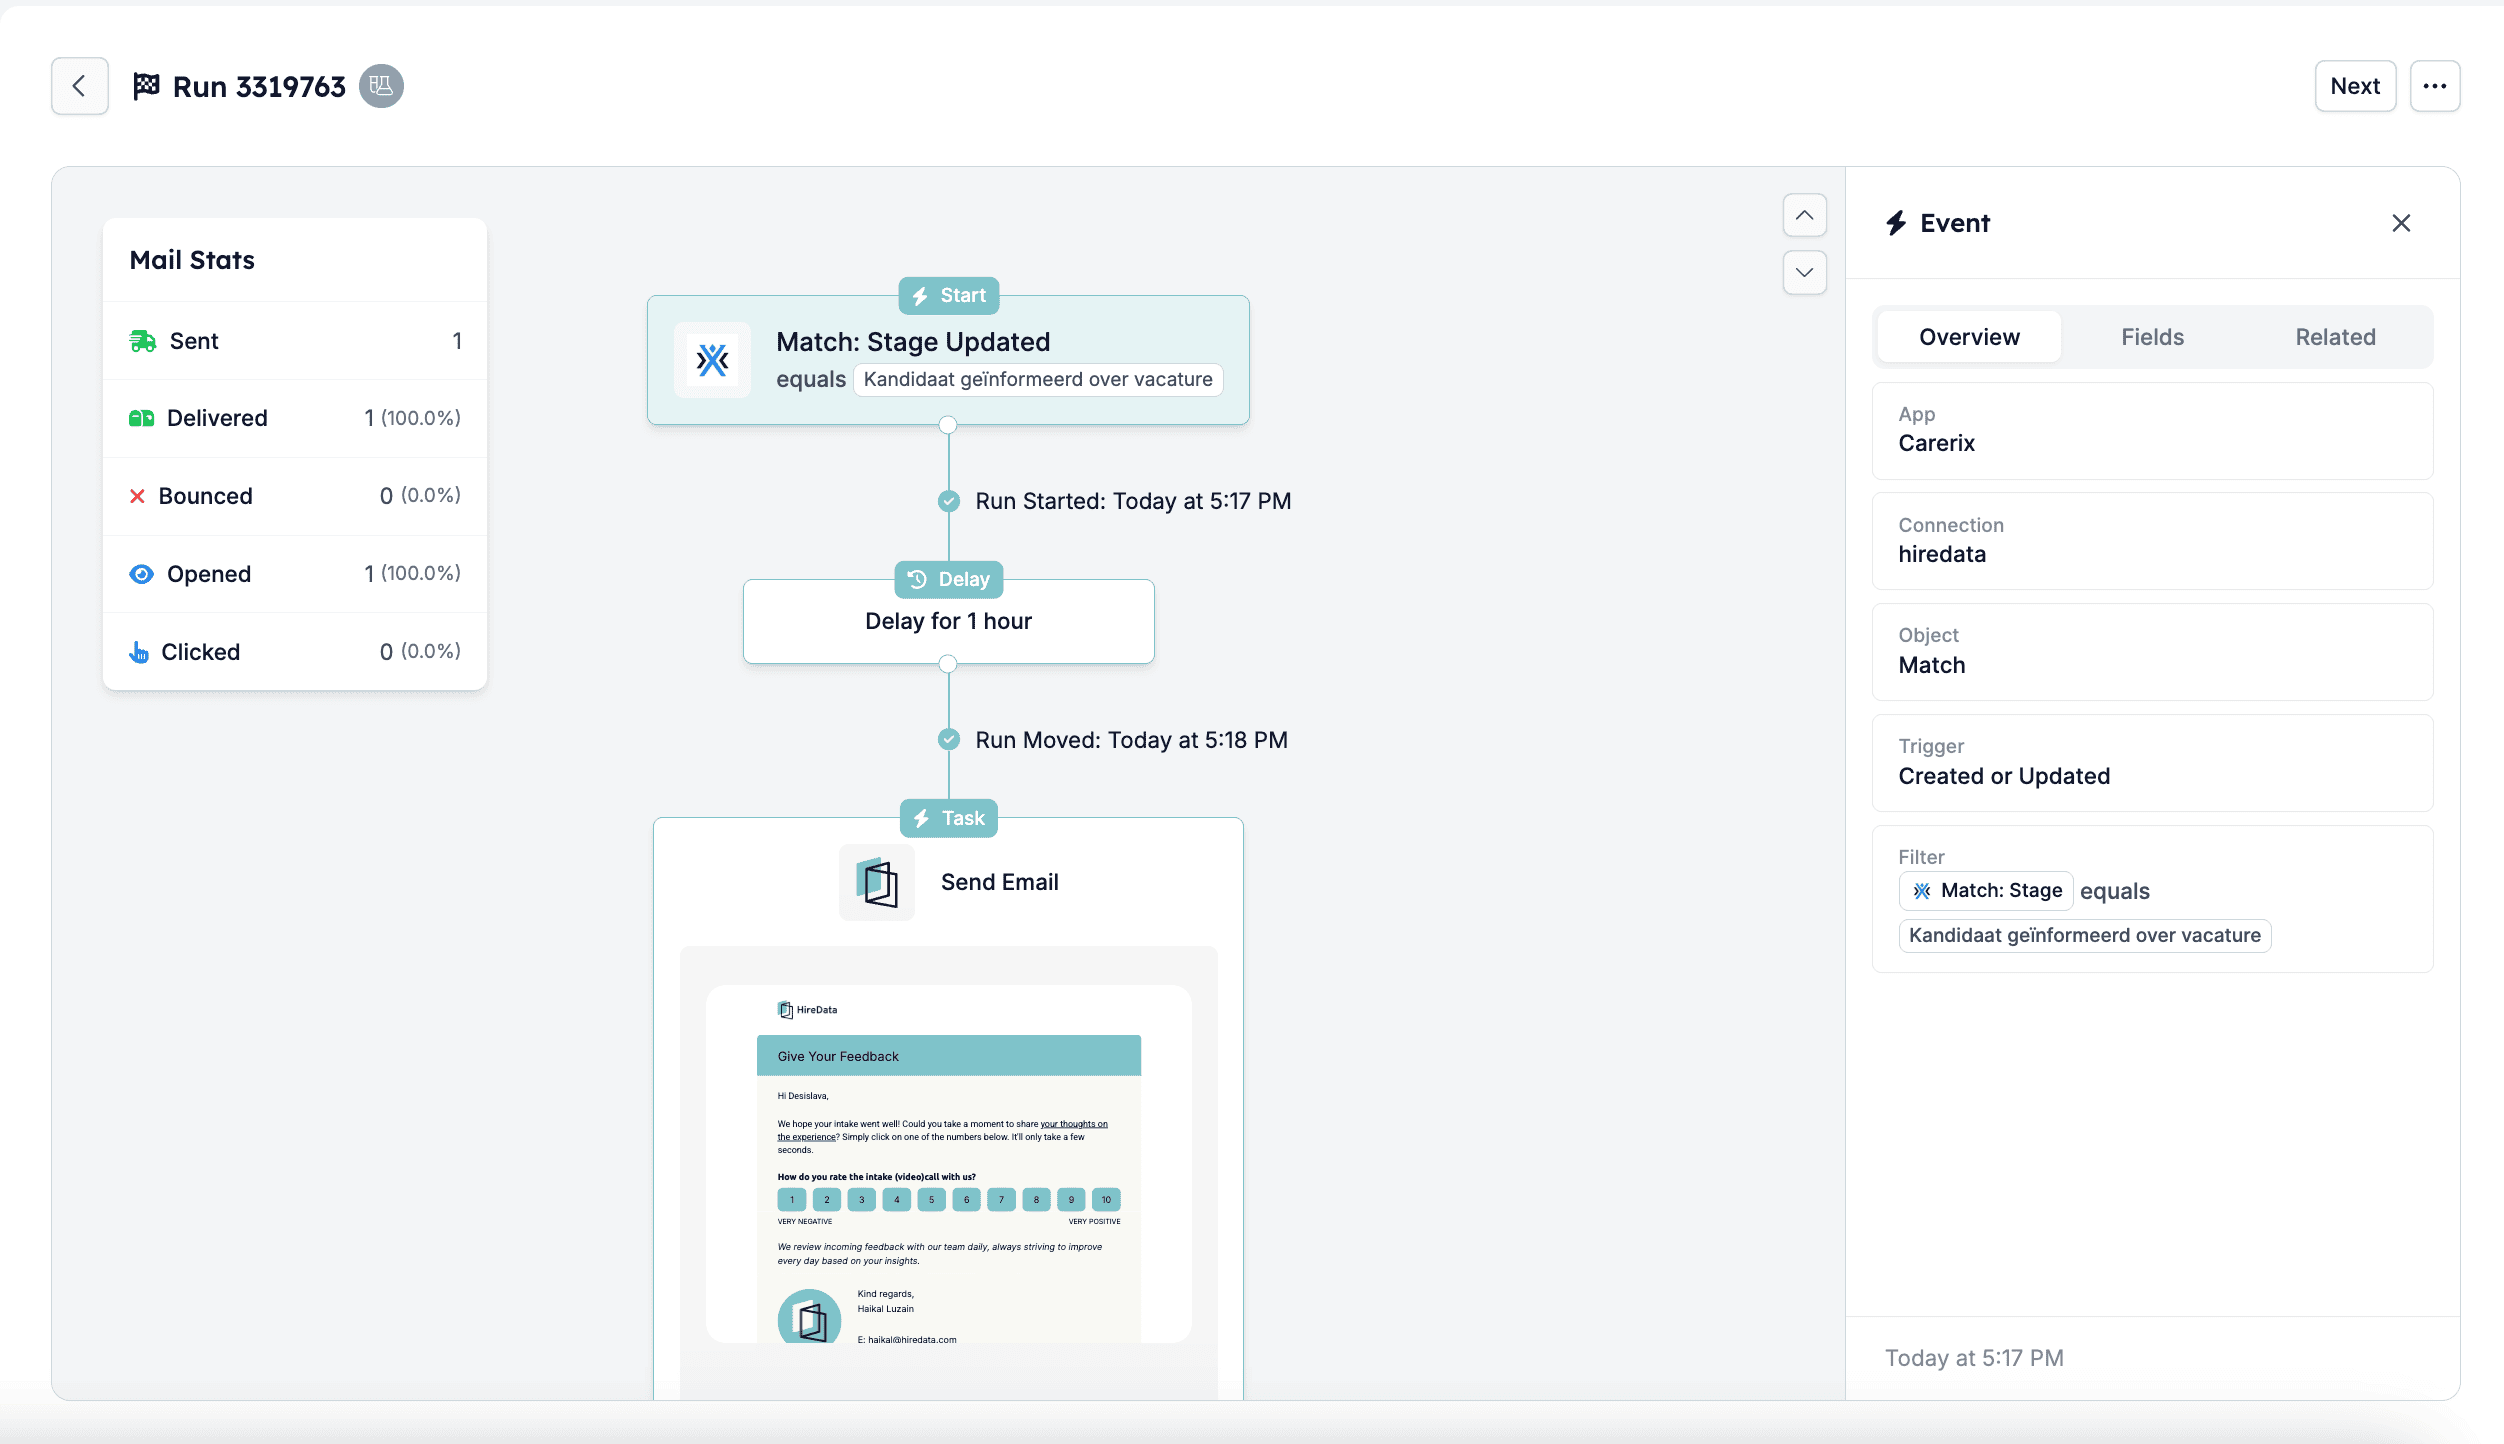 *Fields details:*
 *Related automation and event:*
 ## Testing with Preview a Single Item
You can use this to see how the automation would process an individual item without actually running tasks.
## Testing with Preview a Single Item
You can use this to see how the automation would process an individual item without actually running tasks.
 ### Step 1: Choose the match/item you would like to test with and click on Run Test
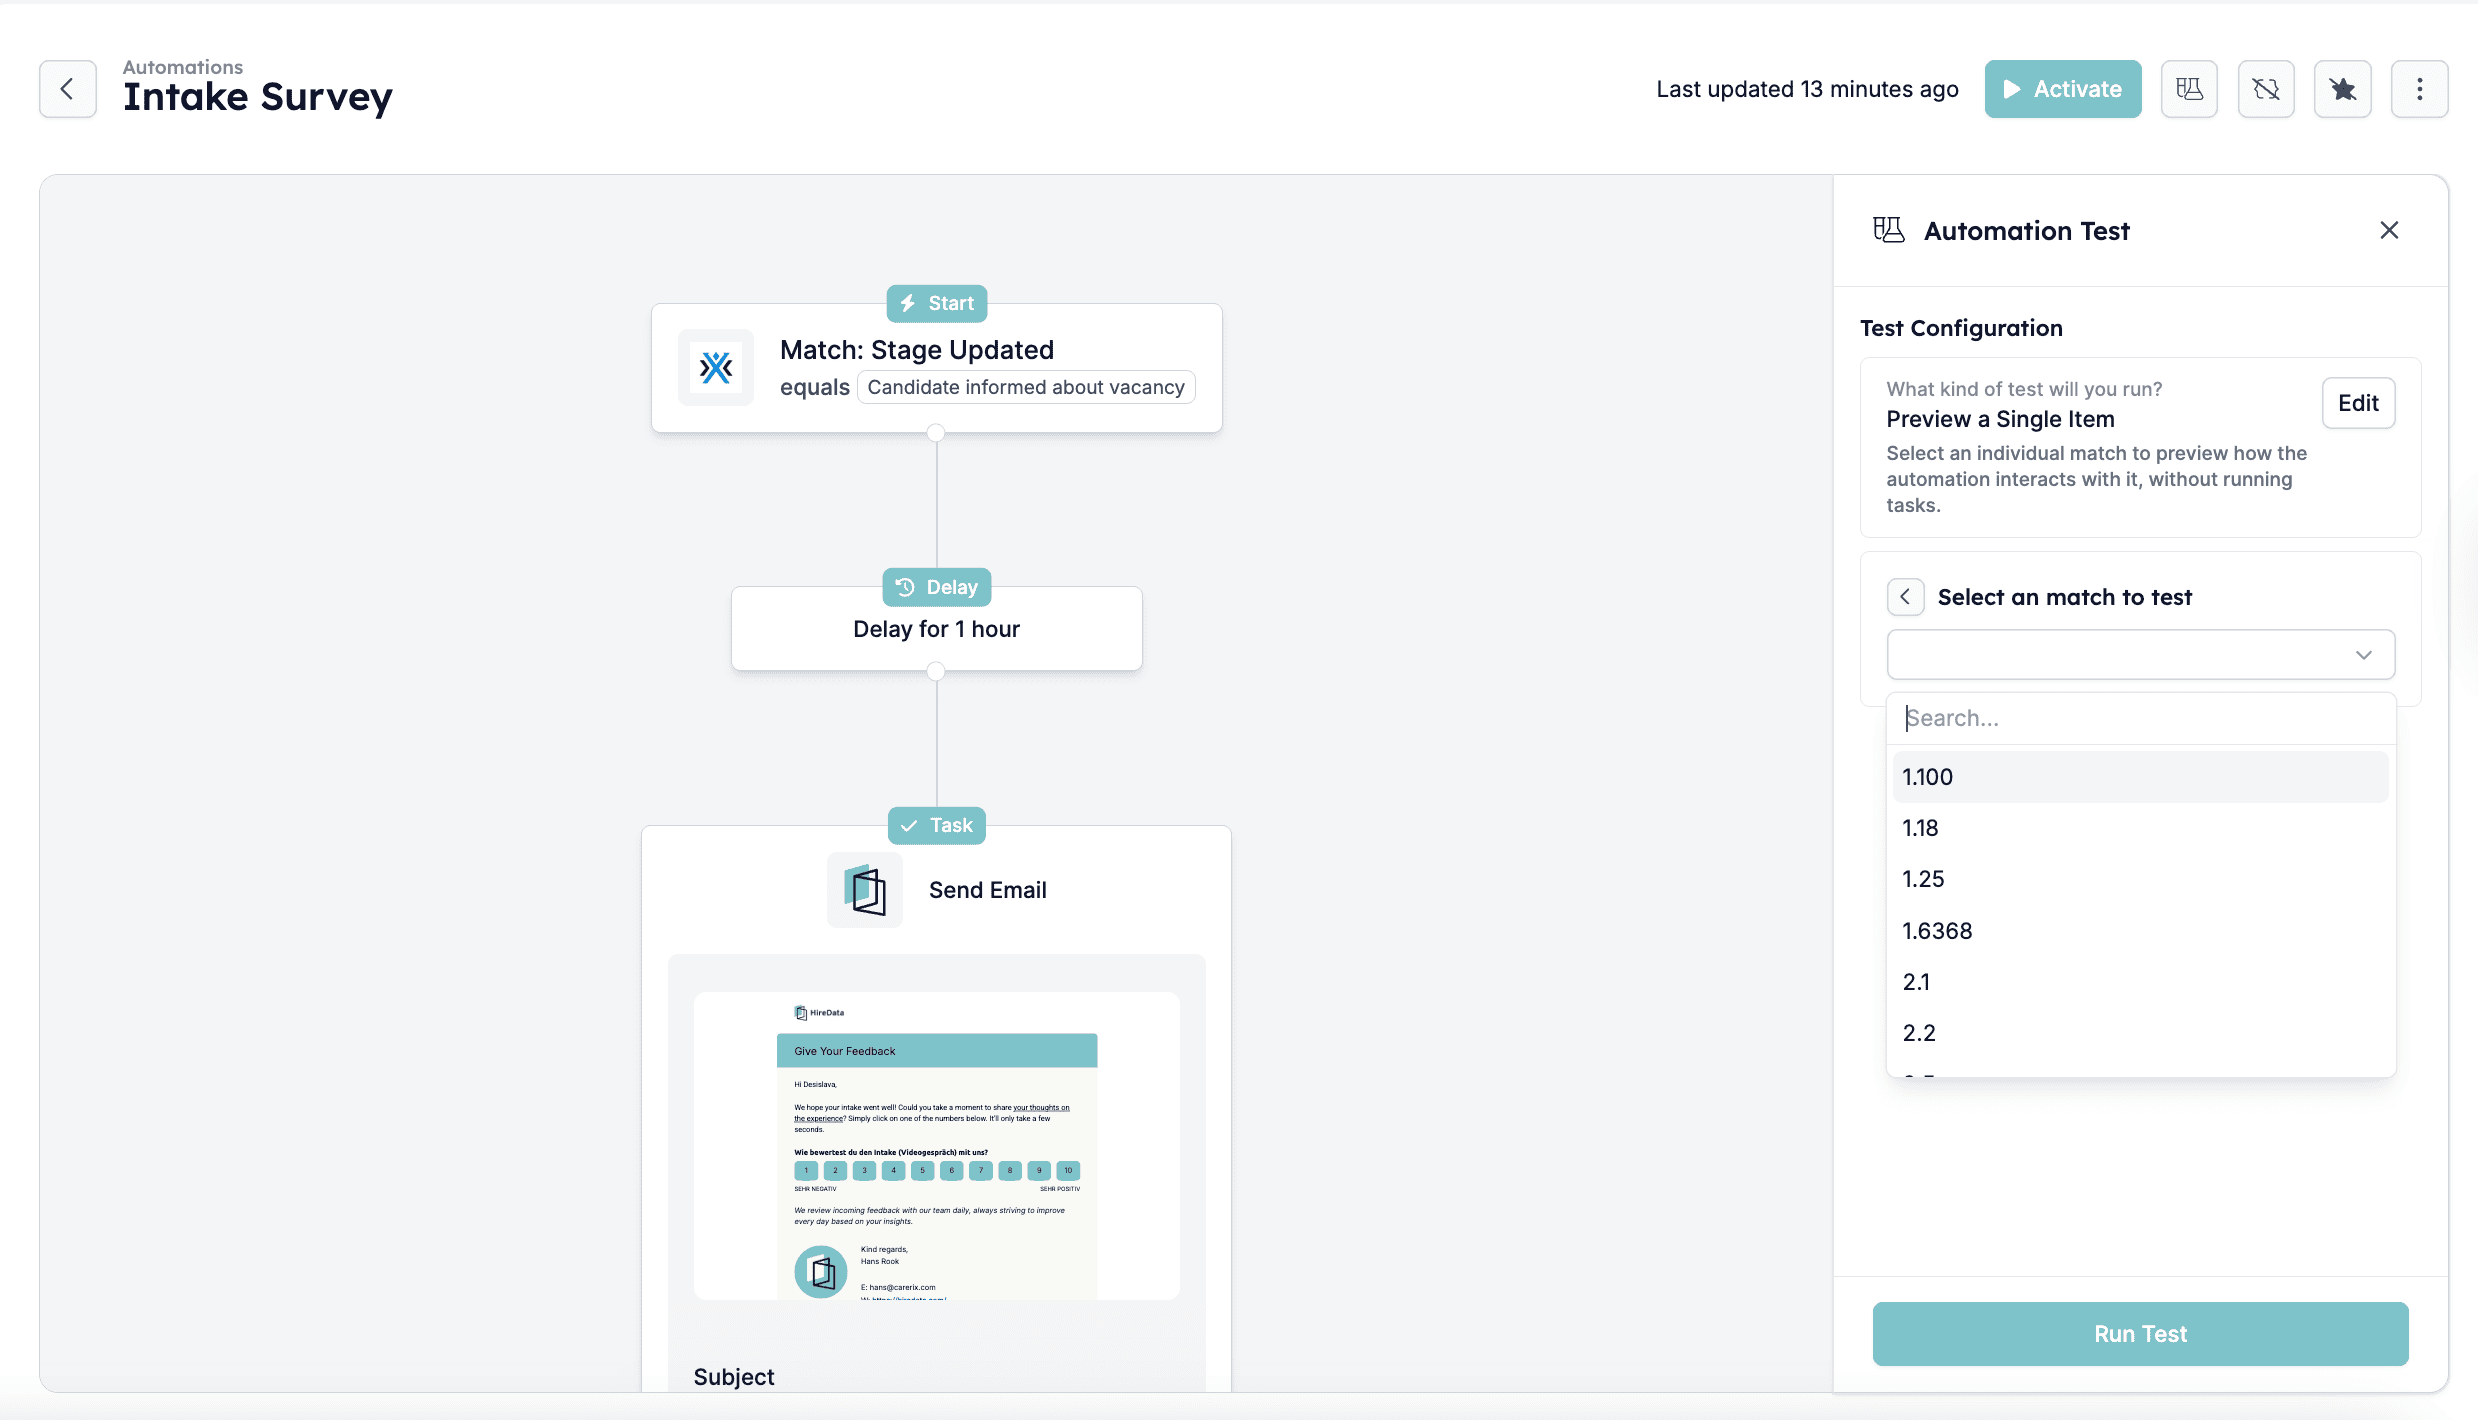 ### Step 2: Monitor the Timeline
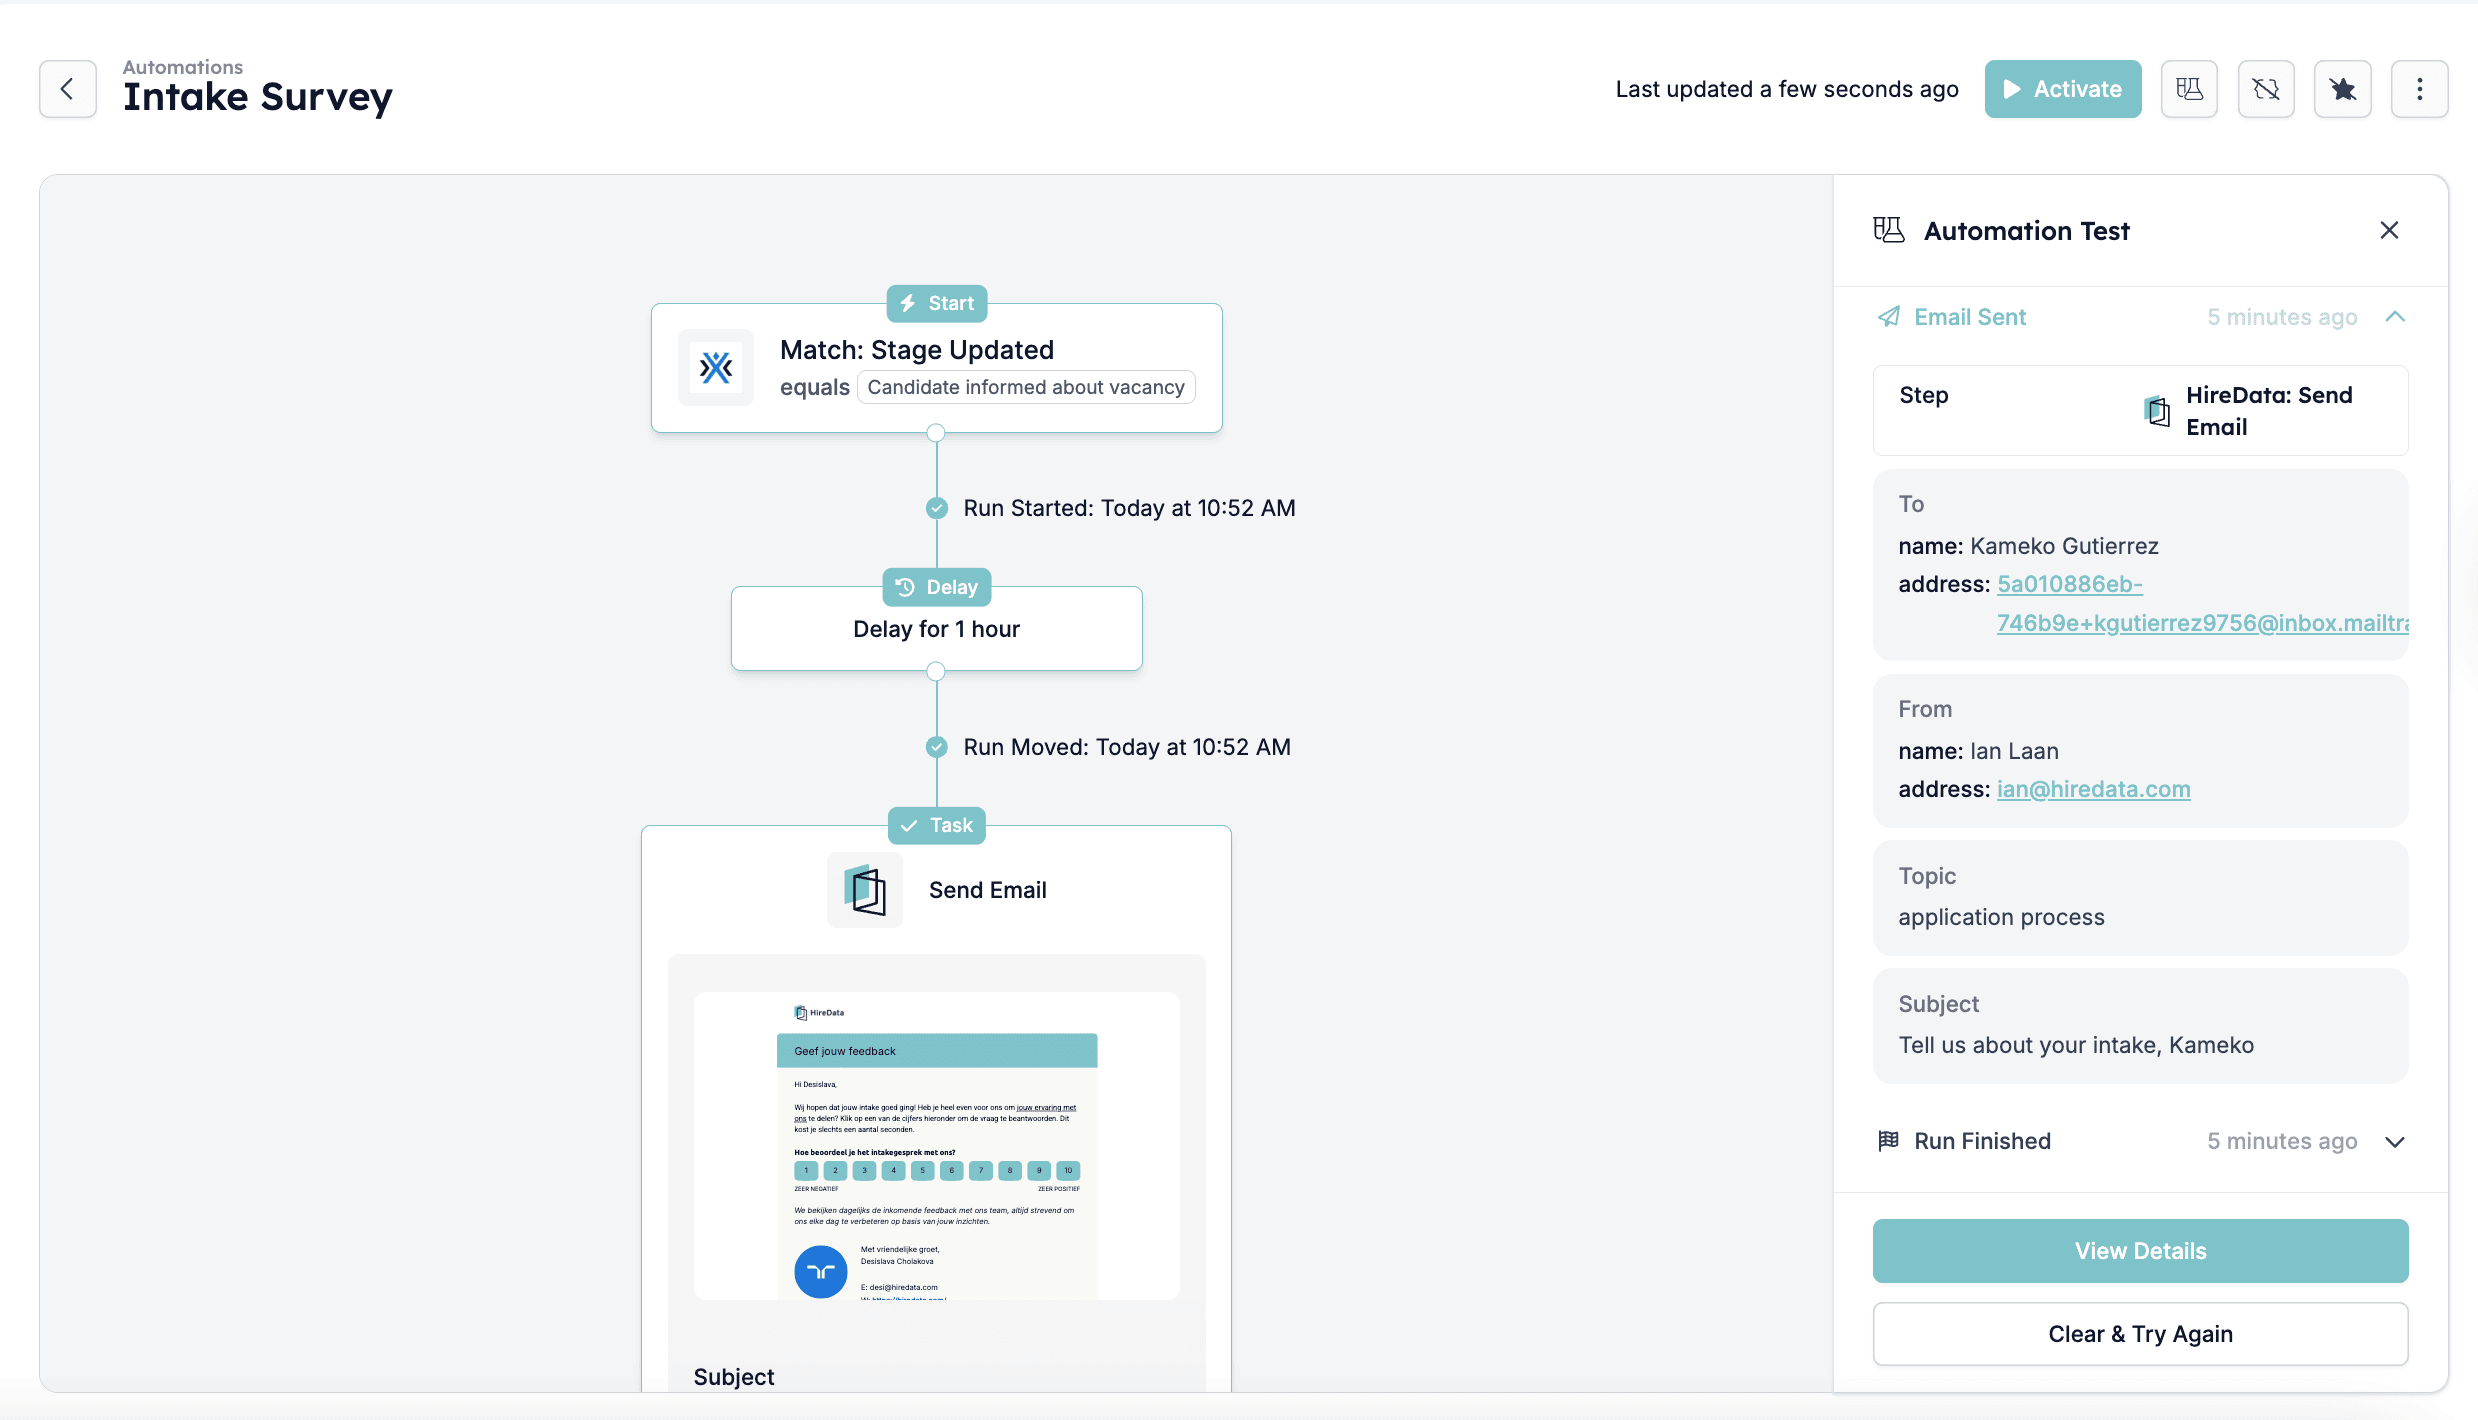
The system will display a timeline of each step in the automation as it runs. You will see alerts such as:
* Run Scheduled
* Run Started
* Interaction Started
* Email Sent (or other task execution)
* Run Finished
Wait for the test to complete and ensure all steps progress smoothly.
### Step 2: Monitor the Timeline
The system will display a timeline of each step in the automation as it runs. You will see alerts such as:
* Run Scheduled
* Run Started
* Interaction Started
* Email Sent (or other task execution)
* Run Finished
Wait for the test to complete and ensure all steps progress smoothly.
 *Email Sent step with more details:*
 ### Step 3: Review the Run and Event Details
After the test run, you can click on **View Details** to check specific event logs, including:
* Email delivery status (sent, delivered, opened, clicked, or bounced)
* Any delays in execution
* Data values used in the test
### Step 3: Review the Run and Event Details
After the test run, you can click on **View Details** to check specific event logs, including:
* Email delivery status (sent, delivered, opened, clicked, or bounced)
* Any delays in execution
* Data values used in the test
 ## Adjusting an automation and testing again if necessary
If you notice an issue, such as missing information or an error in execution, return to the automation editor, make the necessary adjustments, and test again until the automation runs correctly.
By following these steps, you can ensure that your automation works properly before activating it, preventing errors and improving efficiency.
## Related topics
- [Your First Week with HireData](/get-started/your-first-week.md)
- [How to Restore a Deleted Automation](/automations/how-to-restore-a-deleted-automation.md)
- [Quickstart: Your First Automation](/get-started/quickstart.md)
- [Set up a trigger](/apps/custom-apps/set-up-a-trigger.md)
- [Task History](/pages/task-history.md)
## Adjusting an automation and testing again if necessary
If you notice an issue, such as missing information or an error in execution, return to the automation editor, make the necessary adjustments, and test again until the automation runs correctly.
By following these steps, you can ensure that your automation works properly before activating it, preventing errors and improving efficiency.
## Related topics
- [Your First Week with HireData](/get-started/your-first-week.md)
- [How to Restore a Deleted Automation](/automations/how-to-restore-a-deleted-automation.md)
- [Quickstart: Your First Automation](/get-started/quickstart.md)
- [Set up a trigger](/apps/custom-apps/set-up-a-trigger.md)
- [Task History](/pages/task-history.md)