> ## Documentation Index
> Fetch the complete documentation index at: https://help.hiredata.com/llms.txt
> Use this file to discover all available pages before exploring further.
# How to Verify a Domain in HireData to Send Emails
> Verify your domain in HireData with the right DNS records so you can start sending emails from your own address with strong deliverability and authentication.
*Verifying your domain in HireData is a crucial step to ensure you can send emails directly from HireData. Without domain verification, you will not be able to send emails or use it for your branding. Follow the steps below to complete the verification process.*
**Before you start:** the Email app must be installed before DNS records can be generated or verified. If clicking **Verify DNS** results in a 404 error or no response, see [Why Can't I Verify My DNS Records?](/knowledge-base/why-cant-i-verify-my-dns-records)
## Step 1: Add a New Domain
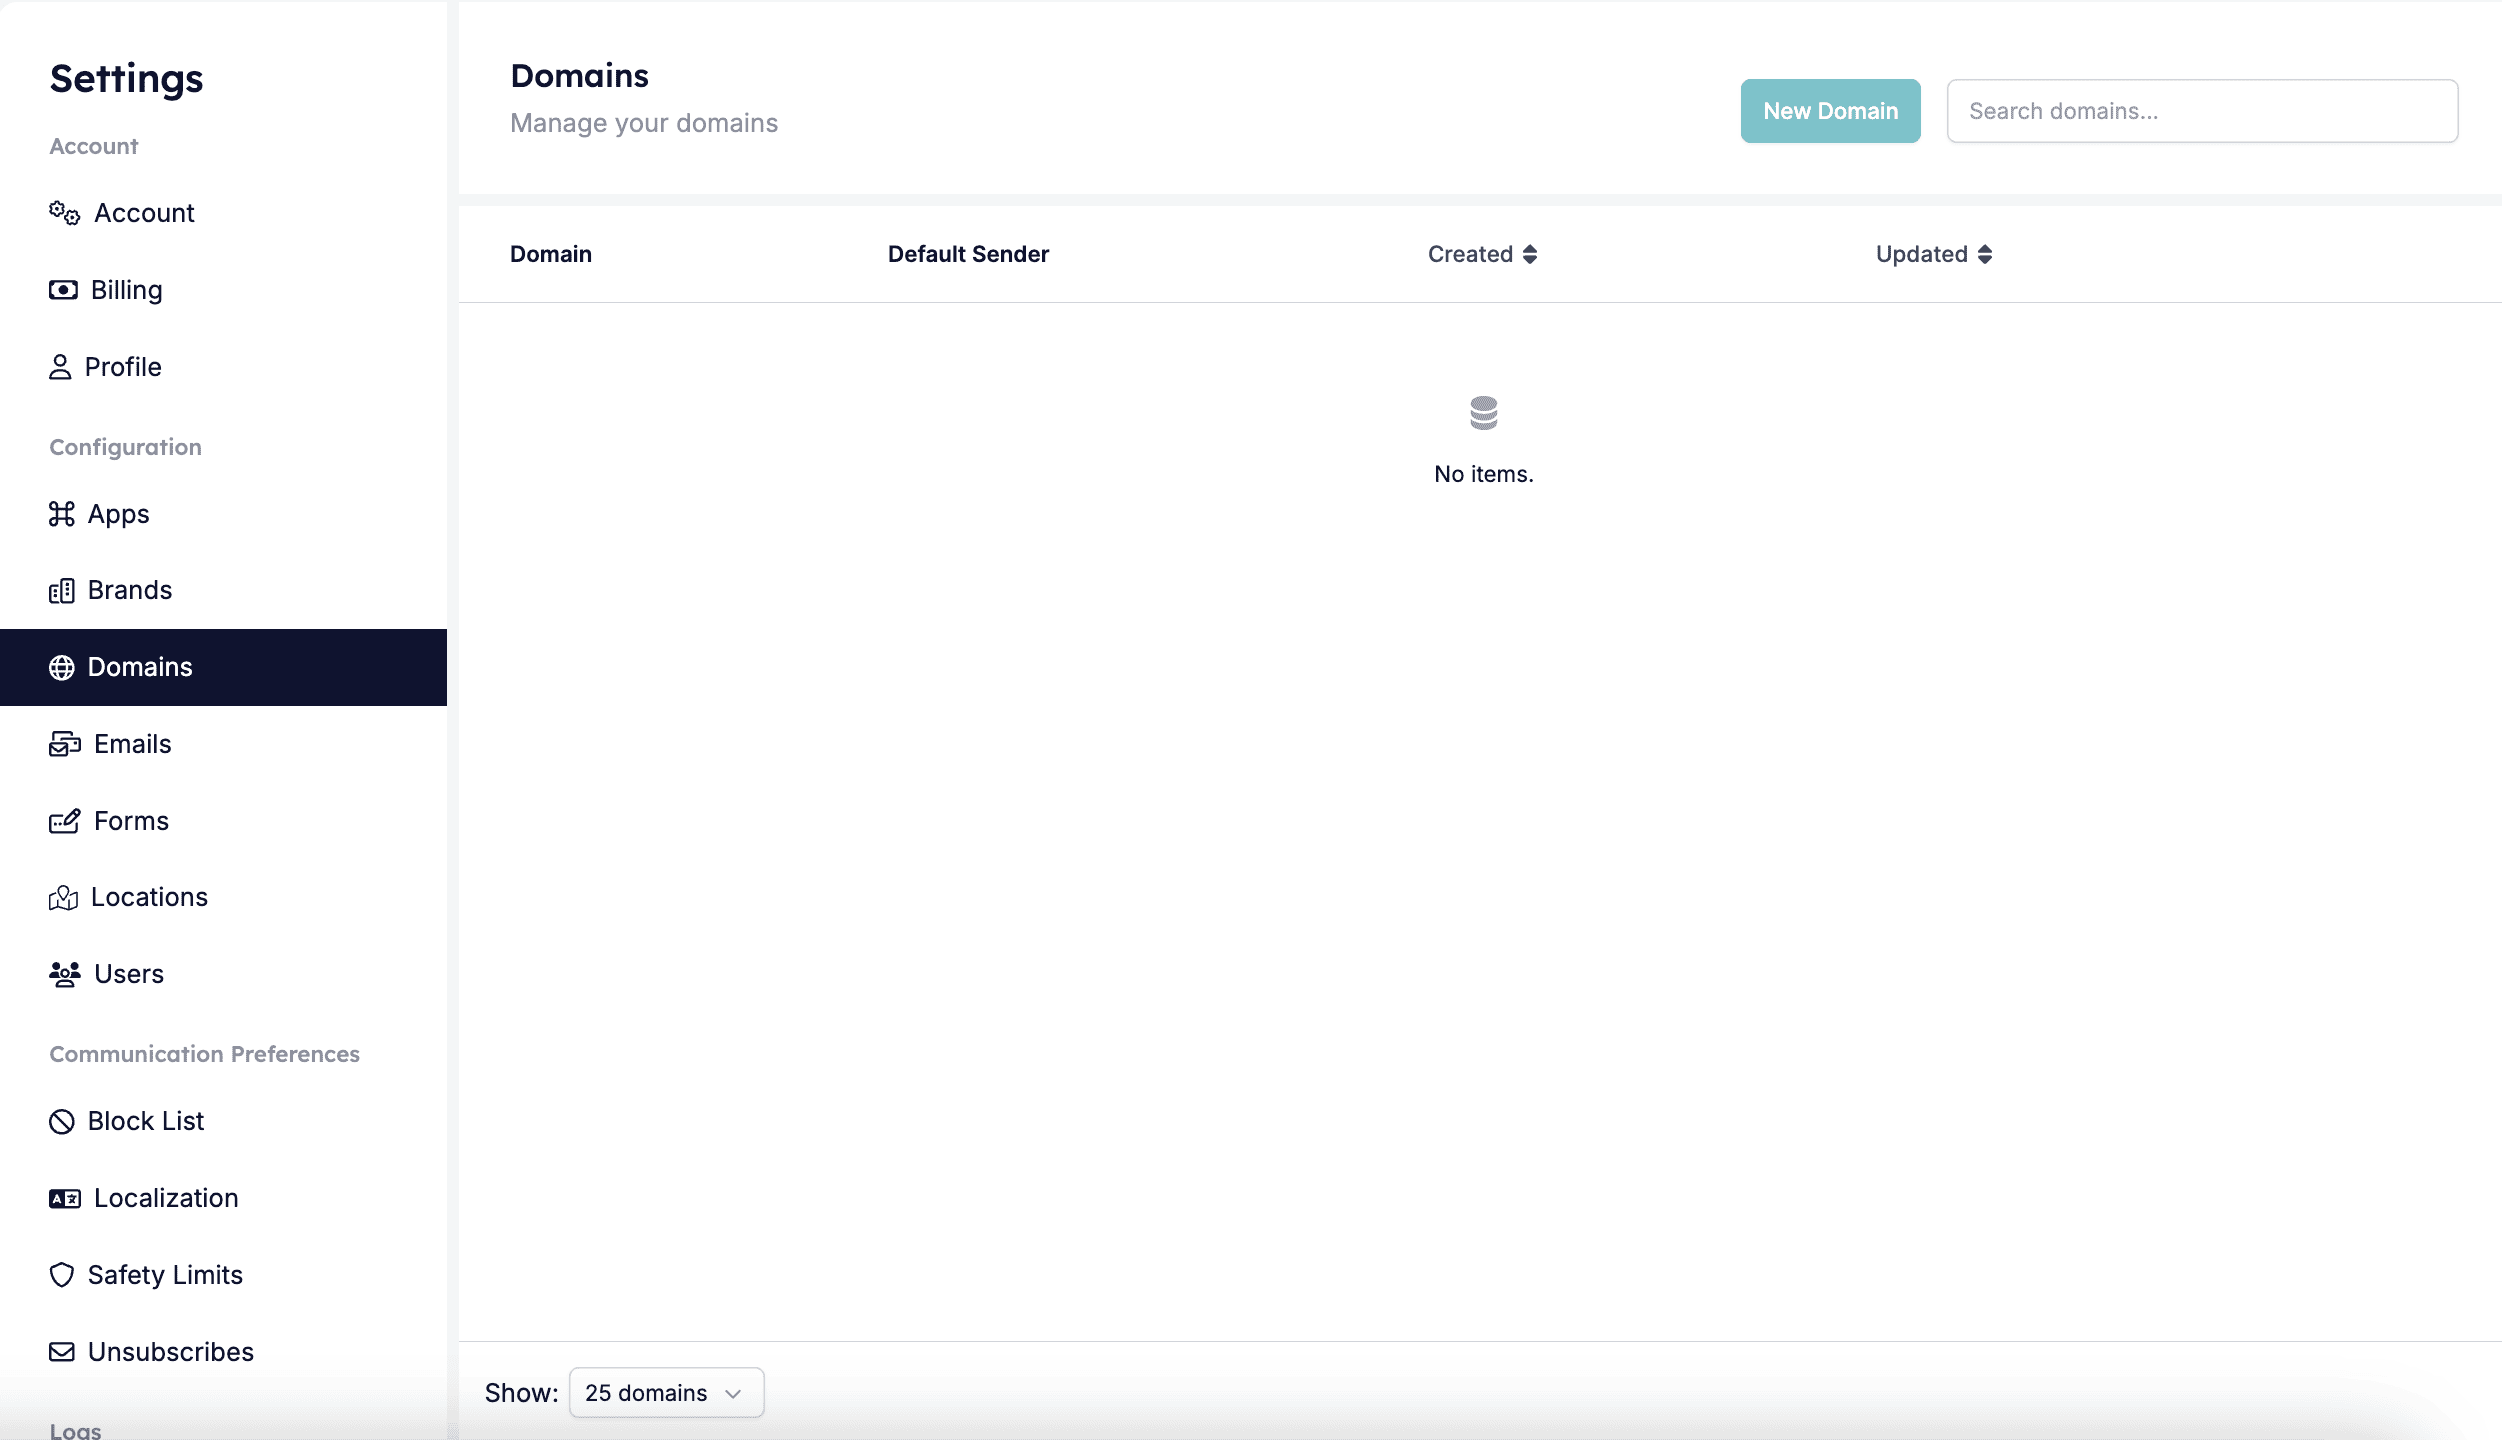
Log in to your HireData account, open your settings, and then the [**Domains**](https://app.hiredata.com/settings/account/domains) page.
Click on the **New Domain** button to add a new domain.
 ## Step 2: Enter Domain Details
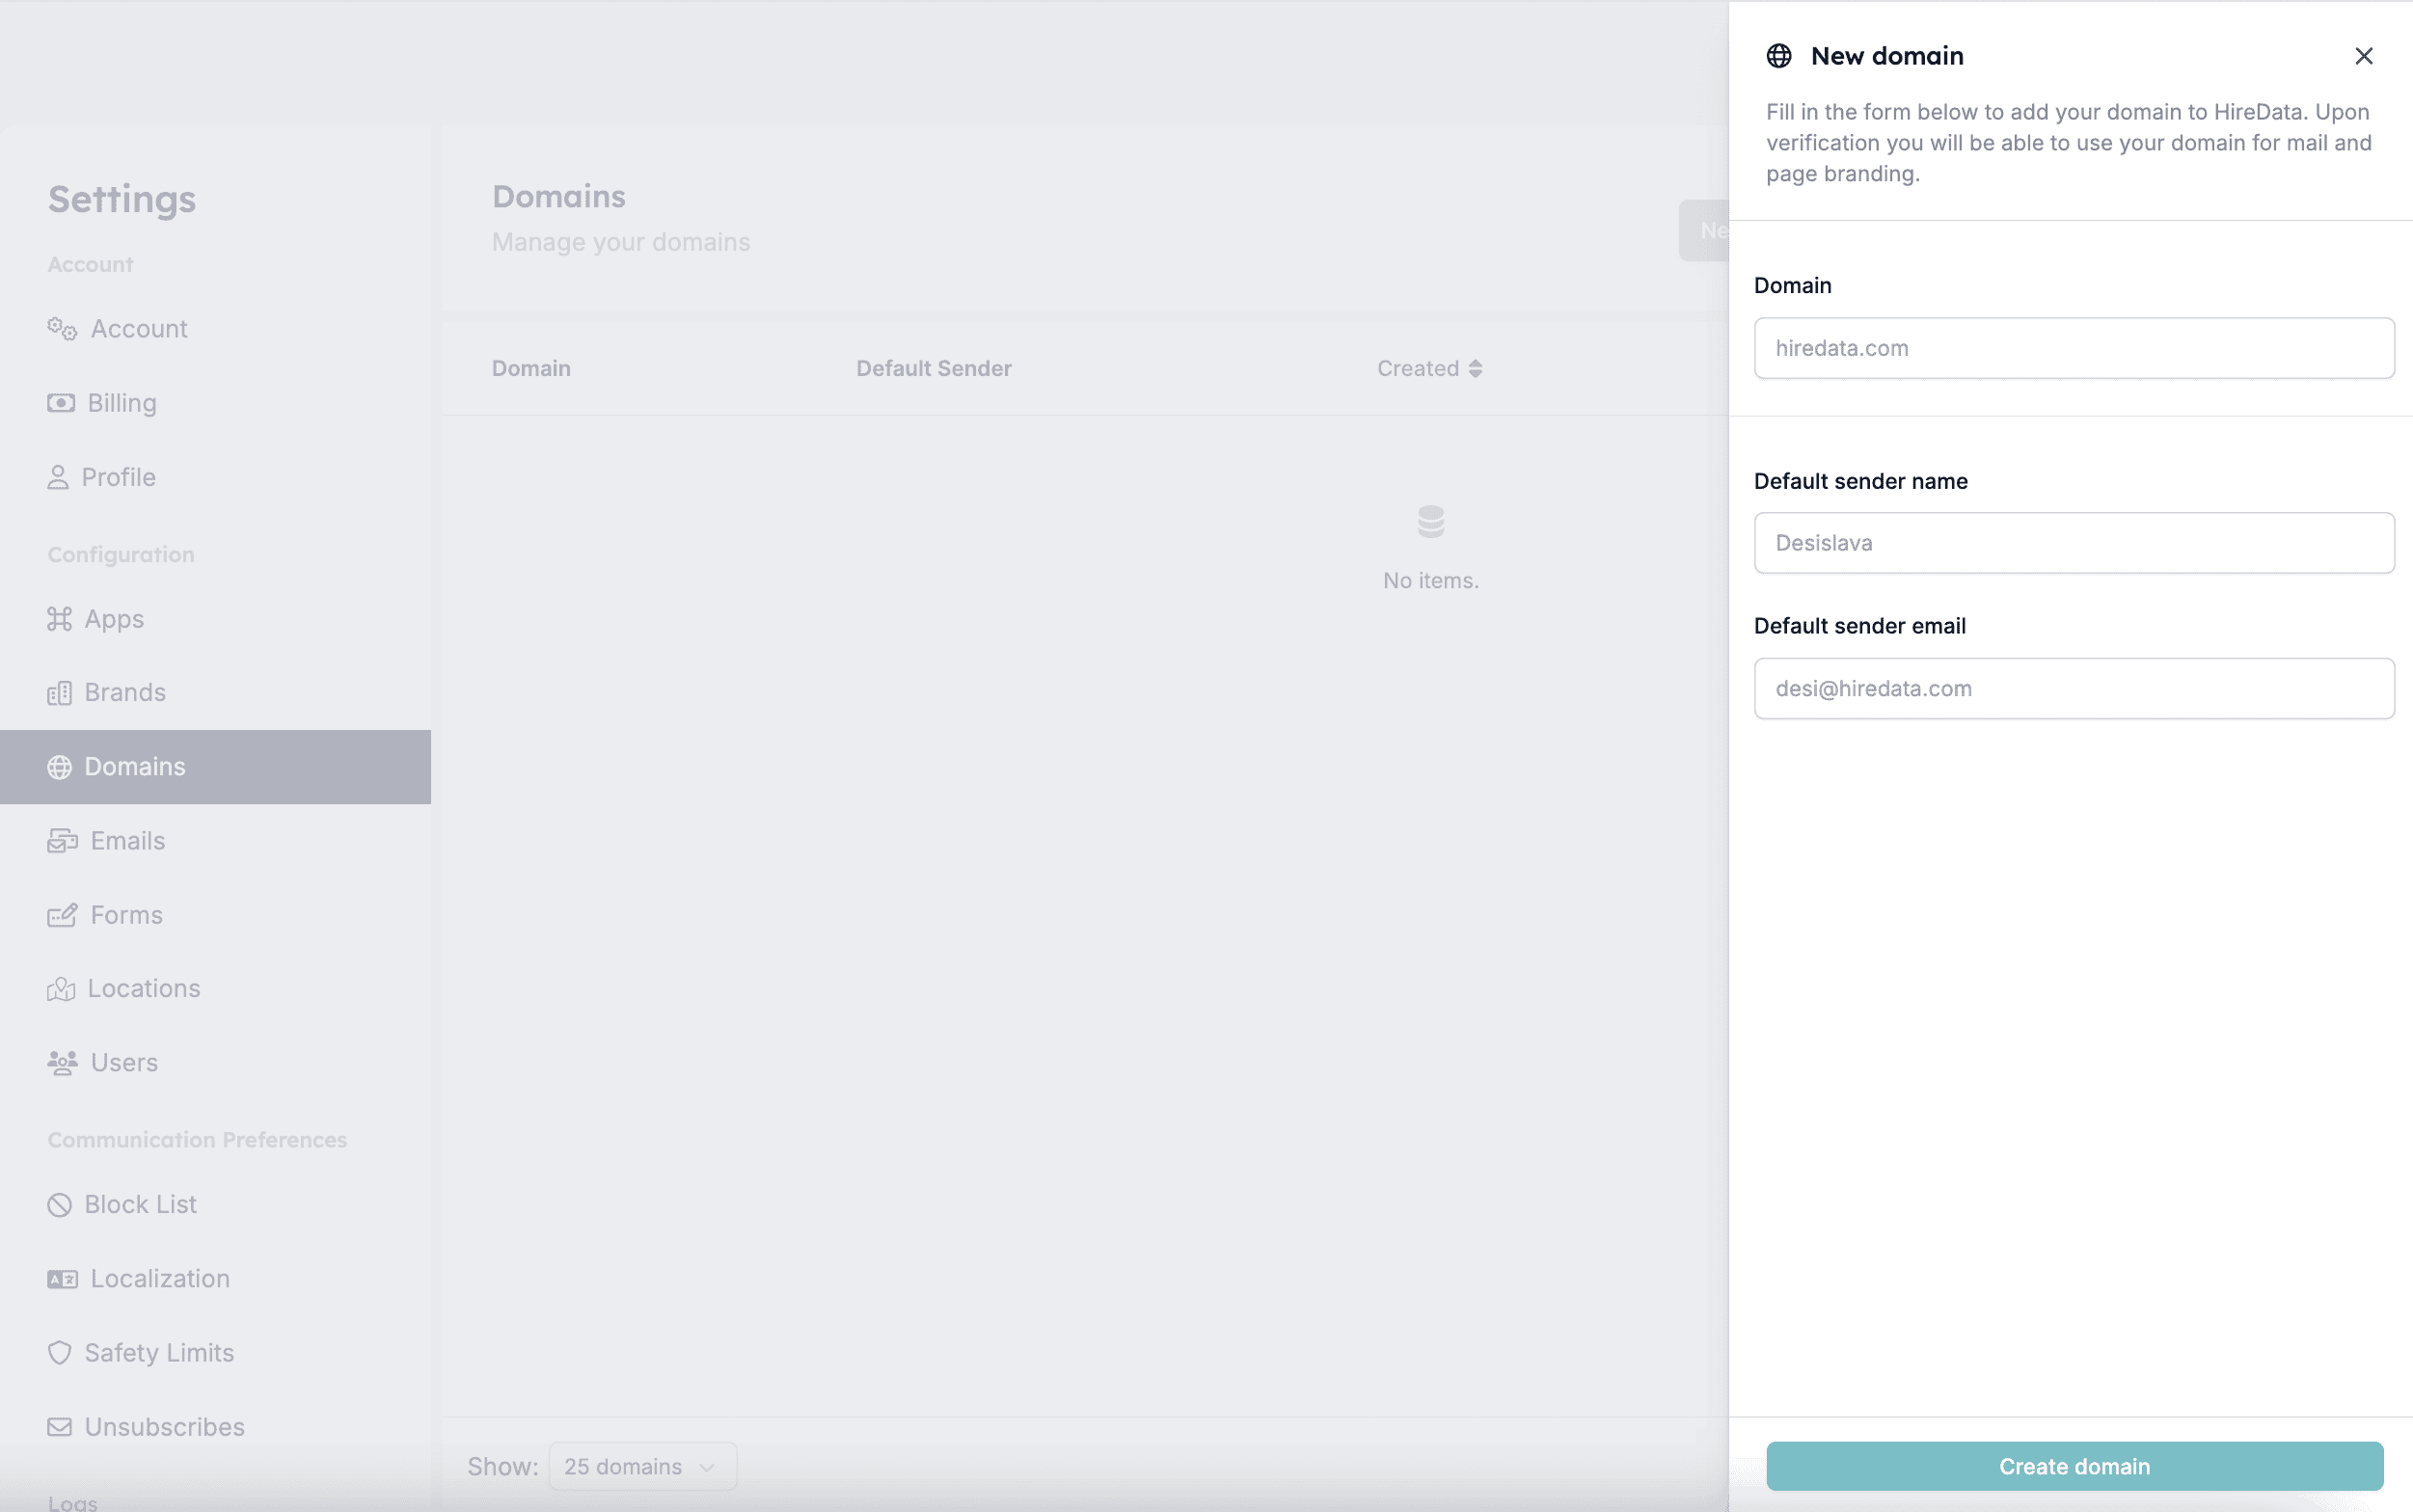
After you click on **New Domain**, a new screen will appear where you will need to fill in the domain details, including:
1. **Domain name**
2. **Default Sender Name** – this is the name that will appear as the sender in emails sent from HireData if this information is missing in the events' records received from your app.
3. **Default Sender Email** – this will be the default email address used when sending emails if this information is not available.
Click on **Create Domain** and continue with the next step.
## Step 2: Enter Domain Details
After you click on **New Domain**, a new screen will appear where you will need to fill in the domain details, including:
1. **Domain name**
2. **Default Sender Name** – this is the name that will appear as the sender in emails sent from HireData if this information is missing in the events' records received from your app.
3. **Default Sender Email** – this will be the default email address used when sending emails if this information is not available.
Click on **Create Domain** and continue with the next step.
 ## Step 3: Generate DNS Records
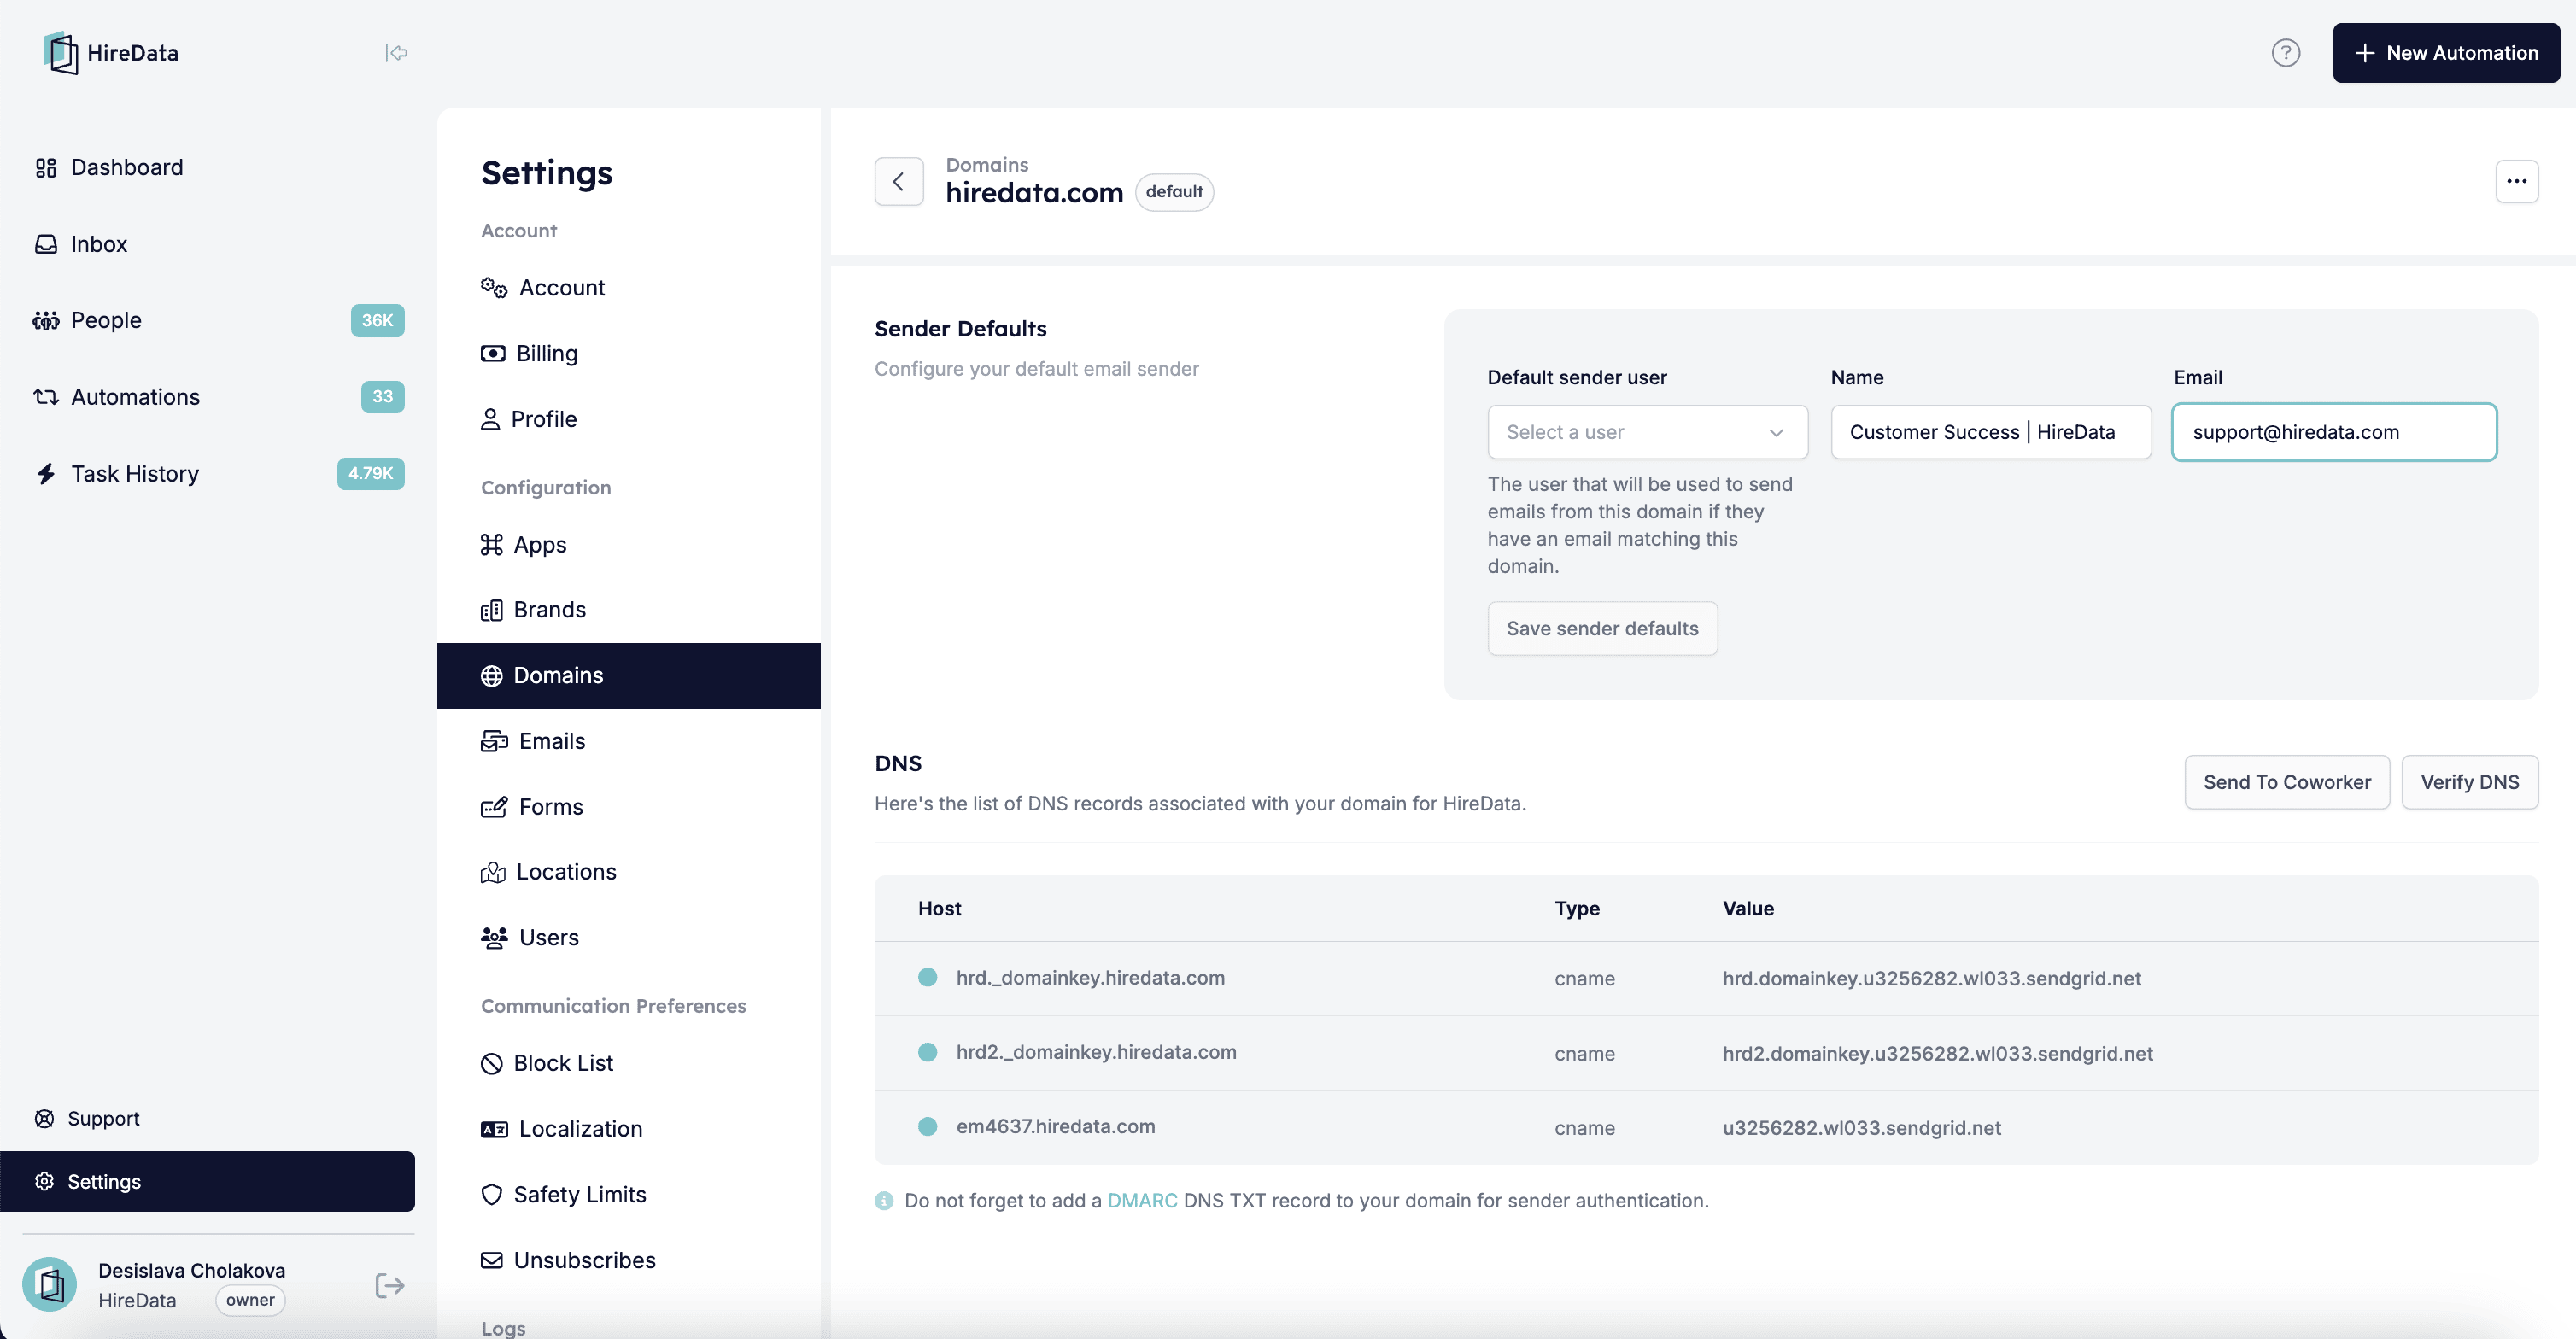
DNS (Domain Name System) records are like signposts that tell the internet where to find different services linked to your domain. When you verify your domain in HireData, you need to add specific DNS records to prove that you own the domain and allow us to send emails on your behalf.
These records include:
* **CNAME Records**: These link your domain to another domain, often used for verification.
* **DMARC TXT Record** (optional): This record helps protect your domain from email phishing, and unauthorized email use, improving email deliverability.
Without these records, email providers might block or mark your emails as spam. That’s why adding and verifying the DNS records is essential for smooth email delivery.
Simply click on **Generate DNS Records** if they are not automatically generated.
## Step 3: Generate DNS Records
DNS (Domain Name System) records are like signposts that tell the internet where to find different services linked to your domain. When you verify your domain in HireData, you need to add specific DNS records to prove that you own the domain and allow us to send emails on your behalf.
These records include:
* **CNAME Records**: These link your domain to another domain, often used for verification.
* **DMARC TXT Record** (optional): This record helps protect your domain from email phishing, and unauthorized email use, improving email deliverability.
Without these records, email providers might block or mark your emails as spam. That’s why adding and verifying the DNS records is essential for smooth email delivery.
Simply click on **Generate DNS Records** if they are not automatically generated.
 ## Step 4: Add DNS Records to Your Domain Provider
After you have the DNS records, you need to add them to your domain provider (e.g., GoDaddy, Cloudflare, Namecheap, etc.).
1. Navigate to the DNS Settings section on your provider's website.
2. Add the provided DNS records exactly as shown in HireData.
3. Save the changes.
Things to consider:
1. Some DNS providers require you to enter only the subdomain in the **Host/Name** field, without the full domain. For example, the provider might not accept the host value with "hiredata.com", so it can be removed.
2. Occasionally, DNS providers might automatically handle the trailing dot (`.`) at the end of the values, so you might need to delete it.
## Step 5: Verify DNS Records
Return to the **Domains** page in HireData and click the **Verify DNS** button. If the DNS records have been correctly added, your domain will be verified.
Once your domain is verified, you will be able to send emails directly from HireData by using our built-in email templates or create custom ones to streamline your business communication.
If your domain is not verified, you will not be able to send emails via HireData. Make sure you complete the verification process to avoid any disruptions in your automations.
If you experience any issues with the verification, ensure your DNS records have been correctly added and allow some time for them to be processed. If problems persist, contact your domain provider or HireData support for assistance.
***
## Video guide
## Related topics
- [Why Can't I Verify My DNS Records?](/knowledge-base/why-cant-i-verify-my-dns-records.md)
- [Your First Week with HireData](/get-started/your-first-week.md)
- [Welcome to HireData](/index.md)
- [Adding a default sender to your domains](/settings/domains/adding-a-default-sender-to-your-domains.md)
- [Setting Up an Email Template in HireData](/apps/messaging/emails/setting-up-an-email-template-in-hiredata.md)
## Step 4: Add DNS Records to Your Domain Provider
After you have the DNS records, you need to add them to your domain provider (e.g., GoDaddy, Cloudflare, Namecheap, etc.).
1. Navigate to the DNS Settings section on your provider's website.
2. Add the provided DNS records exactly as shown in HireData.
3. Save the changes.
Things to consider:
1. Some DNS providers require you to enter only the subdomain in the **Host/Name** field, without the full domain. For example, the provider might not accept the host value with "hiredata.com", so it can be removed.
2. Occasionally, DNS providers might automatically handle the trailing dot (`.`) at the end of the values, so you might need to delete it.
## Step 5: Verify DNS Records
Return to the **Domains** page in HireData and click the **Verify DNS** button. If the DNS records have been correctly added, your domain will be verified.
Once your domain is verified, you will be able to send emails directly from HireData by using our built-in email templates or create custom ones to streamline your business communication.
If your domain is not verified, you will not be able to send emails via HireData. Make sure you complete the verification process to avoid any disruptions in your automations.
If you experience any issues with the verification, ensure your DNS records have been correctly added and allow some time for them to be processed. If problems persist, contact your domain provider or HireData support for assistance.
***
## Video guide
## Related topics
- [Why Can't I Verify My DNS Records?](/knowledge-base/why-cant-i-verify-my-dns-records.md)
- [Your First Week with HireData](/get-started/your-first-week.md)
- [Welcome to HireData](/index.md)
- [Adding a default sender to your domains](/settings/domains/adding-a-default-sender-to-your-domains.md)
- [Setting Up an Email Template in HireData](/apps/messaging/emails/setting-up-an-email-template-in-hiredata.md)