

1
Select a template
A search box and one card per email template, each with a live preview. Click a card to open the template in a preview dialog with its subject, the rendered email, Edit Email, a Send test mail button, a toggle that shows or hides variable values, and Use template. A template that carries a brand fills in the brand for you.
2
Select a brand
Appears when the workspace has at least one brand. A Brands search box and one card per brand with its colour strip. Click a card to see the template rendered in that brand, then Use brand.
3
Select a recipient
Presets for the people the event carries, such as Response (Respondent). Choosing one moves the wizard on. Switch on Use fixed recipient to send every run to the same address: pick a User, or leave it on None and type a Name and Email, then Continue.
4
Select a sender
The same choice for the sender, with Use fixed sender. In a scheduled automation the sender is always fixed and the switch is not shown.
5
Set up your template
Subject, prefilled from the template and open to variables, then one input per variable the template defines. A date, email, or phone variable offers the matching fields from the run in a select; a text variable takes typed text or a variable. Objects appears when the template or its form reads from a data source. Continue moves on. You reach this step after choosing a recipient or sender preset. Continue after a fixed sender goes straight to the preview, and the same fields wait under Settings > Template.
6
Set up your form
Appears when the template holds a form. Prefill Questions lists the form’s questions so a run can answer them in advance. Additional Fields lists the form’s custom fields. A form without questions or without custom fields says so in place of the list.
7
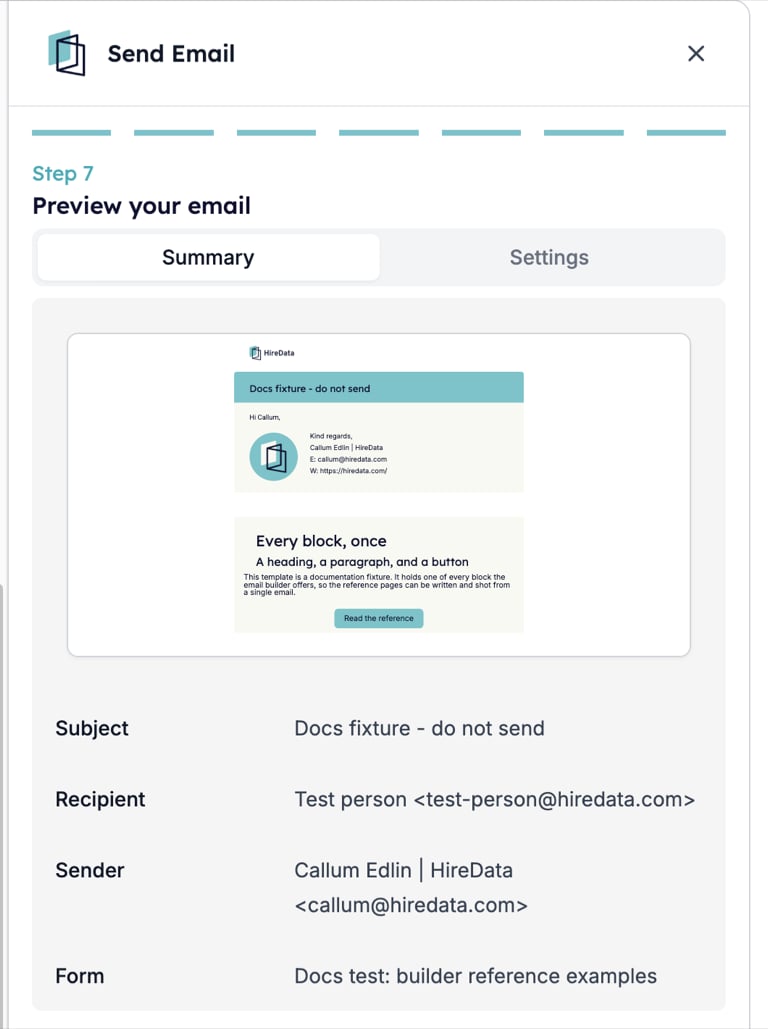
Preview your email
Two tabs. Summary shows the rendered email with Subject, Recipient, Sender, and Form; click the email to open the preview dialog. Settings lists every setting of the task, described below.
Settings
The Settings tab of the last step holds one section per setting. Open a section to change it without walking the wizard again.- Template. The subject and the template’s variables, as in Set up your template.
- Form. The prefilled questions and additional fields, as in Set up your form.
- Recipient. Use fixed recipient with a User select, or Name and Email when no user is chosen. With the switch off, Preset names the person from the event and Label is the name the card shows for them, followed by the field mapping that decides which of the person’s fields supply the name and address.
- Sender. The same controls for the sender. The address must belong to a domain verified in HireData. When it does not, HireData sends from the default sender of the brand’s domain or the workspace domain if one is set, and stops the run with “Invalid sender email.” if not.
- CC and BCC. Click + to add a copy recipient. Each entry has a Name and an Address. Both take a field from the run or typed text: type it and select the Create option that appears under the box. Fill both before saving. – removes an entry. CC addresses are visible to everyone on the email; BCC addresses are not. A test send drops CC and BCC.
- UTM Campaign. Campaign Name, Campaign Source, Campaign Medium, Campaign Term, and Campaign Content, added to every link in the email. The placeholders show the template’s own UTM values. Leave a field empty to keep the template’s value.
- Objects. Shown when the template or its form reads from a data source. Picks the record each object refers to in this run, by External ID, by Fields, or by choosing a Record. An object marked with an asterisk is required: leave it empty and every run stops with “Required data reference missing.”
On the canvas
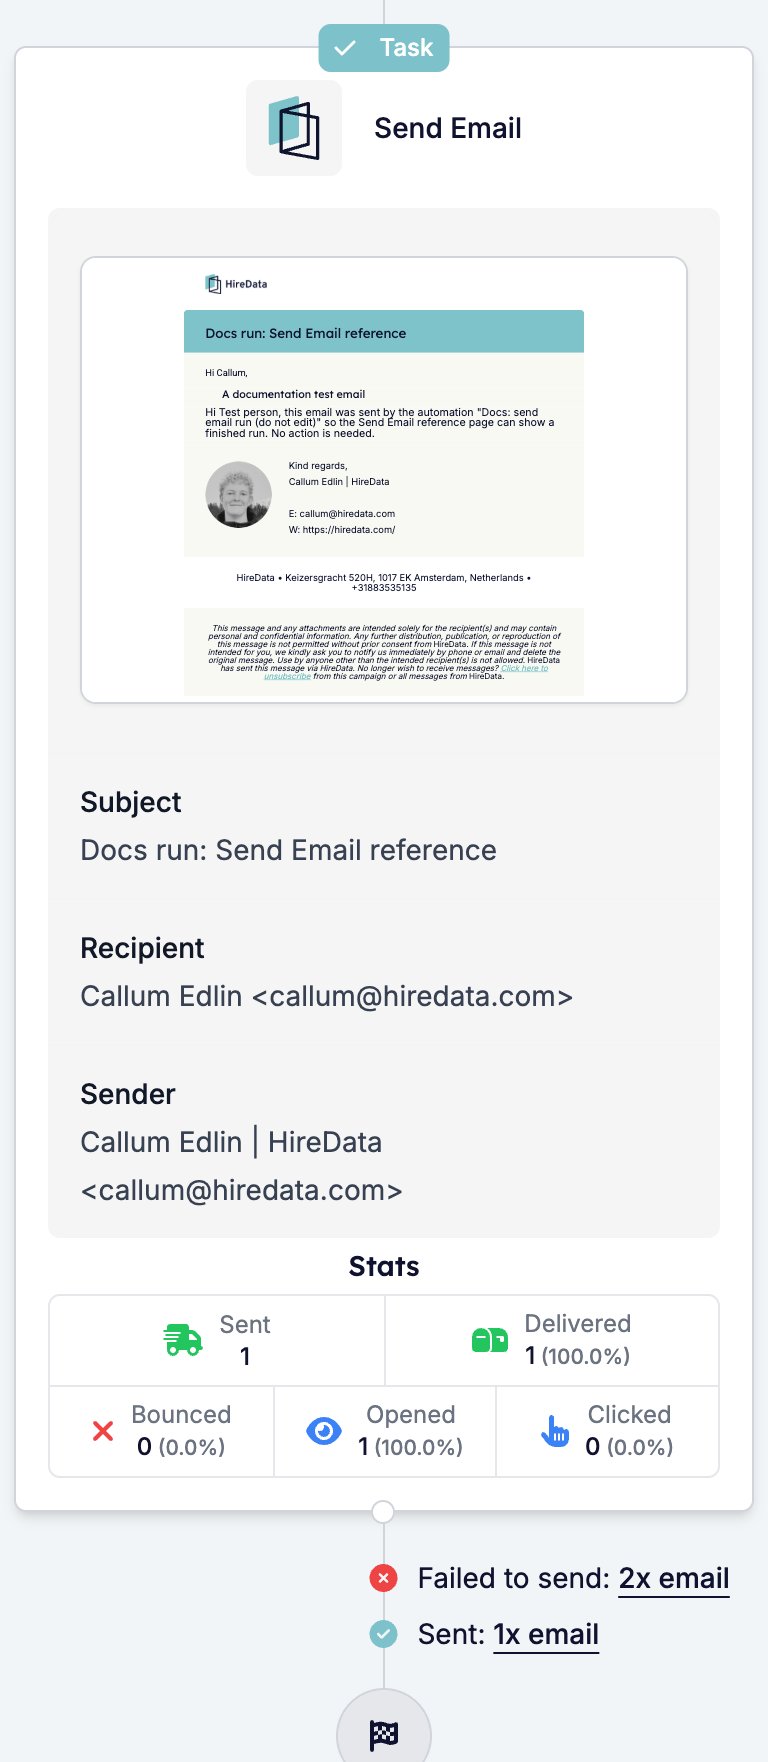
The card shows a Task badge, “Send Email”, the rendered email, and rows for Subject, Recipient, Sender, and Form.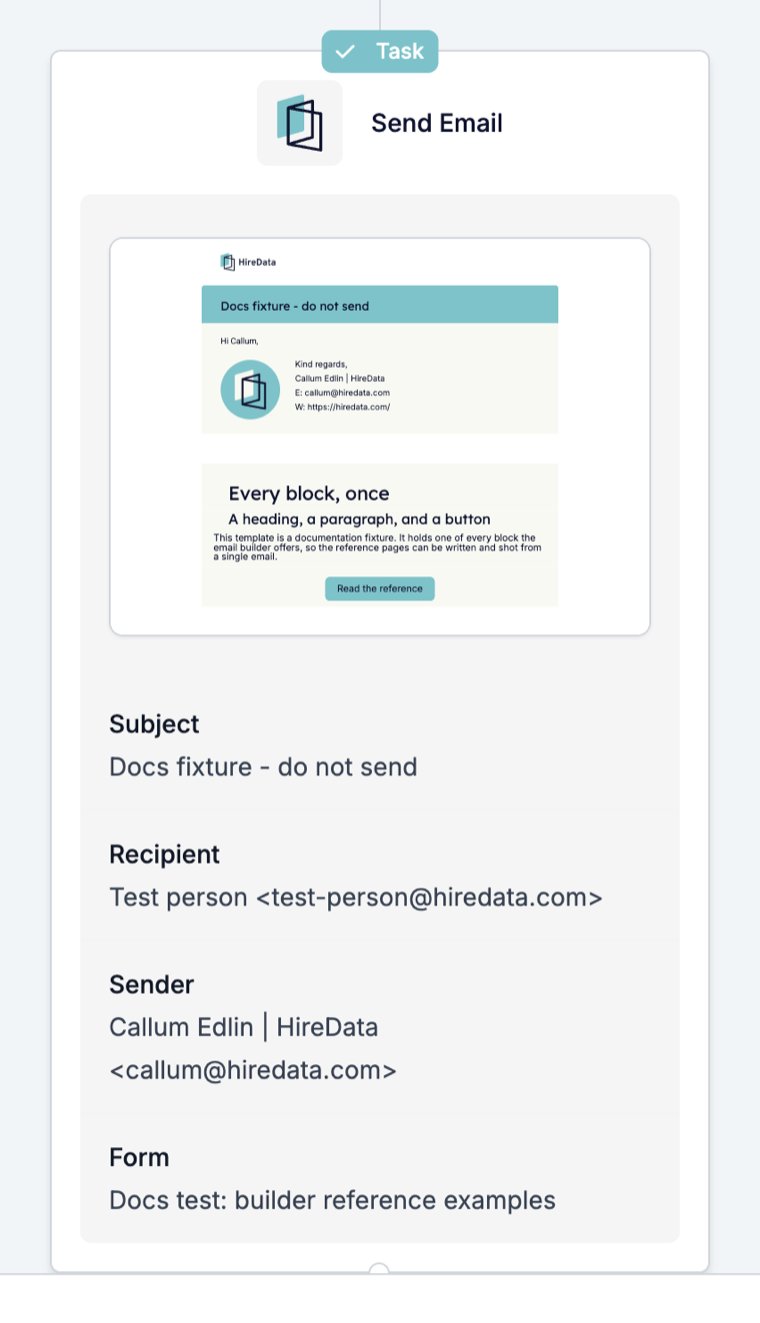
What it outputs
The sent email. On the run page the task’s card shows the email that went out; click it to read the message as the recipient saw it, with Edit Form and Edit Email links to its sources. Clicking the card itself opens the run step, headed Send Email with a Completed badge. Its Overview lists To and From with a name and address each, the Subject, and the value of every template variable. Fields lists every value the task read from the run.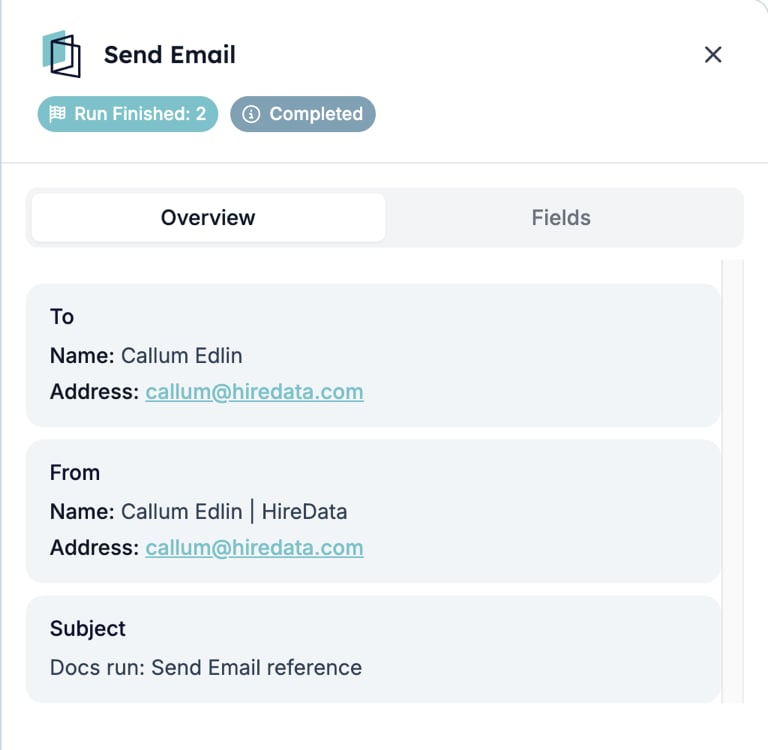
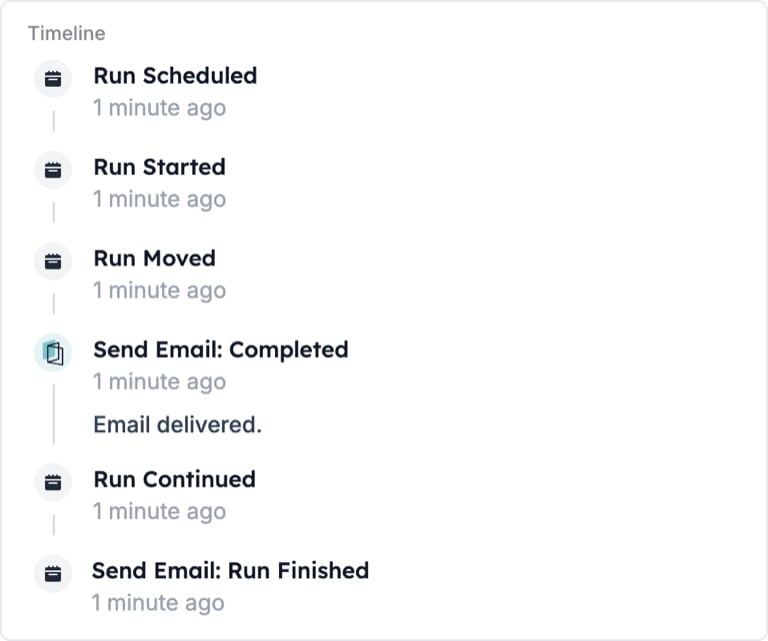
A delivered email completes the step with the message “Email delivered.”
Delivery figures
The automation’s own page, the one that opens from the Automations list before you click into edit mode, adds the figures the run page lacks. They take a few seconds to load and disappear as soon as you enter edit mode.- Stats on the Send Email card: Sent, Delivered, Bounced, Opened, and Clicked, each with a count and a percentage of sent.
- Under the card, one line per outcome with a link to the tasks behind it, such as “Sent: 1x email” and “Failed to send: 2x email”.
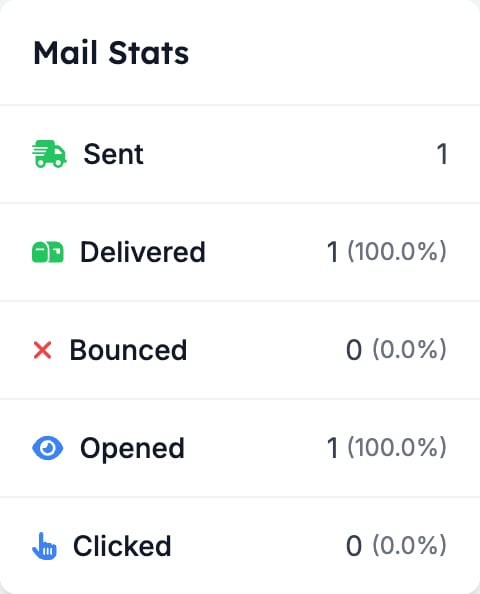
- Mail Stats in the left panel: the same five figures added up across every Send Email step in the automation. Run Stats above it counts runs by state.
What stops the run
A send that HireData refuses. The task card turns red with the line “Cancelled” and the time, and the timeline records “Send Email: Cancelled” with the message. In the runs list the Step column reads “HireData: Send Email”.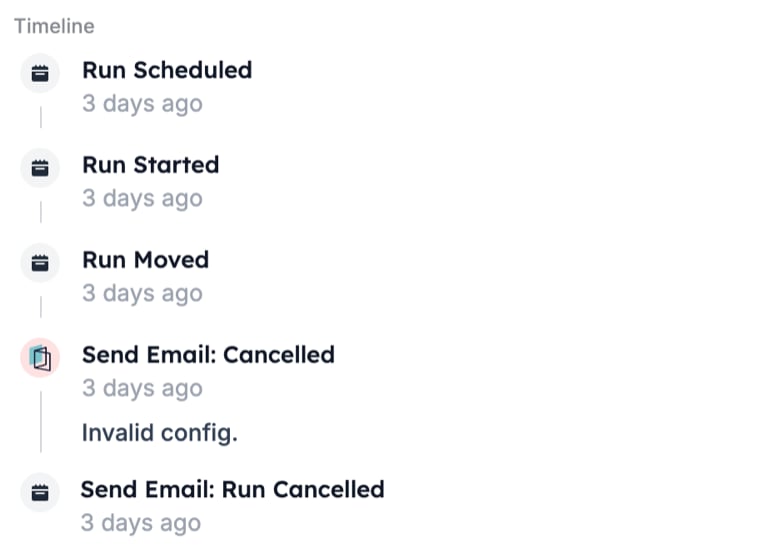
A recipient address that is not a valid email address, an address on your blocklist, or an address that email validation marked invalid also stops the run, each with its own message in the timeline. Reasons are explained in Run cancellation reasons.
Related
- Message lists the other tasks that send something.
- Email Builder: Overview documents the builder that makes the template this task sends.
- Automation safety limits explains the two send-limit messages.
- How to verify a domain in HireData to send emails fixes “Invalid sender email.”
- Task catalogue lists every task per connected app.