

Before you start: install the Email app before you generate or verify DNS records. If clicking Verify DNS results in a 404 error or no response, see Why Can’t I Verify My DNS Records?
Step 1: Add a new domain
Log in to your HireData account, open your settings, and then the Domains page. Click the New Domain button to add a new domain.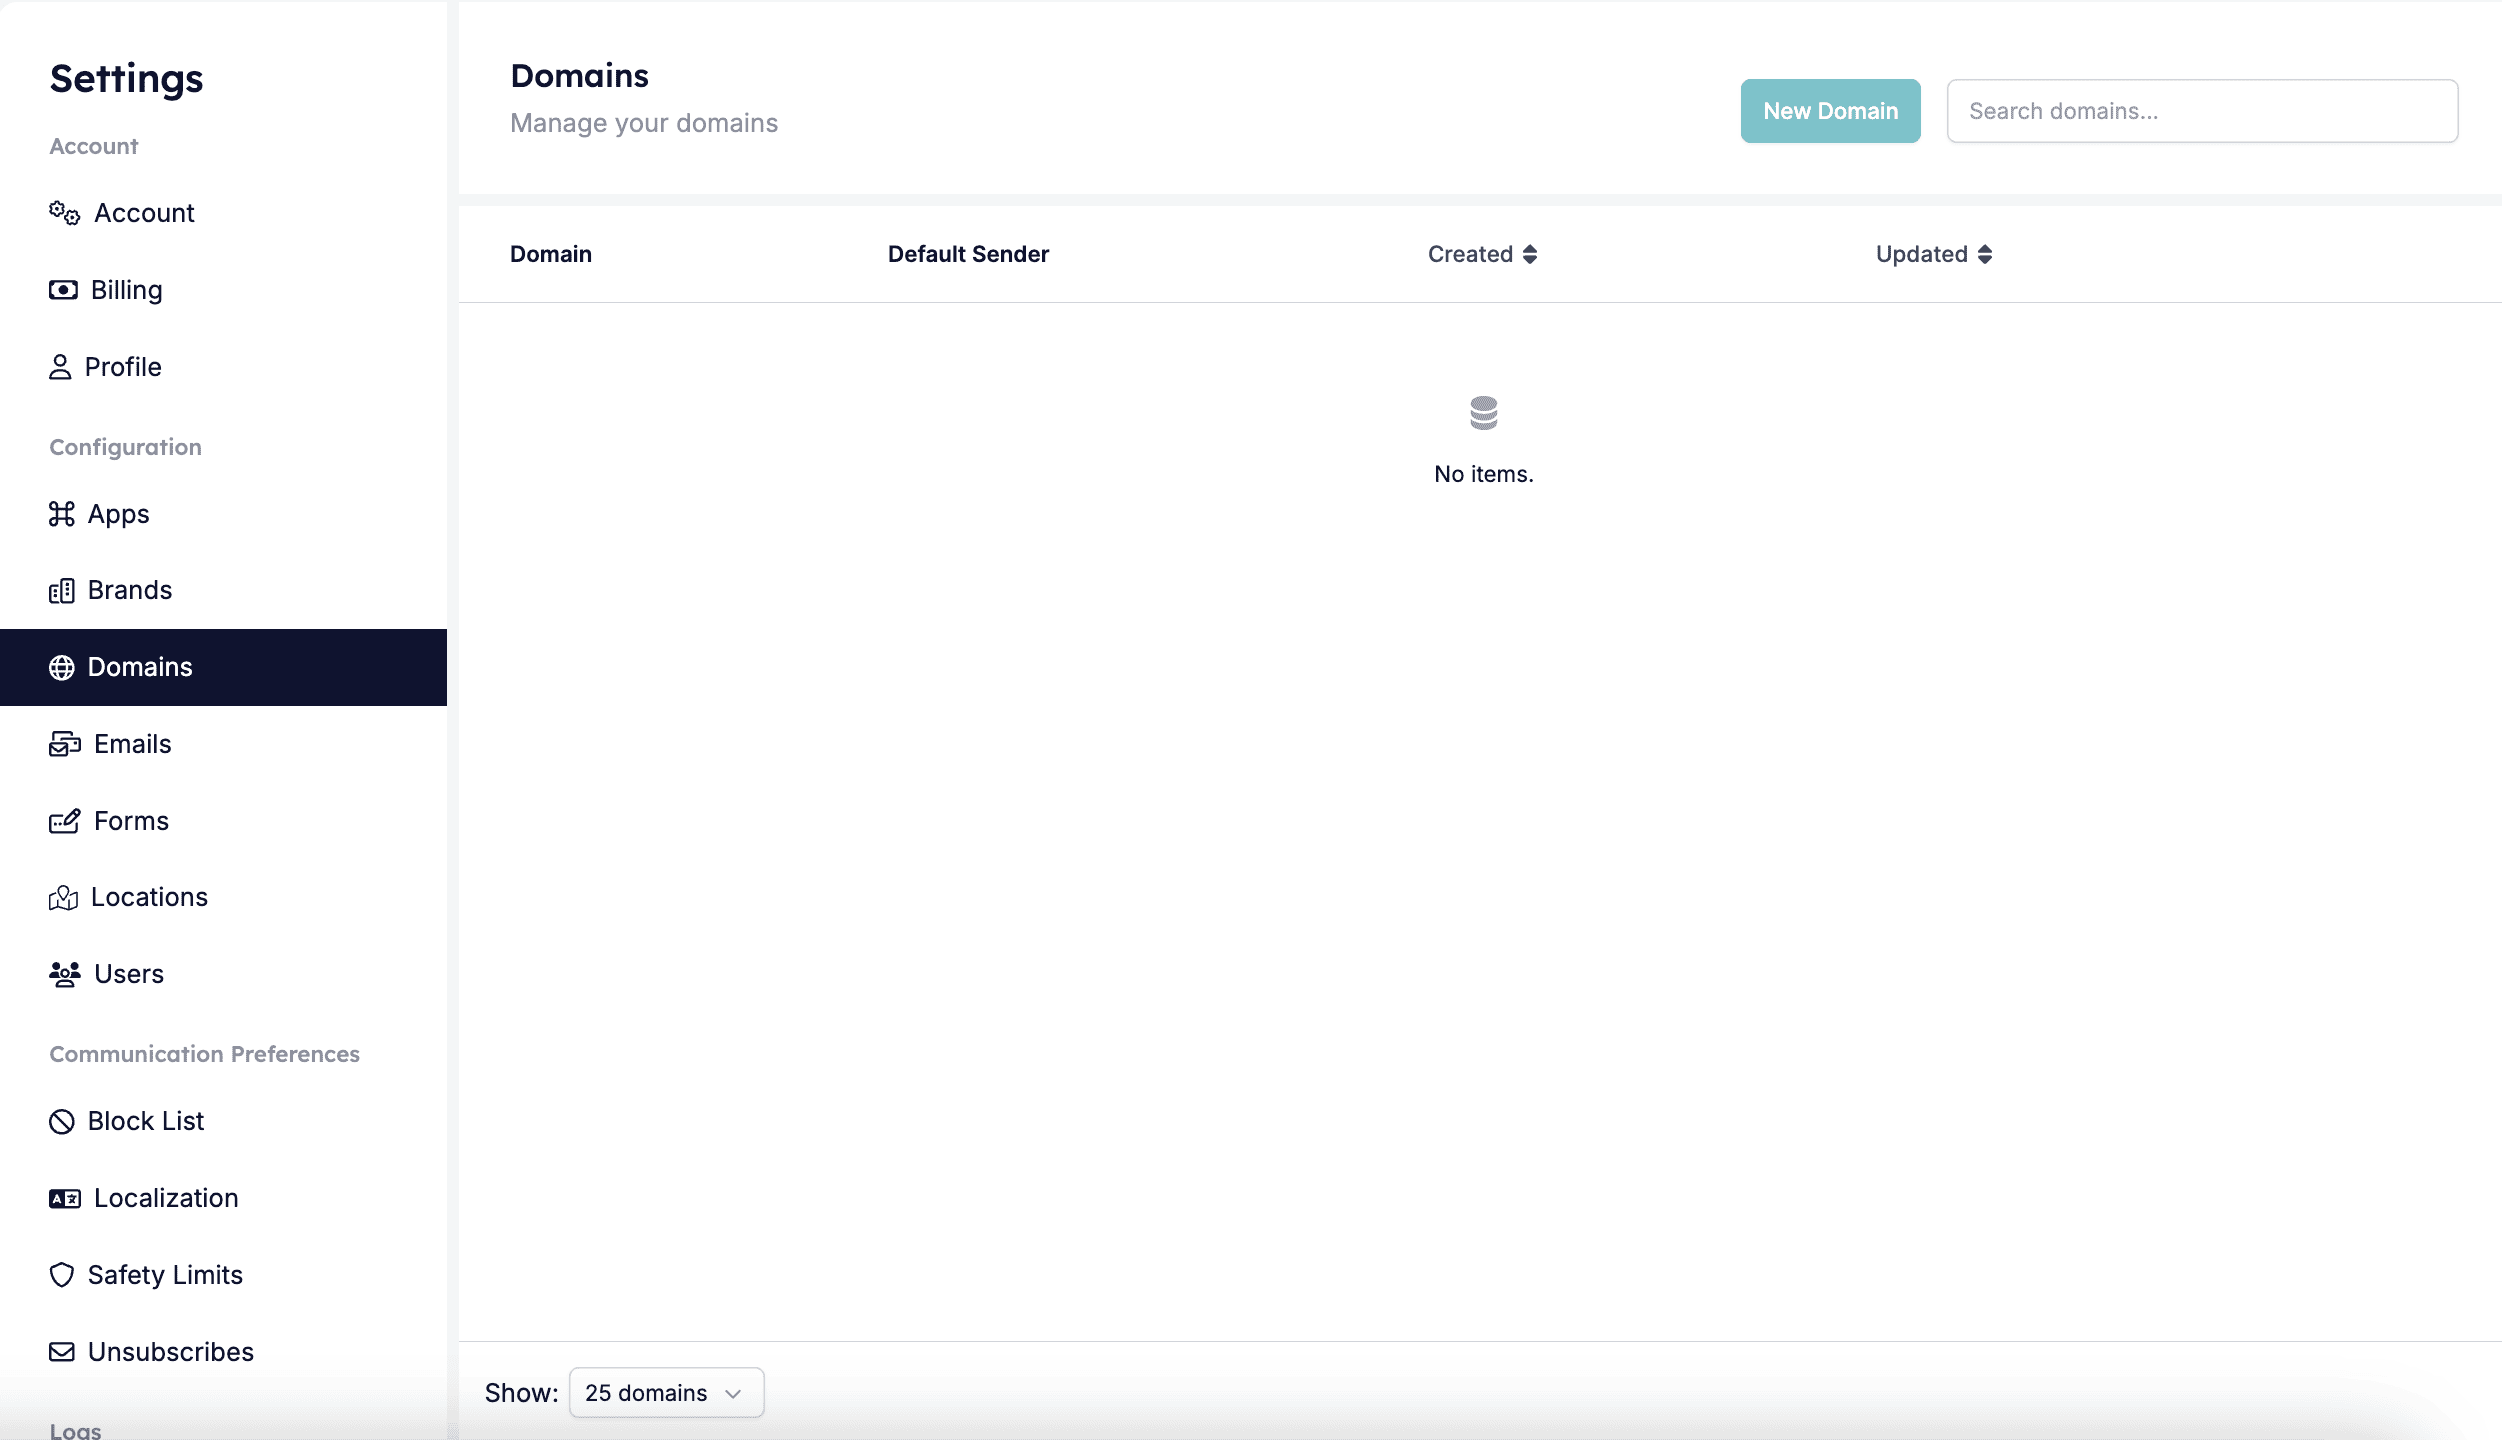
Step 2: Enter domain details
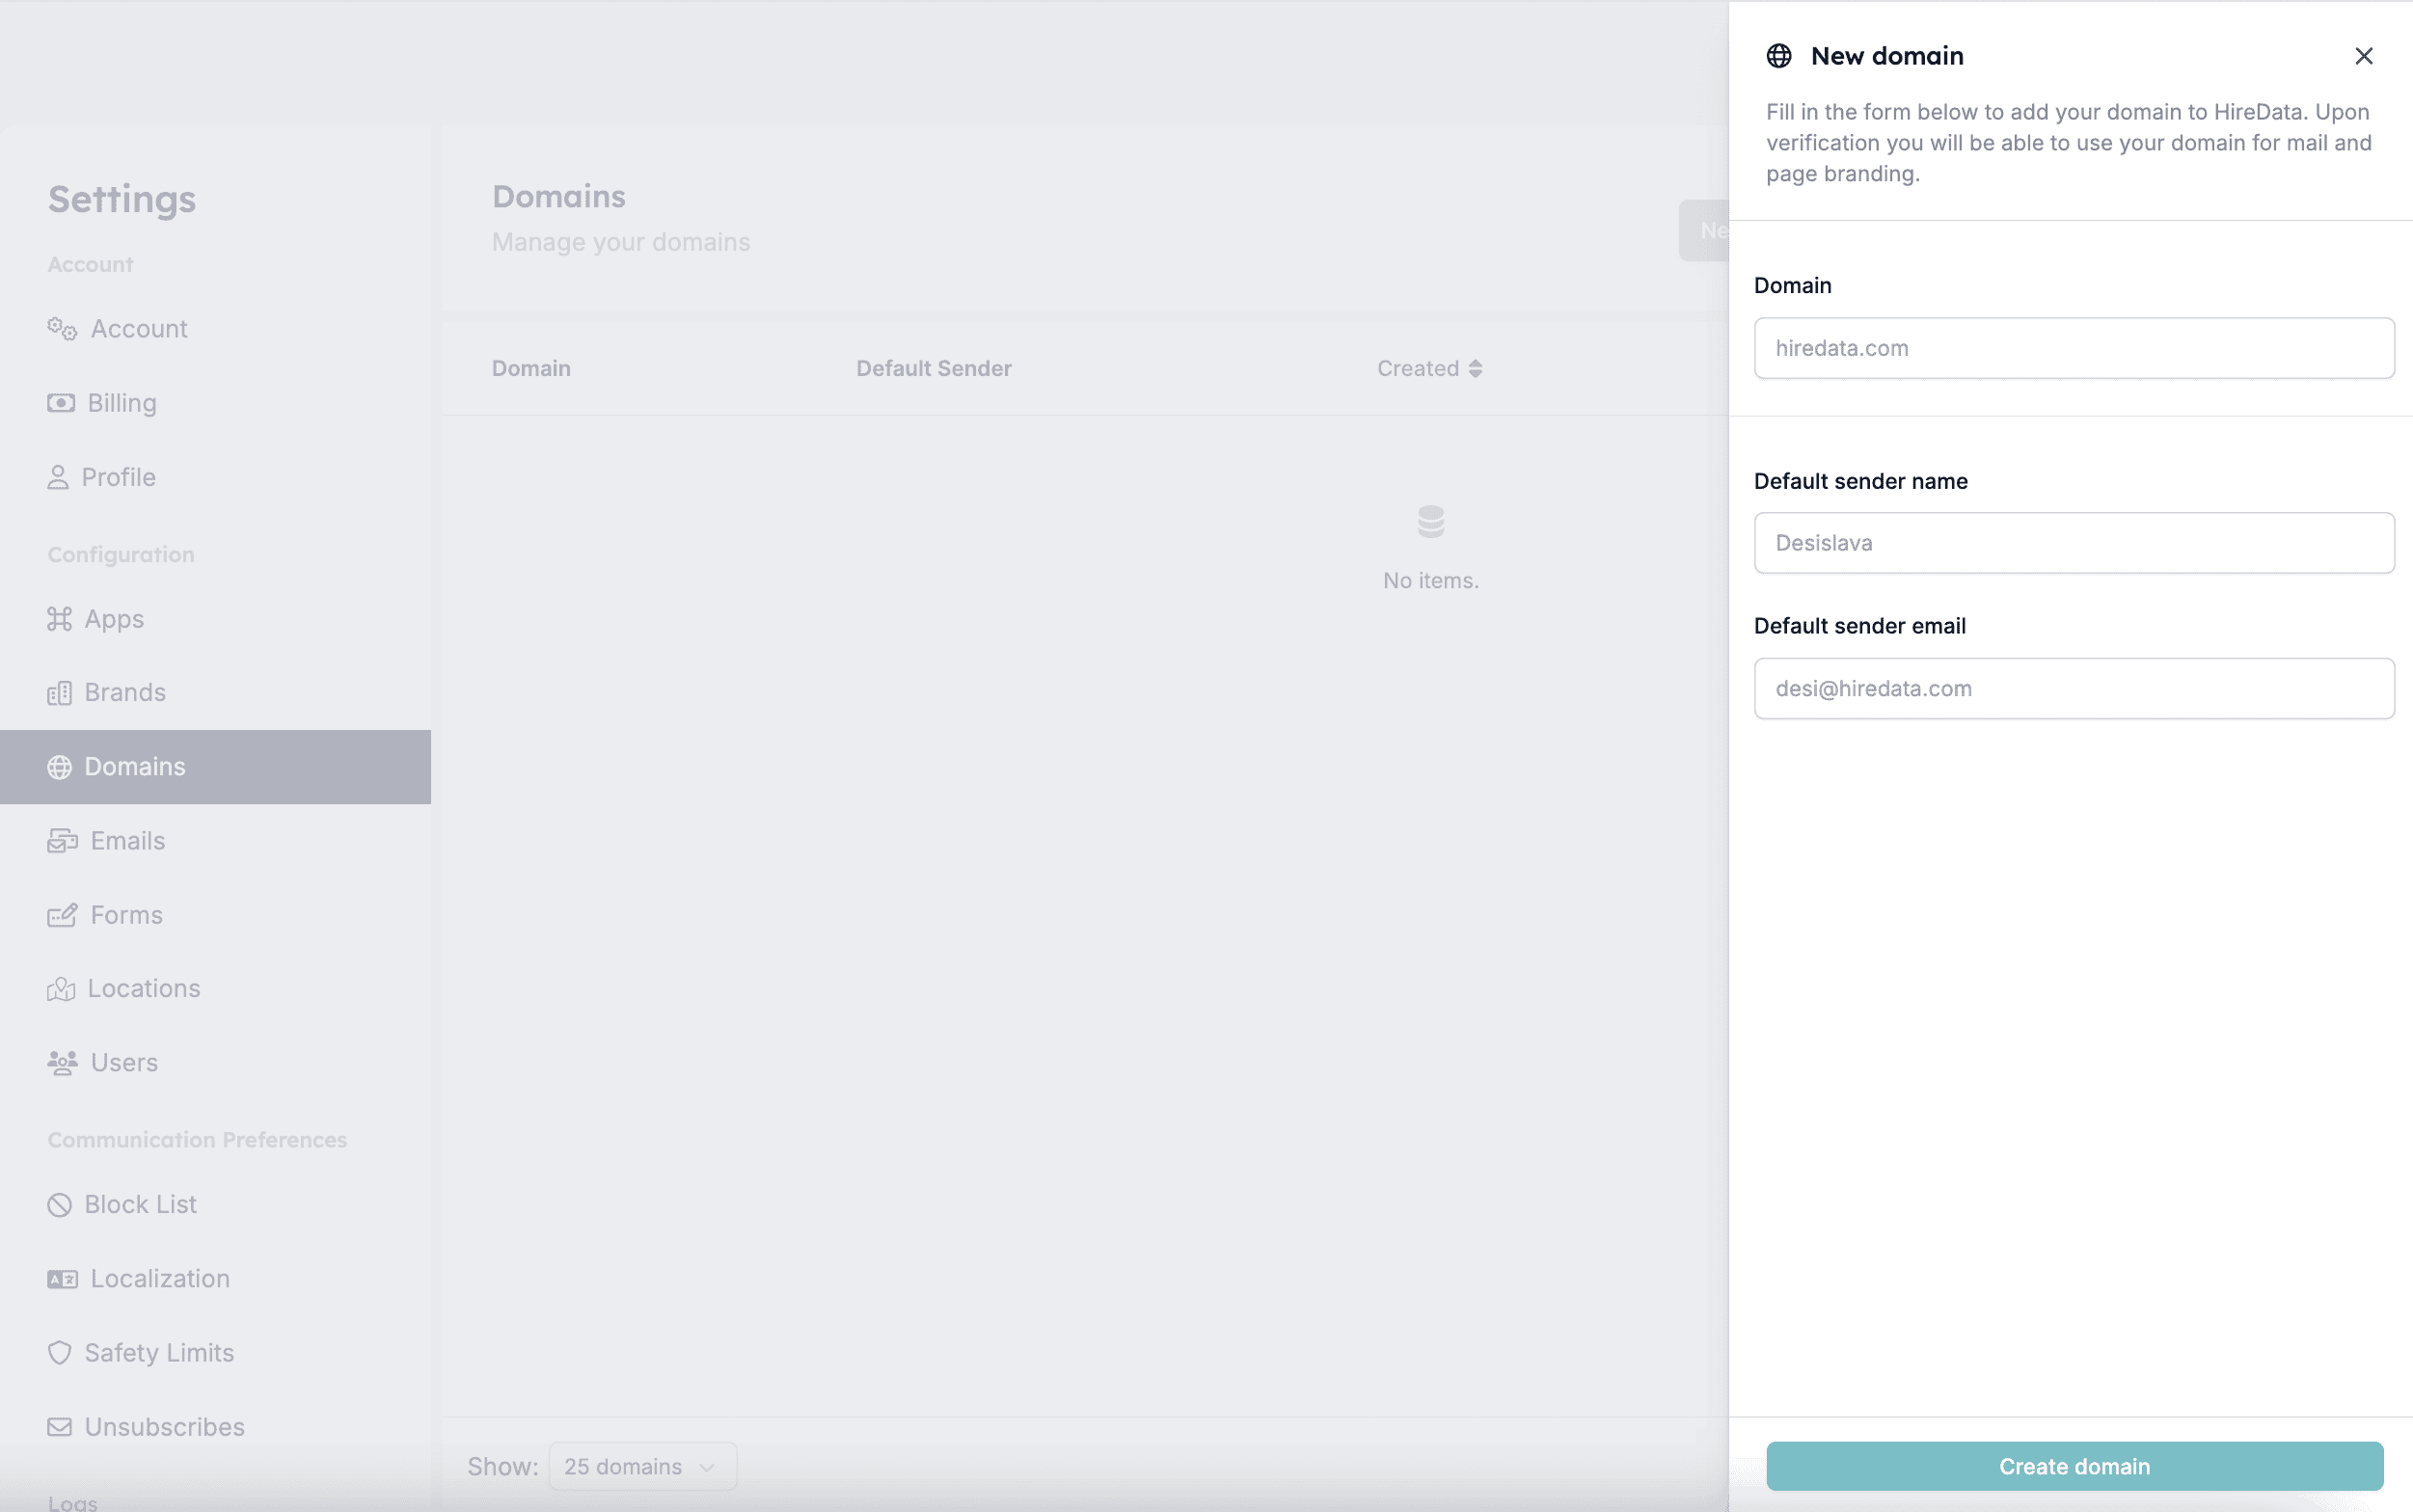
After you click New Domain, a new screen will appear where you will need to fill in the domain details, including:- Domain name
- Default Sender Name – this is the name that will appear as the sender in emails sent from HireData if this information is missing in the events’ records received from your app.
- Default Sender Email – this will be the default email address used when sending emails if this information is not available.
Step 3: Generate DNS records
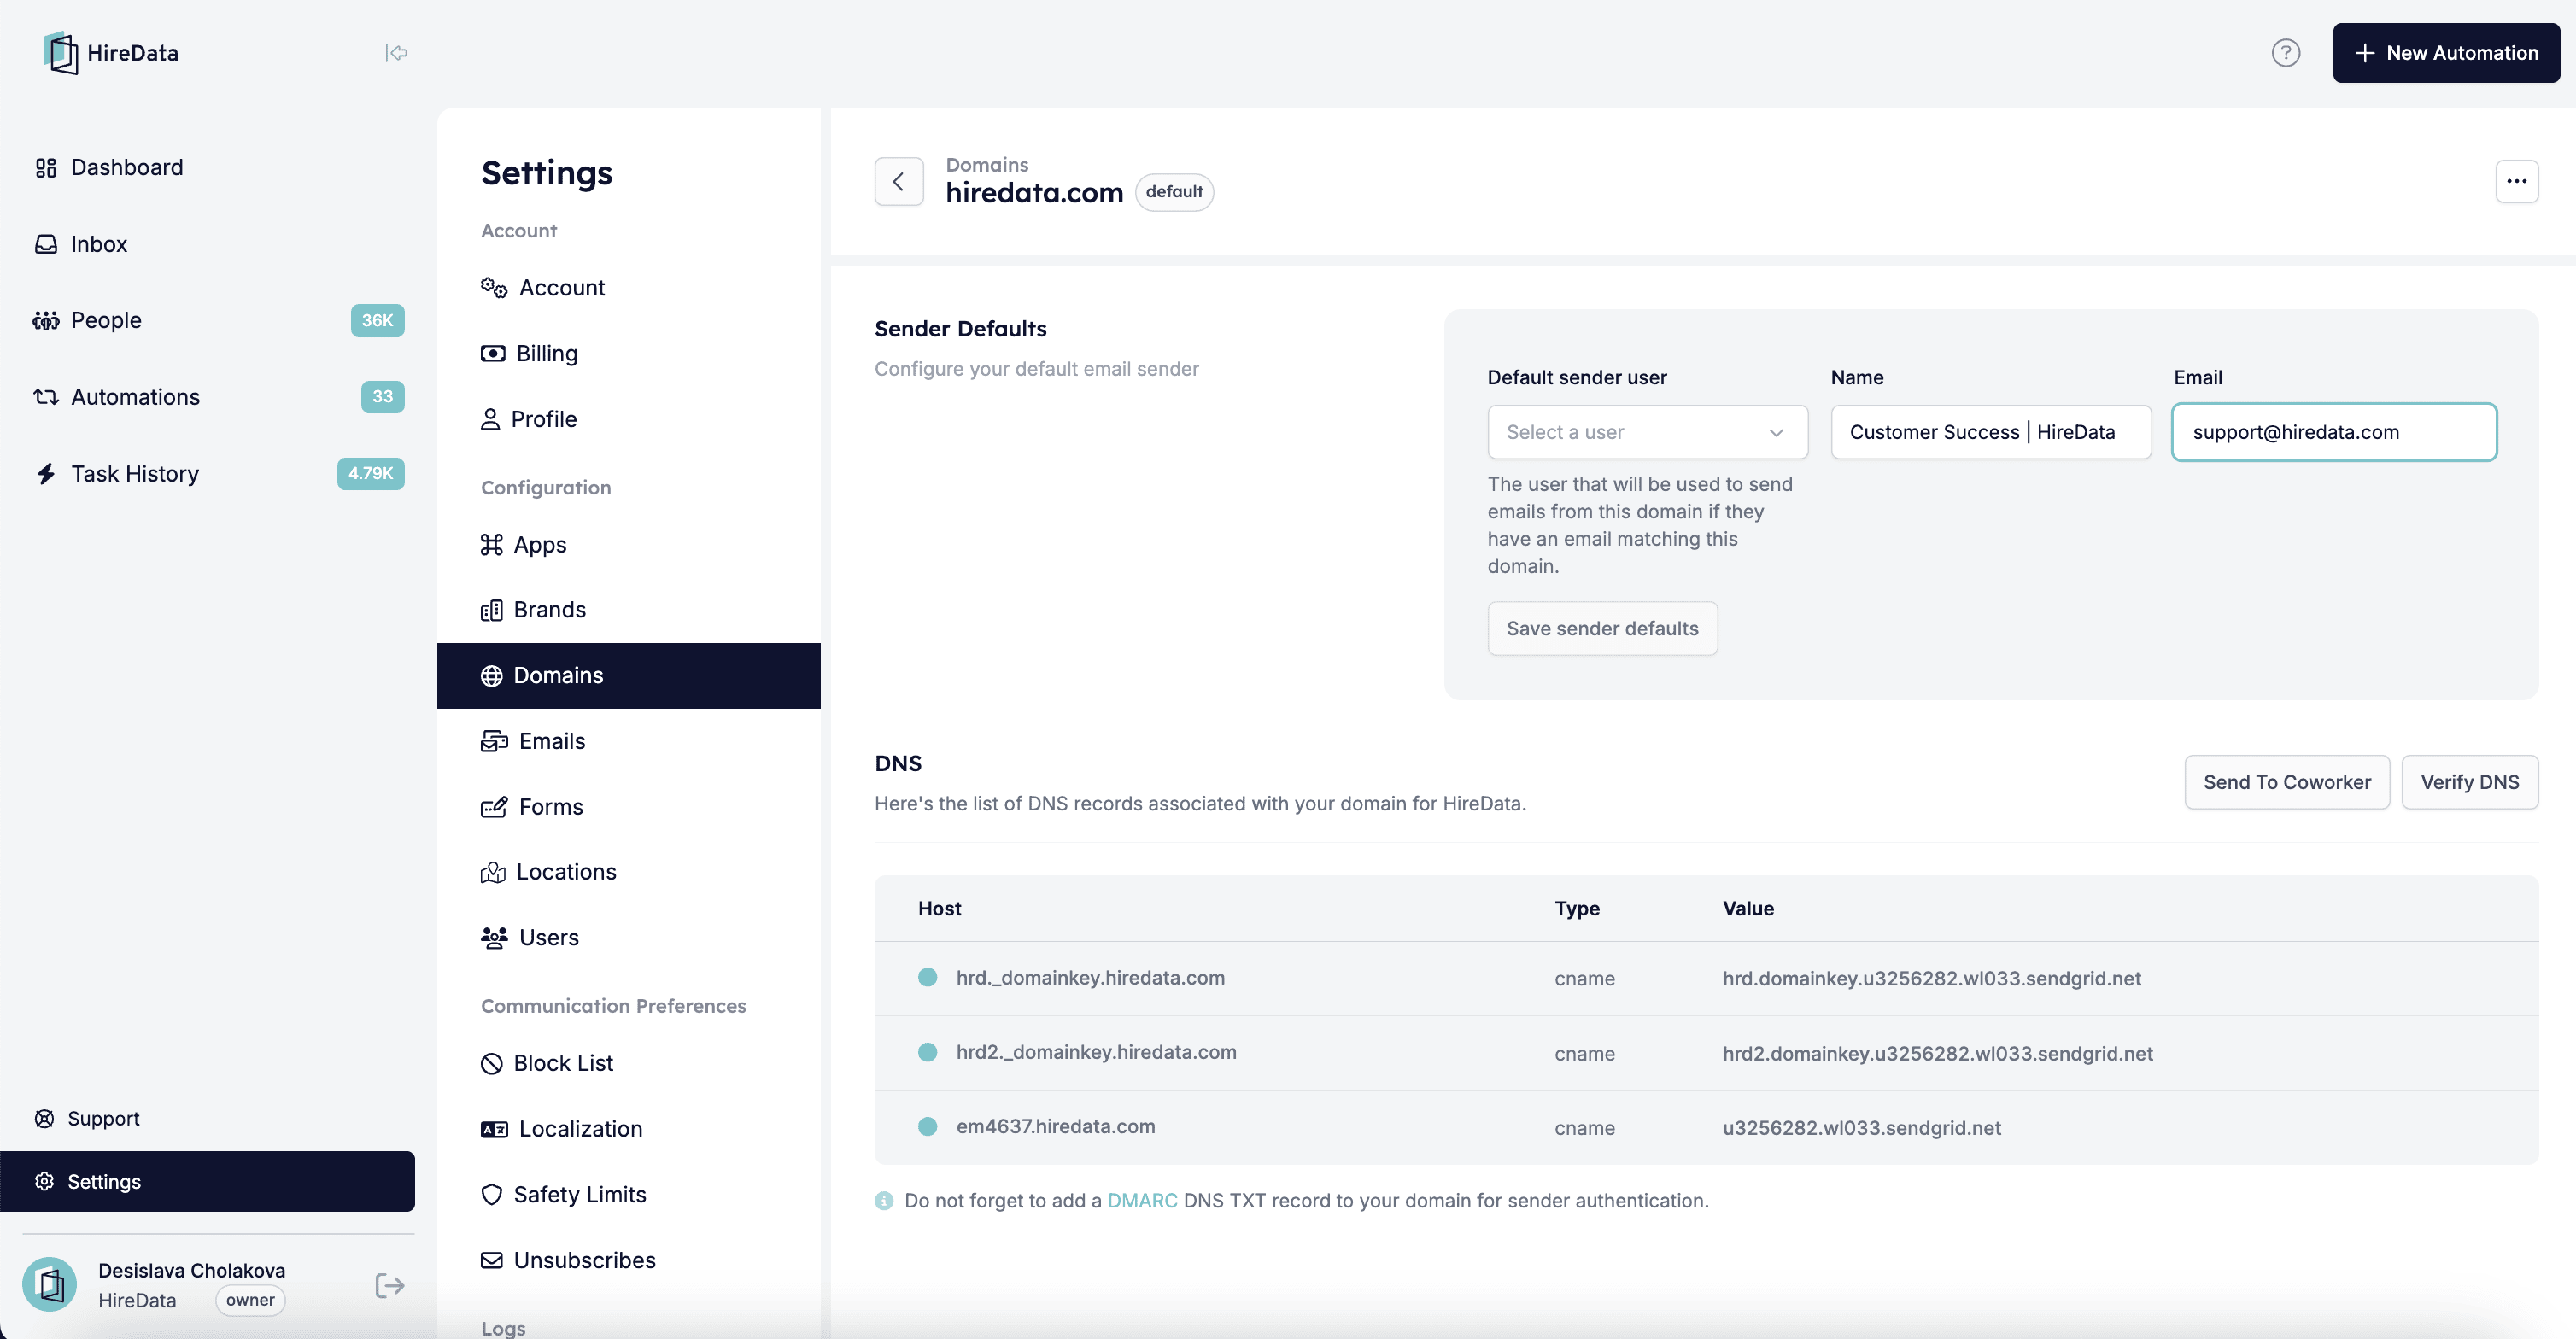
DNS (Domain Name System) records are like signposts that tell the internet where to find different services linked to your domain. When you verify your domain in HireData, you need to add specific DNS records to prove that you own the domain and allow us to send emails on your behalf. These records include:- CNAME Records: These link your domain to another domain, often used for verification.
- DMARC TXT Record (optional): This record helps protect your domain from email phishing, and unauthorized email use, improving email deliverability.
Step 4: Add DNS records to your domain provider
After you have the DNS records, you need to add them to your domain provider (e.g., GoDaddy, Cloudflare, Namecheap, etc.).- Navigate to the DNS Settings section on your provider’s website.
- Add the provided DNS records exactly as shown in HireData.
- Save the changes.